

Master the Classic 1×1 Rib Stitch — Easy, Stretchy Edge for Cuffs & Hats
The 1×1 rib stitch is a knitting staple: simple to work, highly elastic, and beautifully textured. It alternates single columns of knit and purl stitches to create a fabric that hugs and recovers, making it ideal for cuffs, hems, brims and hat bands. This short guide explains materials, abbreviation, clear row instructions for flat and in-the-round knitting, plus quick tips for a neat finish.
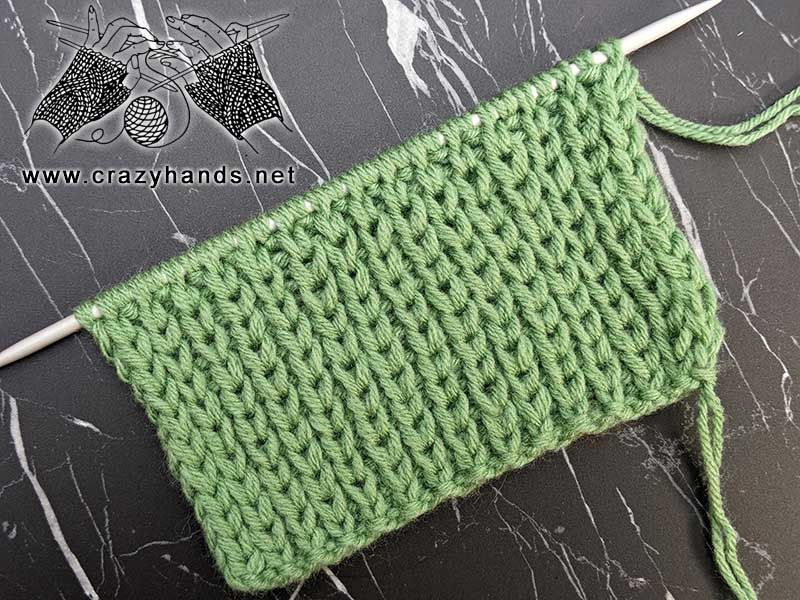
Materials and tools
DPN 4 mm (UK 8 / US 6) — or any needles appropriate for your yarn and desired fabric density.
Common abbreviations
- k – knit
- p – purl
- st(s) – stitch(es)
- sel s – selvage stitch: slip the first stitch purlwise, work to the last stitch, purl the last stitch.
- sl – slip next stitch (follow project-specific instruction whether to hold yarn in front or back).
1×1 rib stitch — basic pattern (flat knitting)
Cast on a multiple of 2 sts, plus 2 selvage stitches if you are working a selvedged piece.
Row 1 (RS): sel s, *k1, p1; repeat from * to last stitch, sel s.
Row 2 (WS): sel s, *k1, p1; repeat from * to last stitch, sel s.
Repeat Rows 1–2. In practice, work each stitch as it appears on the needle (knit the knit, purl the purl) to maintain the rib pattern.
1×1 rib stitch — in the round
Cast on a multiple of 2 sts and join, being careful not to twist. Work every round as: *k1, p1; repeat from * to end of round. The pattern is identical every round when knitting in the round.
Tips for best results
- For a very stretchy edge, use a slightly smaller needle for the cast-on row, or try a stretchy cast-on method (e.g., long-tail or provisional variations).
- To avoid a tight cast-off, bind off loosely or use a stretchy bind-off (e.g., bind off through the back loop, or use a knitted-on bind-off).
- Rib shows stitch definition — use smooth yarn to emphasize the knit/purl columns or textured yarn for a cosy look.
- If your rib looks twisted or ladders between needles, check tension when switching needles and make sure you’re working stitches in pattern (don’t accidentally drop/transfer the sequence).
Common mistakes and fixes
- Gaps at needle joins (in the round): tighten the first stitch of the round slightly or pull the tail snugly after joining.
- Uneven edges when working selvedge stitches: slip the first stitch purlwise and purl the last stitch of each row as described to form a neat edge.
With practice, the 1×1 rib becomes an automatic, go-to stitch for any project that needs elasticity and a clean edge. Try it on a small swatch to see how gauge and needle size affect the stretch and appearance.