

How to Knit 2×1 Ribbing — Stretchy Rib Stitch Perfect for Cuffs & Hats
The knitted 2×1 ribbing stitch is a great way to add stretch, texture and a professional finish to your projects. By alternating two knit stitches with one purl stitch, this rib creates a squishy, elastic fabric that works especially well for cuffs, hems, hat brims and decorative panels. Below you'll find materials, common abbreviations, a clear 6-row pattern for flat knitting and the equivalent rounds for knitting in the round.
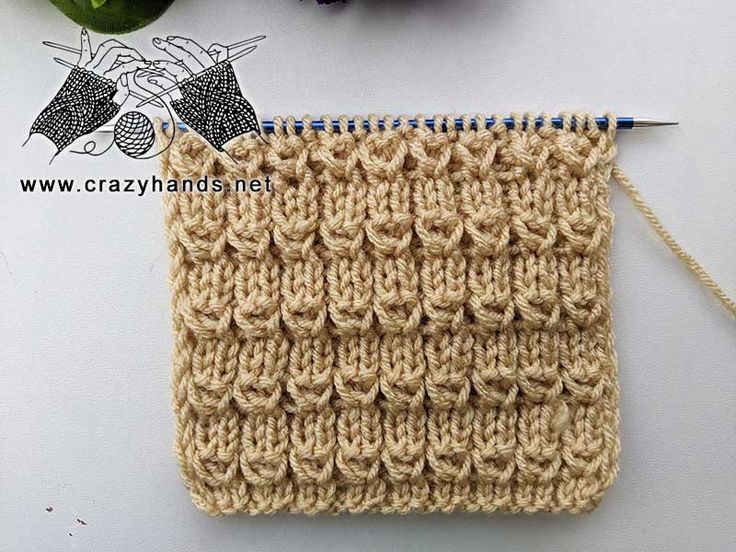
Knitting materials and tools:
- DPN 4 mm (US 6 / UK 8)
- Loops&Threads, Impeccable (4): 100% Acrylic
Common abbreviations of knit stitches:
- k – knit
- p – purl
- k2togb – knit two together through the back loop
- yo – yarn over
- LHN – left-hand needle
- st(s) – stitch(es)
- sel s – selvage stitch: always slip the first stitch knitwise, work to the last stitch, purl the last stitch

Rib 2×1 knit stitch pattern (flat knitting):
Cast on a multiple of 3 sts, plus 1 extra stitch, plus 2 selvage stitches.
Row 1: sel s, [p1, k2] – repeat till the end, p1, sel s.
Row 2: sel s, [k1, p2] – repeat till the end, k1, sel s.
Row 3: sel s, [p1, insert your LHN between next two stitches, yo and draw up a loop, yo, k2togb], p1, sel s.
Row 4: sel s, [k1, p2, slip next stitch holding working yarn in front] – repeat till the end, k1, sel s.
Row 5: sel s, [p1, slip next stitch knitwise, p2, pass slipped stitch over last two purl stitches] – repeat till the end, p1, sel s.
Row 6: sel s, [k1, p2] – repeat till the end, k1, sel s.
Repeat Rows 1-6 to form the pattern.
For knitting in the round:
Cast on a multiple of 3 sts:
Rounds 1-2: [p1, k2] – repeat till the end.
Round 3: [p1, insert your LHN between the next two stitches, yo and draw up a loop, yo, k2togb] – repeat till the end.
Round 4: [p1, slip next stitch holding the working yarn in back, k2] – repeat till the end.
Round 5: [p1, slip next stitch knitwise, p2, pass slipped stitch over last two purl stitches] – repeat till the end.
Round 6: [p1, k2] – repeat till the end.
Repeat Rounds 1-6 to form the pattern.
Tips
- Maintain even tension; ribbing will look its best when knit and purled stitches have consistent size.
- This rib is naturally elastic — consider it for edges that must stretch (brims, cuffs).
- Try a short test swatch to confirm fabric appearance and stretch before committing to a large project.