

Spiral-Texture Knitted Helical Stitch Scarf — Step-by-Step Bulky Yarn Pattern
Create a standout accessory with the Knitted Helical (Helical Spring) Stitch Scarf. This pattern produces a striking spiraling texture that works especially well in bulky yarn for quick results and strong visual impact. The instructions below include abbreviations, a sample border, the main helical pattern, and shaping to start and finish the scarf. You will need bulky yarn and appropriately sized needles for the yarn; cast on 41 stitches to begin.
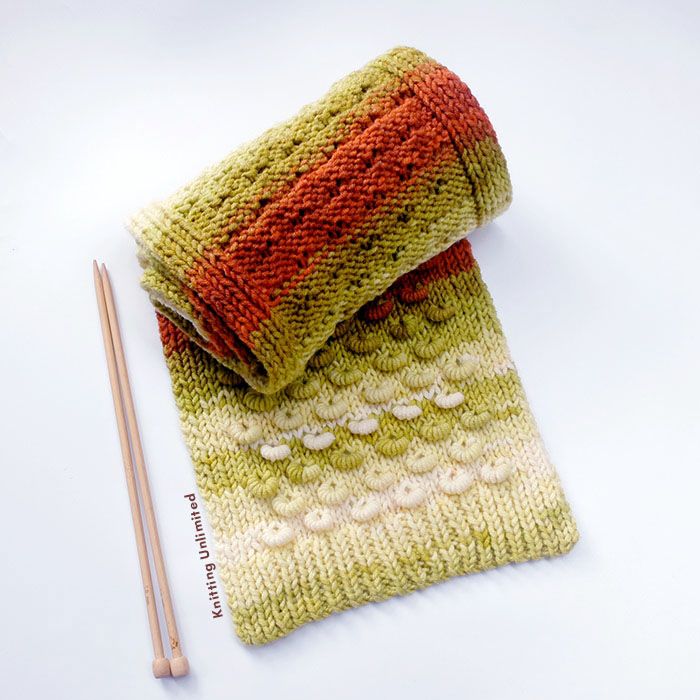
Caption: Close-up showing the coiled, spiral texture of the Helical Spring stitch on a bulky yarn scarf.
ABBREVIATIONS
- RS, WS: right side, wrong side.
- St (sts): stitch (stitches).
- K: knit.
- P: purl.
- Kfb: Knit front and back.
- K2tog: knit 2 sts together.
How to make the Helical Spring stitch (also called Helical Stitch):
- Take the yarn to the back of the work.
- Insert the right-hand needle into the next stitch on the left-hand needle.
- Wrap the yarn around both needles 10 times. Use the tip of your right thumb to help grip the yarn while wrapping.
- Knit the stitch as normal, then carefully pull the new stitch through the wrapped loops.
- Gently pull on the working yarn to coil the loops up close to the needle, forming the spring/spiral effect.
Notes: The sample uses bulky yarn and the appropriate needles for that yarn. The pattern below includes a 12-stitch rib border which can sometimes cause curling; if you prefer, substitute a non-curling edge stitch or add a garter-stitch border.
Cast on: 41 sts.
Rib stitch border
Row 1 (RS): K1, (p1, k1) ×20.
Row 2 (WS): P1, (k1, p1) ×20.
Rows 3–10: Repeat rows 1–2.
Decrease 41 stitches to 36 stitches
Row 11: K1, p1, k1, p1, k1, p1, k2, (k2tog, k4) ×4, k2tog, k1, p1, k1, p1, k1, p1, k1.
Row 12: P1, k1, p1, k1, p1, k1, p24, k1, p1, k1, p1, k1, p1.
Main pattern
Row 13: K1, p1, k1, p1, k1, p1, k24, p1, k1, p1, k1, p1, k1.
Row 14: P1, k1, p1, k1, p1, k1, p1, (make Helical Spring st, knit 1, purl 2) ×5, make Helical Spring st, k1, p1, k1, p1, k1, p1, k1, p1.
Row 15: K1, p1, k1, p1, k1, p1, k24, p1, k1, p1, k1, p1, k1.
Row 16: P1, k1, p1, k1, p1, k1, p3, (make Helical Spring st, knit 1, purl 2) ×4, make Helical Spring st, k1, p3, k1, p1, k1, p1, k1, p1.
Repeat rows 13–16 until you reach the desired length.
Increase 36 stitches to 41 stitches
Row 17: K1, p1, k1, p1, k1, p1, k24, p1, k1, p1, k1, p1, k1.
Row 18: P1, k1, p1, k1, p1, k1, p2, (pfb, p4) ×4, p2, p1, k1, p1, k1, p1, k1, p1.
Rib stitch border
Then bind off loosely and weave in ends.
Finishing tips: Block gently if desired to even the texture and set the spiral appearance. Because this stitch builds a lot of texture, allow extra yarn for length when planning your project.