

Create Elegant Fancy Ribbing — Step-by-Step Knit Pattern for Rows & Rounds
Add a touch of texture and elegance to scarves, hats or sweaters with this Knitted Fancy Ribbing, worked either in rows or in the round. The stitch produces an attractive raised rib with small decorative openings and is easy to memorize once you establish the 3-stitch repeat. Below you’ll find materials, abbreviations, clear step-by-step instructions for both rounds and flat knitting, plus a few helpful tips for successful results.
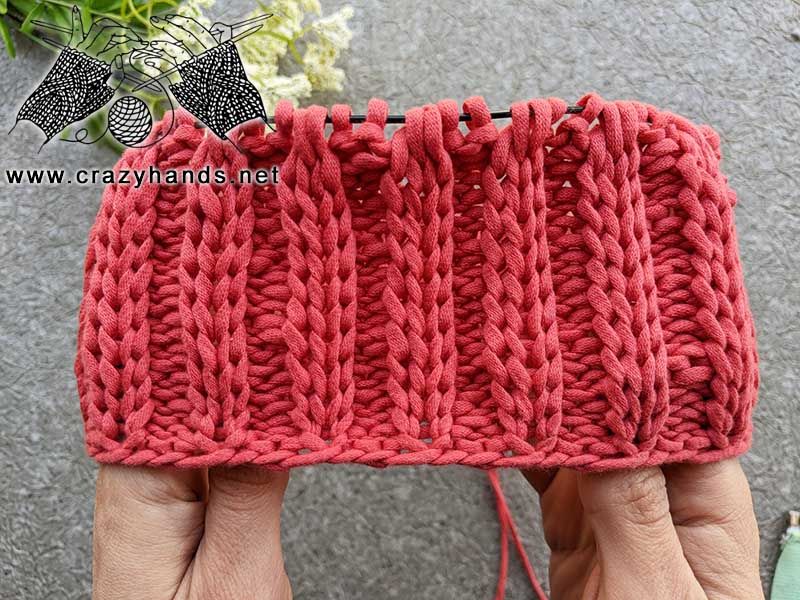
Sample swatch showing the finished fancy ribbing pattern worked in Bernat Maker home décor yarn on 4.5 mm needles.
Knitting materials and tools:
- DPN 4.5 mm (US 7 / UK 7)
- Bernat Maker, Home décor yarn (5): 72% – Cotton, 28% – Nylon
Common abbreviations used in the pattern:
- k – knit
- p – purl
- p2tog – purl two together
- sel s – selvage stitch: slip the first stitch knitwise, work to the last stitch, purl the last stitch
- RS – right side
- WS – wrong side
- st(s) – stitch(es)
Knit ribbing in rounds
Cast on any number that is a multiple of 3 sts. Place a marker and join to work in the round.
Round 1: [p2, k1] — repeat around.
Round 2: [p2, pick up the right leg of the V-shaped stitch below the next stitch and place it on the left needle, knit it, then slip the next stitch with the working yarn held in back] — repeat around.
Round 3: [p2, insert the right-hand needle into the next stitch as if to purl (hold this stitch with your thumb), then immediately insert the needle into the following stitch as if to knit. Yarn over and pull the yarn through both stitches while continuing to hold the first stitch with your thumb. Drop both stitches off the left needle — you will now have two new stitches on the right-hand needle.] — repeat around.
Round 4: [p2, k1, slip next stitch with the working yarn in back] — repeat around.
Repeat Rounds 3–4 to continue the pattern for the length you want.
Knit ribbing in rows (flat)
Cast on a number multiple of 3 sts, plus 2 extra sts, plus 2 selvage sts.
Row 1 (WS): sel s, [k2, p1] — repeat across, k2, sel s.
Row 2 (RS): sel s, [p2, pick up the right leg of the V-shaped stitch below the next stitch and place it on the left needle, knit it, then slip the next stitch with the working yarn held in back] — repeat across, p2, sel s.
Row 3 (WS): sel s, [k2, p2tog, but do not drop them off the left needle. Drop only the first stitch, then slip the next stitch with the working yarn held in front] — repeat across, k2, sel s.
Row 4 (RS): sel s, [p2, k1, slip next stitch with the working yarn in back] — repeat across, p2, sel s.
Repeat Rows 3–4 to form the pattern across your piece.
Notes & tips
- Work a small swatch to get comfortable with the pick-up and double-stitch manoeuvres used in Rounds/Rows 2 and 3 before starting a large project.
- The pattern repeat is based on a 3-stitch motif; for flat knitting add the extras and selvage stitches as instructed to keep edge shaping neat.
- When slipping stitches with the yarn in front or back, keep the working yarn tensioned so the slipped stitch sits evenly on the needle and the fabric does not become too loose or too tight.
- This stitch looks lovely in medium to bulky yarns (the sample uses a home décor weight) and suits accessories and edges on garments.
Repeat the indicated rounds or rows to work the ribbing to the desired length. Finish as preferred for your project (bind off, graft a brim, or pick up for facing), and block gently if required by your yarn.