


Knitted Chain Ankle Socks — Step-by-Step Knitting Pattern & Instructions
This knitted chain ankle sock pattern produces a cozy, stylish ankle sock worked in the round with a decorative chain stitch pattern. The instructions cover cuff shaping, short rows for a comfortable heel, a heel flap and gusset, foot length adjustments, and a grafted toe (Kitchener). Suitable for knitters comfortable with DPNs or magic loop, short rows, decreases (ssk, k2tog) and basic finishing techniques.
Skill level: Intermediate — you should be familiar with knitting in the round, picking up stitches, short rows, and grafting with Kitchener stitch.
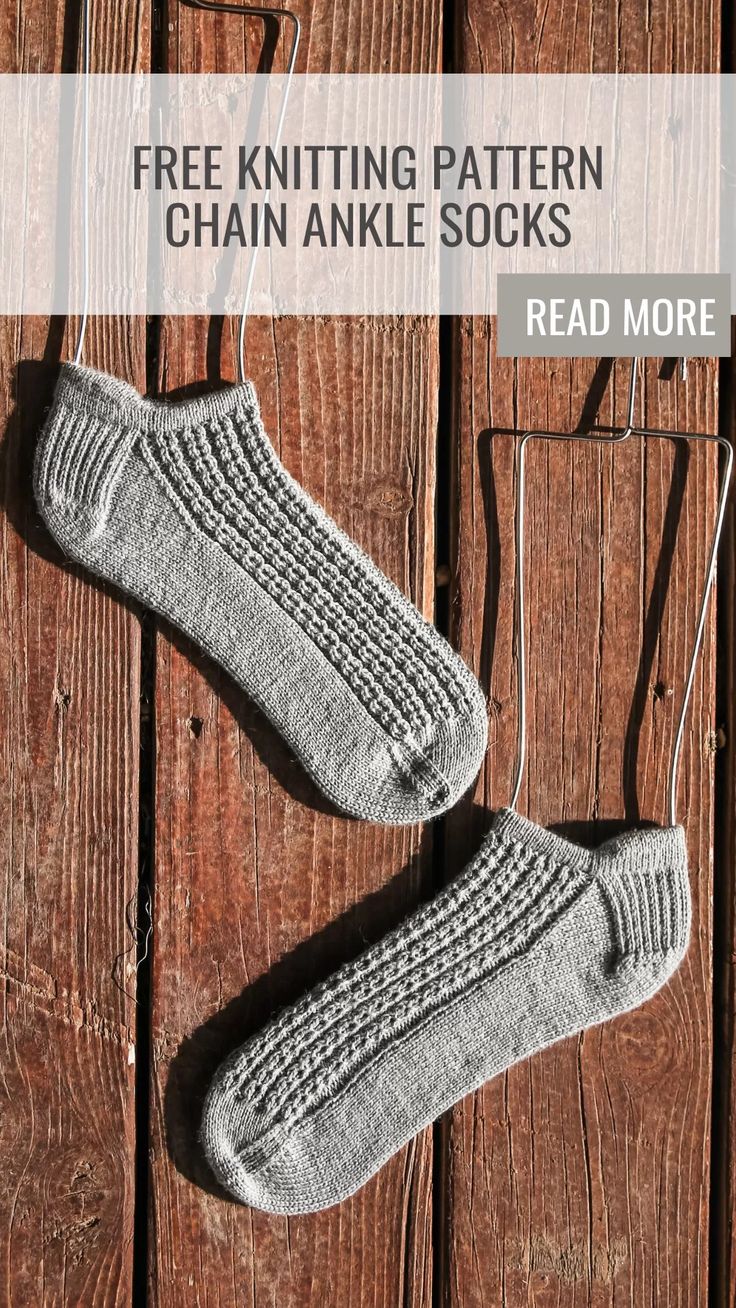
The knitted chain ankle sock is an absolute must-have for your sock collection! With its charming chain-stitch design and cozy fit, it adds a touch of style to any outfit. These socks are comfortable and versatile — great for lounging at home or casual outings. Follow the instructions below to make a pair that fits from baby through adult sizes.
Materials:
Yarn: 1 skein of Hobbii Unicorn Solids 437yd/100g
Needles: US #1 / 2.25mm DPNs (or circular for magic loop; if using circulars, use stitch markers to label needle 1, 2 and 3)
Notions: stitch markers, tapestry needle
Gauge: 32 sts x 44 rows per 4x4 ins (10x10 cm)
Sizing: baby, (toddler, child), adult M, adult L
Finished measurements (unstretched):
Foot Length (adjustable): 4, (6, 8) 10, 11.25 ins or 10 (15, 20) 25.5, 28.5 cms
The model size is a medium adult for a ladies US size 10.
Chain Stitch Pattern
Set-up Row – [p1, k2, p1] across
Round 1 – [p1, k1, yo, k1, p1] across
Round 2 – [p1, k3, p1] across
Round 3 – [p1, k3, p1] across
Round 4 – [p1, mcdd (sl1, k1, psso, pick up the back leg of the stitch you just knit, k2tog knitting the next stitch and the stitch you just picked up together), p1] across
Repeat rows 1-4.
Cuff
Cast on 40 (48, 56) 64, 72 sts, join for working in the round.
Separate stitches on your DPNs as follows:
1st needle 20 (24, 28) 32, 36 sts
2nd and 3rd needle 10 (12, 14) 16, 18 sts each needle
Work in stockinette for 4 (5, 5) 5, 6 rounds.
Short rows
Row 1 – Work across 1st needle to 1 st remaining on needle, W&T.
Row 2 – Work across to 1 st remaining on the needle, W&T.
Row 3 – Work across to 1 st before last wrap, W&T.
Row 4 – Work across to 1 st before last wrap, W&T.
Repeat rounds 3 & 4: 1 (1, 2) 2, 3 times.
Next round: Work across cuff in stockinette, picking up wraps and working them together with the sts they wrap as you complete this round.
Work in stockinette for 4 (5, 5) 5, 6 rounds.
Next Round: Fold the cast on edge into the sock, lining up the cast on edge with the current working sts. *Pick up the cast on stitch directly above the current stitch, k2tog, rep from * to the end of the rnd, the stitch count will not change.
Heel Flap
Next round: You will work the heel flap on the next 20 (24, 28) 32, 36 sts. Place the remaining 20 (24, 28) 32, 36 sts on hold.
Row 1 (RS): (sl1, k1) to end, turn work.
Row 2 (WS): sl1, purl to end, turn work.
Repeat rows 1-2 a total of 9 (11, 13), 15, 17 times. This is a total of 18 (22, 26) 30, 34 rows.
Heel Turn
Row 1 (RS): sl1, k12 (12, 15), 18, 20 ssk, k1, turn work.
Row 2 (WS): sl1, p7 (7, 5) 7, 7, p2tog, p1, turn work.
Row 3: sl1, knit to 1 st before the gap, ssk, k1, turn work.
Row 4: sl1, purl to 1 st before the gap, p2tog, p1, turn work.
Repeat rows 3-4 until all stitches have been worked: 14 (16, 16), 20, 22 sts remain.
Knit across these heel stitches slipping the first st.
Gusset
Pick up and knit 10 (12, 14), 16, 18 sts along the edge of heel flap, PM,
Work across front 20 (24, 28) 32, 36 in pattern, PM,
Pick up and knit 10 (12, 14), 16, 18 sts along heel flap,
k7 (8, 8) 10, 11 sts, mark the new BOR (located at the bottom of the foot).
[54 (64, 72) 84, 94 sts]
Round 1: knit to marker, work front 20 (24, 28) 32, 36 in pattern, knit to bor marker
Round 2: knit to 3 sts before marker, k2tog, k1, sm, work in pattern to next marker, sm, k1, ssk, knit to end [2 sts dec]
Work rounds 1-2 a total of k7 (8, 8) 10, 11 times.
[40 (48, 56) 64, 72 sts]
Foot
Continue working in the round in established pattern until the piece measures 3 (5, 6.5) 8, 9 ins or 7.5 (12.5, 16.5) 20.5, 23 cms from back of heel, or 1 (1, 1.75) 2, 2.25 ins or 2.5 (2.5, 4.5) 5, 5.5 cms short of desired foot length. Finish after completing a round 4 of the chain stitch pattern.
Toe
You will now be working in stockinette only.
Round 1: k1, ssk, knit to 3 sts before marker, k2tog, k2, ssk, knit to 3 sts before end of round, k2tog, k1 [4 sts dec]
Round 2: knit
Work rounds 1-2 a total of 6 (8, 9) 10, 12 times until 16 (16, 20) 24, 24 sts remain.
For a left-handed tutorial of these decreases visit my youtube here
Cut yarn leaving a long enough tail to sew the toe closed, then graft toe using Kitchener stitch.
Weave in all ends.
Kitchener stitch
Place half the stitches on one needle, half the stitches on the other needle, (top and bottom NOT side to side).
Cut yarn (leaving a long yarn tail) and thread through a blunt needle.
Set-up steps: Insert needle purlwise (back to front) through the first st on front needle, leaving the st on the needle. Then insert needle knitwise (front to back) through the first st on the back needle, leaving the st on the needle.
Step 1: Insert needle knitwise through first st on front needle, then slip this st off the needle.
Step 2: Insert needle purlwise through the second st on front needle, leaving the st on the needle.
Step 3: Insert needle purlwise through first st on back needle, then drop this stitch off the needle.
Step 4: Insert needle knitwise through second st on back needle, leaving the st on the needle.
From this point to the end, repeat steps 1-4.
Kitchener stitch can be intimidating, but you get into a rhythm:
Front needle: knitwise drop off, purlwise leave on,
Back needle: purlwise drop off, knitwise leave on,
Repeat! At the end of the row, there is only 1 stitch left on each needle. Work steps 1 and 3 once more.
Abbreviations
- k – knit
- p – purl
- sm – slip marker
- pm – place marker
- st – stitch
- sts – stitches
- k2tog – knit 2 stitches together
- ssk – slip next st knitwise, slip next st knitwise, place stitches back onto left needle, knit both slipped sts together
- w&t – wrap the yarn around the next stitch, turn work
- mcdd – sl1, k1, psso, pick up the back leg of the stitch you just knit, k2tog knitting the next stitch and the stitch you just picked up together