Knitted Splint Covers
Oh, knitted splint covers are an absolute game-changer! Not only do they add a cozy touch to a typically uncomfortable situation, but they also provide a soft barrier that helps prevent any irritation or rubbing from the splint. Plus, they can be made in so many cute patterns and colors, making the road to recovery a little brighter! So, whether you're looking to add a personal flair or just want some extra comfort, knitted splint covers are definitely the way to go.
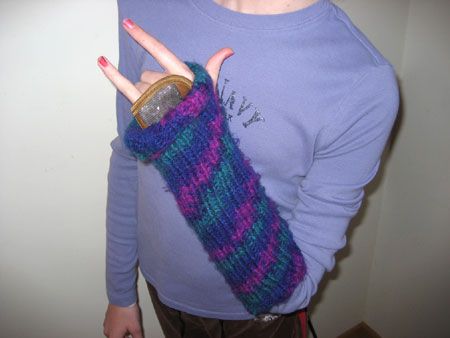
The pictured splint cover is knit in Lion Brand Yarn’s Jiffy, the Denver colorway.
Here is the “pattern.”
Take three measurements (while the recipient is wearing the splint):
1. Circumference, which should be pretty much the same along the length of the splint
2. Distance from the “notch” of the of the thumb-forefinger L up the arm to the end of the splint.
3. Distance from the “notch” of the thumb-forfinger L down the hand to the other end of the splint.
For my niece, these measurements were 10″, 8.5″, and 2″.
Using the gauge information on the yarn band and appropriate double-point needles, cast on a number of stitches that is a multiple of four and that will be approximately equal to the splinted-arm circumferance (measurement #1). (I used U.S. 10.5 needles and cast on 40 stitches.)
Close the circle, place marker, and work in K2, P2 rib until you have a length equal to measurement #2. At some point on the following round, cast off four stitches as you continue working in K2, P2 rib. Then, on the subsequent round use a backwards loop cast-on to restore those four stitches. This will be the thumb hole.
Continue working in K2, P2 rib until the distance from the thumb hole to the end of the piece equals measurement #3.
Cast off.
Voila, a splint cover. It’s still not as glamorous as a cast, but it’s way more glam than an unadorned, clunky brown splint.