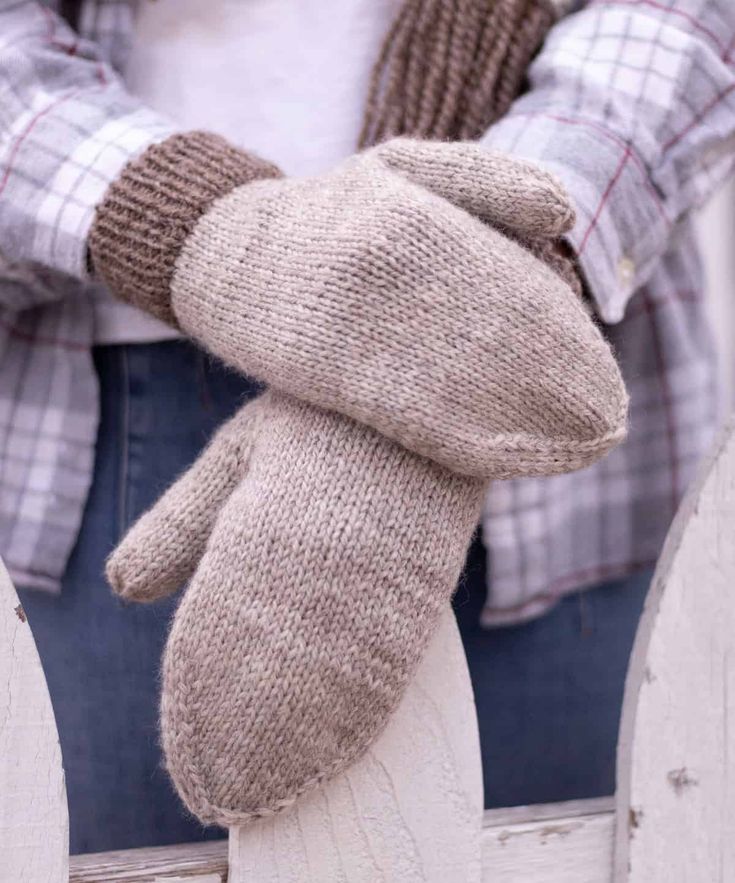
Knitted Vanilla Mittens
When it comes to cozy winter accessories, nothing quite beats a pair of knitted vanilla mittens. Picture yourself roaming around in the snowy wonderland, hands snug and toasty in these soft, vanilla-colored beauties. These mittens are not just a fashion statement but a warm hug for your hands on chilly days. With their charming vanilla hue, they effortlessly add a touch of sweetness to your winter ensemble. Whether you're building a snowman or sipping hot cocoa, these adorable knitted vanilla mittens are sure to become your favorite winter must-have!
Skill Level
Intermediate
To knit these mittens you will need to feel comfortable following written instructions and know the following skills: knitting in the round, simple increases and shaping, knit decreases, and picking up stitches.
Materials
- 1, (1, 1, 1) (2, 2, 2) balls / 191, (191, 191, 191) (382, 382, 382) yards Originally Lovely Lana yarn or similar Aran weight wool yarn
- Note: Two color version requires 2 balls (1 main color and 1 accent color) of Originally Lovely Lana yarn for all sizes
- Size US 4 (3.5 mm) knitting needles – either Double Pointed Needles or circular needles for Magic Loop
- Size US 5 (3.75 mm) knitting needles – either Double Pointed Needles or circular needles for Magic Loop
- Stitch markers
- Stitch holder or scrap yarn to hold live stitches
- Tapestry needle to weave in ends
Notes
- These mittens will be worked in the round using either Double Pointed Needles or a longer circular needle for the Magic Loop technique. You will begin at the cuff and work upward to shape the hand. Thumb stitches will be set aside as you finish the hand and be worked at the end.
- Hand circumference is measured as the widest distance around your knuckles before your fingers, excluding the thumb.
- Please note, hand length can be easily customized in the pattern while hand circumference cannot. Because of this, it is more important to choose a size based on hand circumference.
- Pattern is written for smallest size with changes for larger sizes in parenthesis. When only one number is given, it applies to all sizes. To keep track of your size, you may highlight or circle all numbers for your chosen size before you begin.
- There will be sections in the pattern that apply only to one size. If the section isn’t explicitly noted, it applies to all sizes.
Help Choosing Size
These mittens are designed to have slight positive ease. Choose a size that is about ½ inch (1.25 cm) larger than your actual corresponding hand circumference. For example, if your hand circumference is 7.5 inches (19 cm), you would knit a size L.
Gauge
22 stitches and 30 rows = 4 inches (10 cm) in stockinette stitch using size 5 needles
Because we are using a smaller needle size than recommended for the yarn, the gauge for these mittens should be quite dense and thick. This will make a pair of mittens that is strong, durable, and warm.
Please note: Always remember to gauge swatch especially when substituting yarn in a pattern! Small changes in gauge can lead to large changes in the finished garment so assure a proper fit with the proper gauge!
Abbreviations
This pattern is written using U.S. English Terminology
- AC = accent color
- Beg = beginning
- BO = bind off
- CO = cast on
- DPN = double pointed needles
- K = knit
- K2tog = knit 2 together (right leaning decrease)
- M = stitch marker
- MC = main color
- ML = magic loop technique
- M1L = make one left
- M1R = make one right
- P = purl
- PM = place stitch marker
- Rd = round
- Rep = repeat
- Sl = slip one stitch purl-wise with the working yarn in back
- Ssk = slip, slip, knit (left leaning decrease)
- SM = slip stitch marker
- St = stitch
- Sts = stitches
- Stst = stockinette stitch
- YO = yarn over
- [ ] = repeat the instructions inside the brackets as directed.
- * = repeat the instructions following the single asterisk as directed
Vanilla Mittens Knitting Pattern
Using size 4 needles, cast on 36, (40, 42, 44) (48, 50, 52) sts using either backwards loop cast on or provisional cast on method. If knitting the two color version, begin using AC (color you will be working for the cuff).
NOTE: The cast on method matters because we will be working a ‘foldover cuff’ meaning a double-layered cuff at the wrist. Some knitters prefer the provisional cast on method for this technique but I find that the backwards loop cast on method is the easiest as it keeps the ending stitches from becoming too tight.
Join to work in round. PM to denote beg/end of each round. Knit 3 (3, 4, 4) (4, 4, 4)” / 7.5 (7.5, 10, 10) (10, 10, 10) cm in k1, p1, rib stitch.
NOTE: If you choose not to work a foldover cuff, you can work 1.5, (1.5, 2, 2) (2, 2, 2)” / 3.75 (3.75, 5, 5) (5, 5, 5) cm in k1, p1 rib stitch before switching to size 5 needles and working the hand of the mitten.
Foldover Cuff
On the next round, switch to size 5 needles. If working the two-color version, begin working in MC (color used for the hand portion of the mitten).
You will now work the foldover cuff. To work the cuff, pick up the first stitch from the cast on edge and place onto the left needle. Knit this stitch together with what was the first stitch on your left hand needle. Repeat for each consecutive stitch until all stitches and cast on stitches are worked together.
Hand
Work 7 (7, 9, 9) (9, 11, 11) more rounds even in stst.
Continue on to shape one left hand and one right hand mitten according to the following directions.
Left Hand Shaping
Set Up Round: k to last 5, sl1, PM, k3, PM, sl1.
Round 1: k to M, SM, M1L, k to M, M1R, SM, k1. [38, (42, 44, 46) (50, 52, 54) sts].
2: k to 1 before M, sl1, SM, k to M, SM, sl1.
Repeat rounds 1-2 four (4, 5, 5) (5, 6, 6) more times. [46, (50, 54, 56) (60, 64, 66) sts].
3: k to first M, slip 13 (13, 15, 15) (15, 17, 17) sts between Ms onto scrap yarn or st holder, remove Ms, CO 3 sts, k last st of round to join.
You will now continue working the 36 (40, 42, 44) (48, 50, 52) hand sts and leave the 13 (13, 15, 15) (15, 17, 17) sts set aside for thumb to be worked later.
Right Hand Shaping
Set Up Round: sl1, PM, k3, PM, sl1, k to end of rd.
Round 1: k1, SM, M1L, k to M, M1R, SM, k1, k to end of rd. [38, (42, 44, 46) (50, 52, 54) sts].
2: sl1, SM, k to M, SM, sl1, k to end of rd.
Repeat rounds 1-2 four (4, 5, 5) (5, 6, 6) more times. [46, (50, 54, 56) (60, 64, 66) sts].
3: k1, slip 13 (13, 15, 15) (15, 17, 17) sts between Ms onto scrap yarn or st holder, remove Ms, CO 3 sts, k to end of rd to join.
You will now continue working the 36 (40, 42, 44) (48, 50, 52) hand sts and leave the 13 (13, 15, 15) (15, 17, 17) sts set aside for thumb to be worked later.
Both Hands
Work stst even in round until hand measures 4.5 (5, 5.25, 5.75) (6, 6.5, 6.5)” / 11.5 (12.75, 13.25, 14.5) (15.25, 16.5, 16.5) cm from cuff OR until hand measures 1.5 (1.5, 1.75, 1.75) (2, 2, 2)” / 3.75 (3.75, 4.5, 4.5) (5, 5, 5) cm less than desired finished length.
Decreases
If working Magic Loop method: Verify that the first half of your stitches are on the front needle and the second half are on the back needle.
If working working on DPNs: Adjust your needles so the first half of the sts are divided between needles 1 and 2 and the second half of your sts are divided between needles 3 and 4.
Round 1: k1, ssk, k to 3 before halfway point, k2tog, k2, ssk, k to 3 before end of rd, k2tog, k1. [32, (36, 38, 40) (44, 46, 48) sts].
2: knit.
Repeat rounds 1-2 four more times. [16, (20, 22, 24) (28, 30, 32) sts].
3 (sizes M and 2X ONLY): k to 3 before halfway point, k2tog, k to 3 before end of rd, k2tog, k1. [16, (20, 20, 24) (28, 28, 32) sts].
All Sizes: repeat round 1 two (3, 3, 4), (5, 5, 6) more times. [8 sts]
Final Round: k2. Adjust needles at this point so that the next 4 stitches are on a first needle and the second 4 stitches are on a second needle. Seam these 8 stitches together using kitchener stitch.
NOTE: alternatively, you may thread through the remaining stitches and cinch tight to close.
Break yarn and weave in end to secure.
Thumb
Begin by slipping the 13 (13, 15, 15) (15, 17, 17) sts set aside for thumb onto your needles.
Set Up Round: Pick up 6 sts at hand, this is one stitch from the side of each row and 4 sts across the 3 that were cast on to complete the hand. You will now work the thumb in the round. [19 (19, 21, 21) (21, 23, 23) sts].
1: k to 1 before the 6 picked up stitches, PM, ssk, k4, k2tog, PM. [17 (17, 19, 19) (19, 21, 21) sts].
2: k 1 round.
3: k to M, SM, ssk, k2, k2tog. [15 (15, 17, 17) (17, 19, 19) sts].
Continue working in the round until thumb measures 1.75 (2, 2, 2.25) (2.25, 2.25, 2.5)” from picked up sts OR to desired length. Remove Ms.
Final Round: k1, [k2tog] to end of round.
Thread through remaining sts and cinch to close. Weave in all ends.
Finishing
Weave in all ends to secure.
Block by gently soaking in lukewarm water and lay flat to dry.
Enjoy!
Sizing:
| Size: |
| Finished Hand Circumference: |
| Finished Hand Length: |
| XS | S | M |
| 6.5″ 16.5cm | 7″ 17.75cm | 7.5″ 19cm |
| 6″ 15.25cm | 6.5″ 16.5cm | 7″ 17.75cm |
| L | XL | 2X | 3X |
| 8″ 20.5cm | 8.5″ 21.5cm | 9″ 23cm | 9.5″ 24.25cm |
| 7.5″ 19cm | 8″ 20.5cm | 8.5″ 21.5cm | 8.5″ 21.5cm |
XS, (S, M, L) (XL, 2X, 3X)
Could someone please explain sizing info. Which no’s. refer to small, medium and large? Why are there multiple no’s for each size?