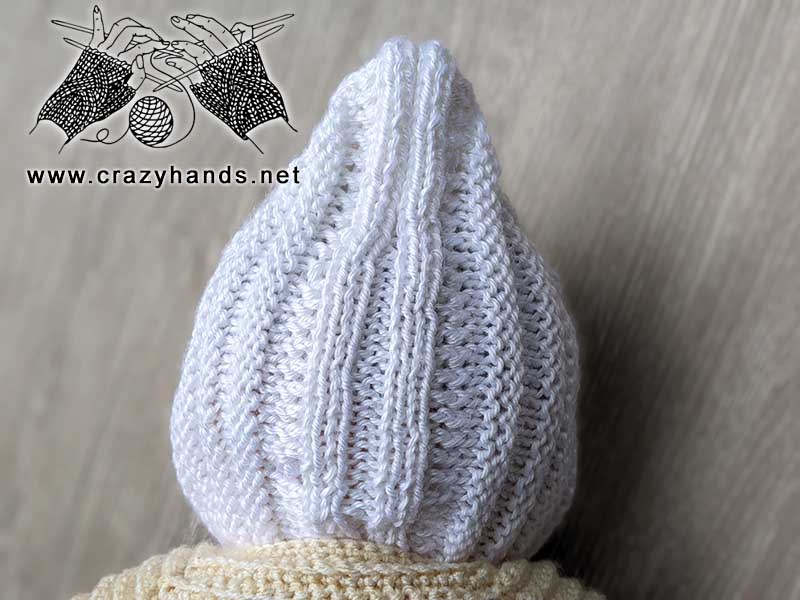
Adorable Knitted Baby Pixie Hat Pattern (0–3 months) — Worsted-Weight Yarn
This knitted baby pixie hat is a charming, pointed-top hat sized for newborns (0–3 months). The pattern uses worsted/aran weight yarn and simple ribbing to create a cozy, textured hat with ties. Below you'll find the materials, abbreviations and a clear row-by-row pattern to knit the hat and finish it with i-cord ties.

Knitting materials and tools
- Knitting needles: US 6 / UK 8 (4 mm) for the ribbing/body and US 4 (3.5 mm) or 3.5 mm DPNs for the ties (i-cord).
- Yarn: Caron Simply Soft (4) – 100% acrylic (or any medium/worsted/aran weight with about 180 m / 190 yards per 100 g skein). Quantity: less than 1 ball.
- Stitch markers
Size
Age: 0–3 months
Number of stitches cast on: 68
Gauge: 20–21 sts = 4 inches in stockinette
Common abbreviations
- k – knit
- p – purl
- pm – place marker
- k2tog – knit two together (through the front loop)
- k2togb – knit two together through the back loop
- k3togb – knit three together through the back loop
- p2tog – purl two together
- sel s – selvage stitch: slip first stitch purlwise, work to last stitch, purl last stitch
- RHN – right hand needle
- LHN – left hand needle
Knitting pattern (body of the pixie hat)
Using 4 mm needles, cast on 68 stitches.
Row 1: sel s, [k2, p2] – repeat to end, k2, sel s, turn.
Row 2: sel s, [p2, k2] – repeat to end, p2, sel s, turn.
Row 3: repeat Row 1.
Row 4: repeat Row 2.
Row 5: sel s, k6, [p2, k2] – repeat until you have 7 stitches on the needle, k6, sel s.
Row 6: sel s, p6, [k2, p2] – repeat until you have 7 sts on your needle, p6, sel s.
Row 7: repeat Row 5.
Row 8: sel s, k8, [p2, k2] – repeat until you have 9 stitches on the needle, k8, sel s.
Row 9: sel s, p8, [k2, p2] – repeat until you have 9 sts on your needle, p8, sel s.
Row 10: repeat Row 8.
Row 11: sel s, k10, [p2, k2] – repeat until you have 11 stitches on the needle, k10, sel s.
Row 12: sel s, p10, [k2, p2] – repeat until you have 11 sts on your needle, p10, sel s.
Row 13: repeat Row 11.
Row 14: sel s, k12, [p2, k2] – repeat until you have 13 stitches on the needle, k12, sel s.
Row 15: sel s, p12, [k2, p2] – repeat until you have 13 sts on your needle, p12, sel s.
Row 16: repeat Row 14.
Row 17: sel s, k14, [p2, k2] – repeat until you have 15 stitches on the needle, k14, sel s.
Row 18: sel s, p14, [k2, p2] – repeat until you have 15 sts on your needle, p14, sel s.
Row 19: repeat Row 17.
Continue in this manner, increasing two more stitches on each side every three rows on the right side and left side. Knit until you have 10 stitches of ribbing in the center (p2, k2, p2, k2, p2). Place stitch markers between those 10 sts.
After that knit one more row – knit all knit stitches and purl all purl stitches. Turn the hat.
Sewing edges and shaping the crown
Cut the working yarn. Slip all stitches to the first stitch marker (29).
Attach the working yarn.
Row 1: p2, k2, p2, k2, p1, p2tog (remove the stitch marker)
Row 2: sel s, k1, p2, k2, p2, k1, k2togb (remove the stitch marker)
Row 3: sel s, p1, k2, p2, k2, p1, p2tog
Row 4: sel s, k1, p2, k2, p2, k1, k2togb
Row 5: Repeat Row 3
Row 6: Repeat Row 4
Continue repeating Rows 3 and 4 until you have the central 10 sts on your needle.
Cut the working yarn. Place the hat with the back facing you and the pointed crown looking down.
Picking up stitches and knitting ties (i-cord)
Pick up stitches (without working yarn) along the left edge through the front loops only. Turn the hat and pick up loops on the other side through the back loops only. Put the hat aside and start knitting the first tie.
Using 3.5 mm DPNs, cast on 3 stitches and knit an i-cord: slide stitches to the other end of the needle, bring working yarn from the left side, k3; repeat sliding and knitting until the cord measures at least 17 cm. Do not cut the yarn — this will be the working yarn for attaching to the hat.
When the tie is ready, place the hat again with the back facing you and the pointed crown looking down, slip 3 sts from the DPN to circular needle.
[K2, k2togb, return 3 sts from the RHN to the LHN] – repeat until you reach central 10 sts, [K2, k3togb, return 3 sts from the RHN to the LHN] – repeat 6 times, [K2, k2togb, return 3 sts from the RHN to the LHN] – repeat until you have 3 sts on your needle and then knit another tie to 17 cm. At the end [k2tog, k1], slide stitches again, k2tog.
Cut the yarn and weave in ends.