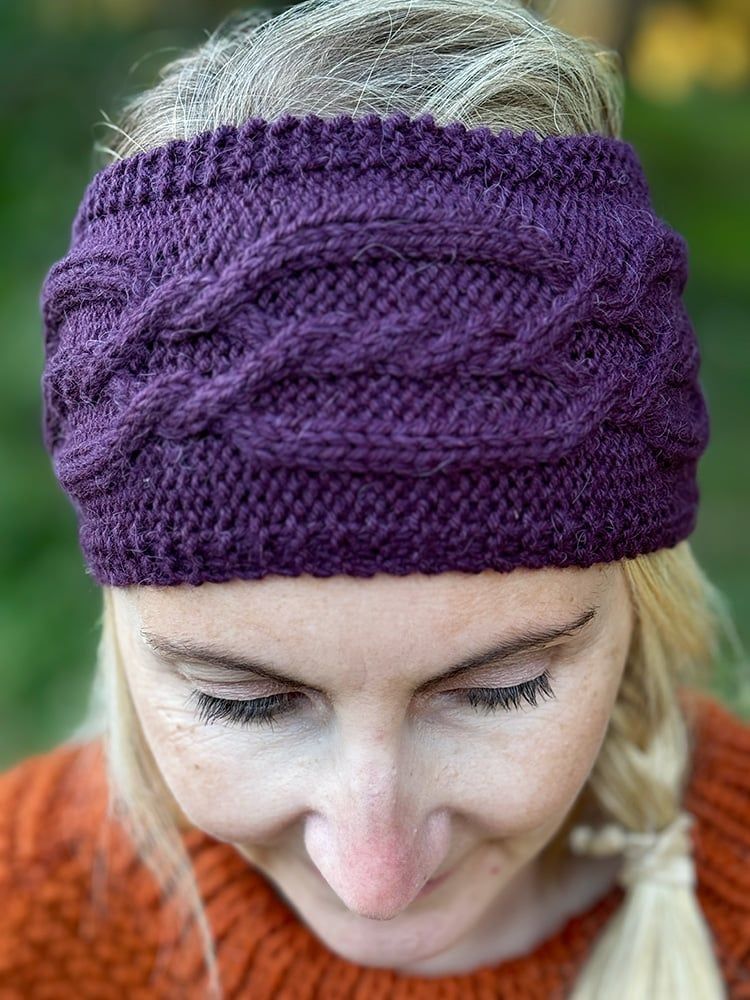
Knitted Cable Headband
The knitted cable headband is a perfect accessory to keep you warm and stylish during the colder months. Its intricate cable design adds a cozy and chic touch to any outfit, making it a versatile piece for both casual outings or more formal events. The soft knit material ensures a comfortable and snug fit, while the stretchy fabric accommodates various head sizes. Whether you are running errands, hitting the slopes, or simply enjoying a leisurely walk, this headband is a must-have addition to your winter wardrobe. Stay fashionable and toasty with the knitted cable headband – your go-to accessory for a touch of charm and warmth!
Key Techniques Used
This pattern incorporates fundamental knitting techniques to help you achieve a polished knitted item:
- Long-tail cast-on method for a stretchy edge.
- Garter stitch and pulled edges for added texture.
- Cable knitting uses a cable needle to cross stitches and create intricate braids. The cables are only on the front of your work and not at the back of your work.
- Proper finishing methods like weaving in yarn tails and blocking.
Supplies You’ll Need:
Before diving into the pattern, gather the following supplies:
- Yarn
- DK weight yarn/Light worsted/8 Ply
- 1 x ball of Rowan Alpaca Soft DK in the color Dark Burgundy 230
- 125m/137 yds/50g
- Knitting Needle Size
- Size 4 mm needles (US 6)
- Cable needle
Notions
- Darning needle/tapestry needle or yarn needle
- Scissors
- Tape Measure
- Stitch markers x 2
Other
- Blocking boards and blocking pins.
- Lukewarm water and a dry towel for soaking and blocking.
Size Information
- Teen = Head Circumference 20-22″ / Headband Length 18″
- Adult Small = Head Circumference 21-22″ / Headband Length 19″
- Adult Medium = Head Circumference 22-23″ / Headband Length 20″
- Adult Large = Head Circumference 23-24″ / Headband Length 21″
- Width of the headband = 4 inches.
- If you wish to make the width smaller (for the teen size) you can subtract stitches from the edge – for example, K2, P2 (cable pattern) P2, K2. With 4 edge stitches instead of 6.
Gauge – 22 stitches/30 rows in 10 x 10 cm/4 inches.
Knitting Abbreviations
- CO – Cast on
- C4F (Cable 4 Front) – Slip next 2 sts onto cable needle and hold at front of work, knit next 2 sts from left hand needle and then knit 2 sts from cable needle.
- K – Knit
- P – Purl
- PM – Place marker
- SM – Slip marker
- St(s) – Stitch(es)
- St st – Stocking stitch
- T4B (Twist 4 Back) – Slip next 2 sts onto cable needle and hold at back of work. Knit next 2 sts from left hand needle, then purl 2 sts from cable needle.
- T4F (Twist 4 Front) – Slip next 2 sts onto cable needle and hold at front of work, purl next 2 sts from left hand needle, then knit 2 sts from cable needle.
- Rep – Repeat
- RS – Right side
- WS – Wrong side
- 1×1 Ribbing – K1, P1 repeat.
Pattern Instructions:
Panel of 16 sts on a background of rev st st.
Cast on 28 stitches.
Work 1×1 Ribbing for 1 inch.
Row 1 (RS): K3, P3 (edge), PM, P2, C4F, P4, C4F, P2, PM, P3, K3 (edge).
Row 2 (WS): K6, SM, K2, P4, K4, P4, K2, SM, K6.
Row 3: K3, P3, SM, P2, K4, P4, K4, P2, SM, P3, K3.
Row 4: As row 2.
Rows 5-6: As rows 1-2.
Row 7: K3, P3, SM, [T4B, T4F] Twice, SM, P3, K3.
Row 8: K6, SM, P2, K4, P4, K4, P2, SM, K6.
Row 9: K3, P3, SM, K2, P4, C4F, P4, K2, SM, P3, K3.
Row 10: As row 8.
Row 11: K3, P3, SM, K2, P4, K4, P4, K2, SM, P3, K3.
Row 12: As row 8.
Rows 13-22: Rep rows 9-12 twice more, then rows 9-10 again.
Row 23: K3, P3, SM, [T4F, T4B] Twice, SM, P3, K3.
Row 24: As Row 2.
Rep rows 1-24 until the length measures = 17 (18, 19, 20) inches.
Work 1×1 ribbing for 1 inch.
The total length should measure around = 18 (19, 20, 21) inches.
Cast off (in ribbing).
Weave in any loose ends/yarn tails.
Block the work.
Making Up
Seam the ends together with the right sides facing you (the right side of the headband with the cables should be facing you).
Use the mattress stitch for an invisible seam.
Blocking the Headband
To give your headband a professional finish:
Soak it in lukewarm water with a mild detergent for a soak wash.
Gently squeeze out excess water using a dry towel—don’t wring it out!
Place the headband on a blocking board and pin it to shape. Let it air dry completely.
Tips for Success
Practice cable knitting on a swatch before starting the headband.
Keep track of your rows to ensure the pattern stays consistent.
Always block your finished headband to smooth out stitches and make the cables pop.