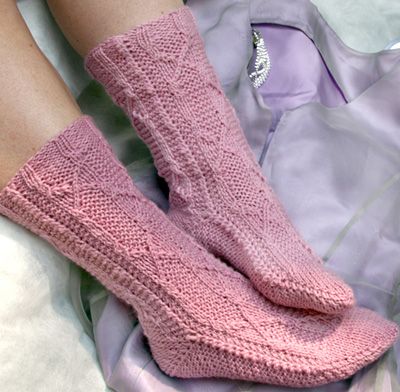
Knitted Two-Needle Socks
Knitted two-needle socks are a fantastic project for both experienced knitters and beginners looking to expand their skill set. They offer a unique twist on traditional sock-making by using just two needles, making them approachable and fun for crafters of all levels. The beauty of these socks is that you can customize them to fit your style, whether you prefer bright and bold colors or classic and muted tones. Not only are they a delight to knit, but the end result is a cozy and comfortable pair of socks that will keep your toes warm and stylish. So, grab your yarn and needles, and get ready to create your own pair of knitted two-needle socks that are as unique as you are!
SIZE
Women's Medium
FINISHED MEASUREMENTS
- Foot Length: 9.5 inches
- Foot Circumference: 8.5 inches
Note: Knitted as written, the pattern has approximately 0.5 inch negative ease.
Circumference may be adjusted by changing needle size. Instep may be lengthened or shortened by working more or fewer pattern rows before beginning toe.
MATERIALS
- Patons Classic Wool [100% Wool; 223yd/205m per 100g skein]; color: #00210 Petal Pink; 2 skeins
- 1 set US #4/3.5 mm straight needles
- Smooth waste yarn
- Split ring markers or safety pins
- Stitch holder OR spare double-point or circular needle, US #4/3.5 mm or smaller
- Tapestry needle
GAUGE
20 sts/28 rows = 4 inches in stockinette stitch
In Heraldic Pattern with knitting relaxed, 24 sts and 32 rows measures 4.25 inches in width and 3.5 inches in length.
LT (Left Twist): Bring right needle behind left needle and knit into back of second stitch on left needle without dropping st from needle; knit into front of first stitch on left needle, drop both stitches from left needle.
RT (Right Twist): K2tog but do not drop sts from left needle, knit again into first st on left needle, drop both stitches from left needle.
RJ (Right Join): Insert right needle from right to left behind both legs of slipped selvedge st, pick up and k 1 st. Place this st on left needle and knit it together with next st.
LJ (Left Join): Slip last st of row to right needle. Insert left needle from left to right behind both legs of slipped selvedge st, pick up and k 1 st. Insert left needle into fronts of last 2 sts on right needle and knit them together (as if working a ssk).
Wyif: With yarn held to front of work
Wyib: With yarn held to back of work
Pattern:
Front Cuff
Using Provisional Cast On, CO 26 sts.
Row 1 [RS]: Sl 1 wyib, p2, [k2, p4] to last 5 sts, k2, p2, k1.
Row 2 [WS]: Sl 1 wyif, k2, [p2, k4] to last 5 sts, p2, k2, p1.
Repeat these 2 rows twice more, then work first row once more.
Front Leg
Row 1 [WS]: Sl 1 wyif, work first row of chart, p last st.
Row 2 [RS]: Sl 1 wyib, work next row of chart, k last st.
Continue in pattern as set, working central 24 sts following chart and selvedge sts as set, until all rows of chart have been worked twice (64 pattern rows in total).
Use split ring markers or safety pins to mark each end of last row worked.
Instep
Work 32 rows of chart once more.
Toe
Note: The upper toe (Rows 1-16) is worked in stockinette st. The underside of the toe (Rows 17-32) is worked in reverse stockinette st.
Row 1 [WS]: Sl 1 wyif, p2tog, p to last 4 sts, p2tog, W&T. 24 sts.
Row 2 [RS]: K to last 2 sts, W&T.
Row 3 [WS]: P to last 3 sts, W&T.
Row 4 [RS]: K to last 3 sts, W&T.
Row 5 [WS]: P to last 4 sts, W&T.
Row 6 [RS]: K to last 4 sts, W&T.
Row 7 [WS]: P to last 5 sts, W&T.
Row 8 [RS]: K to last 5 sts, W&T.
Row 9 [WS]: P to last 6 sts, W&T.
Row 10 [RS]: K to last 6 sts, W&T.
Row 11 [WS]: P to last 7 sts, W&T.
Row 12 [RS]: K to last 7 sts, W&T.
Row 13 [WS]: P to last 8 sts, W&T.
Row 14 [RS]: K to last 8 sts, W&T.
Row 15 [WS]: P to last 9 sts, W&T.
Row 16 [RS]: K to last 9 sts, W&T.
Row 17 [WS]: K7, W&T.
Row 18 [RS]: P8, W&T.
Row 19 [WS]: K9, W&T.
Row 20 [RS]: P10, W&T.
Row 21 [WS]: K11, W&T.
Row 22 [RS]: P12, W&T.
Row 23 [WS]: K13, W&T.
Row 24 [RS]: P14, W&T.
Row 25 [WS]: K15, W&T.
Row 26 [RS]: P16, W&T.
Row 27 [WS]: K17, W&T.
Row 28 [RS]: P18, W&T.
Row 29 [WS]: K19, W&T.
Row 30 [RS]: P20, W&T.
Row 31 [WS]: K to end.
Row 32 [RS]: P11, m1, p2, m1, p11. 26 sts.
Sole
As you knit the sole and back leg of the sock, the work will be joined to the instep and front leg of the sock. This is done by joining the first and last stitches of each RS row to the slipped stitches at the ends of the instep and front leg rows. See the directions for RJ and LJ (Right Join and Left Join) in the Pattern Notes above. You’ll begin by joining the first RS row of the sole to the last row worked before the toe, as follows:
Row 1 [WS]: K all sts.
Row 2 [RS]: RJ, p to last st, LJ.
Repeat these 2 rows until you have joined all instep rows, ending with the second-last row before the marked row.
Heel
Row 1 [WS]: Sl 1 wyif, k to last 2 sts, W&T.
Row 2 [RS]: P to last 2 sts, W&T
Row 3 [WS]: K to last 3 sts, W&T.
Row 4 [RS]: P to last 3 sts, W&T.
Row 5 [WS]: K to last 4 sts, W&T.
Row 6 [RS]: P to last 4 sts, W&T.
Row 7 [WS]: K to last 5 sts, W&T.
Row 8 [RS]: P to last 5 sts, W&T.
Row 9 [WS]: K to last 6 sts, W&T.
Row 10 [RS]: P to last 6 sts, W&T.
Row 11 [WS]: K to last 7 sts, W&T.
Row 12 [RS]: P to last 7 sts, W&T.
Row 13 [WS]: K to last 8 sts, W&T.
Row 14 [RS]: P to last 8 sts, W&T.
Row 15 [WS]: K to last 9 sts, W&T.
Row 16 [RS]: P to last 9 sts, W&T.
Row 17 [WS]: K7, W&T.
Row 18 [RS]: P8, W&T.
Row 19 [WS]: K9, W&T.
Row 20 [RS]: P10, W&T.
Row 21 [WS]: K11, W&T.
Row 22 [RS]: P12, W&T.
Row 23 [WS]: K13, W&T.
Row 24 [RS]: P14, W&T.
Row 25 [WS]: K15, W&T.
Row 26 [RS]: P16, W&T.
Row 27 [WS]: K17, W&T.
Row 28 [RS]: P18, W&T.
Row 29 [WS]: K19, W&T.
Row 30 [RS]: P20, W&T.
Row 31 [WS]: K to end.
Row 32 [RS]: RJ, p to last st, LJ.
Back Leg
Row 1 [WS]: K1, work first row of chart, k last st.
Row 2 [RS]: RJ, work next row of chart, LJ.
Continue in pattern as set, working central 24 sts following chart and joining selvedge sts on RS rows, until all rows of chart have been worked twice.
Back Cuff
Row 1 [WS]: K3, [p2, k4] to last 5 sts, p2, k3.
Row 2 [RS]: RJ, p2, [k2, p4] to last 5 sts, k2, p2, LJ.
Repeat these 2 rows twice more, then work first row once more.
Break yarn, leaving a tail at least 1yd long.
FINISHING
Remove waste yarn from CO edge and place sts on st holder or spare needle.
BO all sts using Sewn Bind Off, binding off sts on working needle first, then sts on holder or spare needle.
Weave in ends.