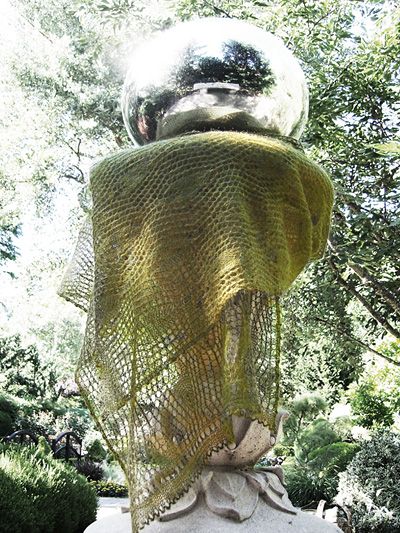
Knitted Handmade Shawl
A knitted handmade shawl is not just a piece of clothing, it's a cozy hug that you can carry with you wherever you go! The intricate patterns, soft textures, and warm embrace of a knitted shawl make it a versatile and stylish accessory for any occasion. Whether you wear it during a crisp autumn day, a chilly evening by the fire, or simply to add a touch of charm to your outfit, a knitted handmade shawl is sure to keep you looking fabulous and feeling oh-so-snug. So, wrap yourself in the love and craftsmanship that goes into creating a knitted shawl, and embrace the comfort and warmth it brings to your world.

SIZE
One
FINISHED MEASUREMENTS
Measurements taken after blocking.
- Width: 22 inches
- Length: 82 inches
MATERIALS
- Artfibers Tsuki [40% silk/60% superkid mohair; 515yd/471m per 40g cone]; color: #04 Olive Green; 2 cones
- 1 24-inch US #6/ 4mm circular needle
- Crochet hook, close in size to US G/6 / 4mm
- Waste yarn
- Sewing needle
GAUGE
- Approx. 24 sts/22rows = 4 inches in Lace pattern AFTER BLOCKING
- Note: Correct gauge is not essential for this project.
PATTERN
SHAWL BODY
Using Crochet Cast On, CO 125 sts. Leave a yarn tail at beginning of CO row, at least 6 inches long.
Work Rows 1-32 of Lace Chart 13 times, then work Rows 1 and 2 once more.
Pattern Repeat will be worked 3 times in each row.
UPPER BORDER
Row 1 [RS]: K2, ssk, yo, k1 tbl, p to last 5 sts, k1 tbl, yo, k2tog, k2.
Row 2 [WS]: K all sts.
Row 3 [RS]: Make picot, k1, ssk, yo, k1 tbl, [yo, k2tog] to last 2 sts, k2.
Row 4 [WS]: Make picot, k to end.
Rows 5 & 6: K all sts.
Rows 7 & 8: Make picot, k to end.
Rows 9 & 10: K all sts.
BO as follows: [Make picot, BO 2 sts, sl st from right needle back to left needle] to end of row, making 1 picot at end of row. Break yarn and sew end into border so that last picot sits properly.
LOWER BORDER
Carefully remove waste yarn from CO edge, placing resulting live sts on needle. Join yarn to tail from CO using Russian Join. 125 sts on needle.
The next row is a bit tricky; try it out on a swatch first if you wish. It is intended to carry the 5-stitch border unbroken along the side, rather than having an obvious half stitch offset. It’s worth the effort!
Row 1 [RS]: P3, k1 but do not drop st from left needle, k2tog but drop only first st from left needle do not drop second st from needle, p2tog (second st of k2tog just worked is purled together with next st), p to last 6 sts, p1 but do not drop st from left needle, k2tog but drop only first st from left needle do not drop second st from needle, k1, p2, p2tog.
Row 2 [WS]: P2, p2tog, yo, p1 tbl, k to last 5 sts, p1 tbl, yo, p2tog, p2.
Row 3 [RS]: Make picot, p2, k2, [yo, k2tog] to last 6 sts, yo, k2tog, k1, p3.
Row 4 [WS]: Make picot, p1, p2tog, yo, p1 tbl, k to last 5 sts, p1 tbl, yo, p2tog, p2.
Work Rows 5-10 and BO as for Upper Border.
FINISHING
Sew in any remaining ends.
Wet block shawl. Links to two excellent articles about blocking lace can be found in the Pattern Notes above.
If using blocking wires or string, thread through columns of yarnovers along side edges of shawl, and through both yarnovers and picots at ends of shawl.