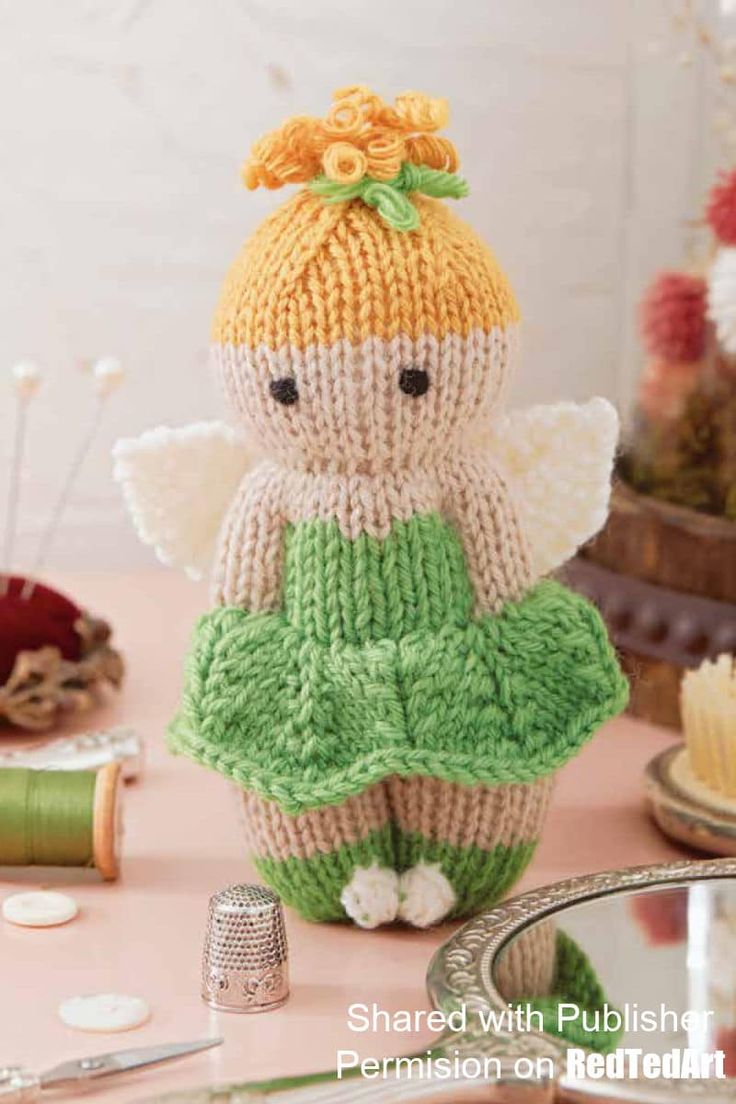
Knitted Tinkerbell Izzy Doll
The Knitted Tinkerbell Izzy Doll is a whimsical and charming addition to any collection. With its intricate details and vibrant colors, this handcrafted doll is sure to bring a touch of magic into your life. Perfect for both children and adults, this doll is not only adorable but also incredibly well-made, making it a cherished keepsake for years to come. Whether as a gift or a personal treat, the Knitted Tinkerbell Izzy Doll is guaranteed to put a smile on your face every time you see it.
SIZE of Tinkerbell
One size
FINISHED MEASUREMENTS for your Fairy Doll
- Height: 6 in. / 15 cm
- Width: 3 in. / 7.5 cm
YARN used to make this tinkerbell doll
Worsted weight (medium #4) yarn, shown in Plymouth Yarn Galway Worsted (100% wool; 210 yd. / 192 m per 3½ oz. / 100 g skein)
- Color A: #145 Happy Green, 1 skein
- Color B: #8 Bleach, 1 skein
- Color C: #112 Almond, 1 skein
- Color D: #202 Grasshopper, 1 skein
NEEDLES
US 5 / 3.75 mm set of 6 double-pointed
needles
NOTIONS
- Stitch marker
- Locking stitch marker (1)
- Tapestry needle
- Polyester stuffing (approx 1 oz. / 29 g per doll)
- US D-3 / 3.25 mm crochet hook
- Wooden dowel or single US 8 / 5 mm bamboo dpn
- 2¼ yd. / 2 m of black worsted weight yarn to embroider eyes
GAUGE
24 sts and 28 rnds = 4 in. / 10 cm over St st, unblocked, taken before stuffing doll
Gauge is not critical for a toy; just ensure the stitches are tight enough so the stuffing will not show through your finished project.
NOTES to read before making your tinkerbell doll
Doll is worked in one piece, in the round, from the bottom up.
Skirt is knit from stitches picked up and knit outward from the doll’s body.
Wings are knit flat and attached to the finished doll.
Bodice is worked in duplicate stitch after stuffing the doll.
Simple sewing techniques are used to define the arms and legs after knitting.
Final details for the eyes are added with embroidery.
Written and charted instructions are provided for the entirety of main body of the doll. Note that the chart will also be used in the finishing of the entire doll for the definition of legs, arms, and neck, as well as embroidery.
To embroider the eyes, use three horizontal bars across both legs of the indicated stitch.
Tinkerbell Knitting Pattern
SHOES – begin at the bottom of the doll
Using color A, loosely CO 32 sts using the Long Tail CO method, leaving a 16 in. / 40.5 cm tail for seaming. Distribute the sts so you have 8 sts on each of 4 needles. Pm for BOR and join to work in the rnd, being careful not to twist the sts.
Rnds 1–2: Knit.
Rnd 3: K13 with color A, join color B, MB with color B, k4 with color A, MB with color B, break color B, knit with color A to end of rnd.
Rnds 4–5: Knit.
Break color A.
LEGS
Join color C.
Rnds 6–16: Knit.
Break color C.
SHORTS
Rejoin color A.
Rnds 17–20: Knit.
Break color A.
TORSO
Rejoin color C.
Rnds 21–30: Knit. At the end of Row 30, clip a locking marker to indicate the location for defining the neck and stuffing the head.
FACE
Rnds 31–38: Knit.
Break color C.
HAIR – make tinkerbell’s hair with a bun!
Join color D.
Rnds 39–42: Knit.
Rnd 43 (dec): K1, *k4, k2tog; rep from *to last st, k1—27 sts.
Rnd 44 (and all even rnds): Knit.
Rnd 45 (dec): K1, *k3, k2tog; rep from * to last st, k1—22 sts.
Rnd 47 (dec): K1, *k2, k2tog; rep from * to last st, k1—17 sts.
Rnd 49 (dec): K1, *k1, k2tog; rep from * to last st, k1—12 sts.
Rnd 51 (dec): K1, *k2tog; rep from * to last st, k1—7 sts.
Break yarn, leaving an 8 in. / 20 cm tail.
Thread the tapestry needle and weave tail through rem sts, cinch shut, and secure on WS.
Make your knitted Tinkerbell’s SKIRT
Beginning at the back of the doll, pick up the right leg of the 32 sts from the last row of color A shorts. Distribute the sts so you have 8 sts on each of 4 needles. Pm for BOR and join to work in the rnd, being careful not to twist the sts.
Join color A to the right edge of the picked-up sts with doll held upside down.
Rnd 1 (inc): *K1, kfb in next 7 sts; rep from * to end of rnd—60 sts.
Rnd 2: Knit, redistributing sts so you have 12 sts on each of 5 needles.
Rnd 3: *Kfb, k3, ssk, k2tog, k3, kfb; rep from * to end of rnd.
Rnd 4: Knit.
Rep [Rnds 3 and 4] 3 times more.
BO all sts knitwise.
Fairy WINGS (MAKE 2)
Using color B, CO 11 sts onto 1 dpn using the Long Tail CO method. Do not join
to work in the rnd.
Row 1 (WS): K5, p1, k5.
Row 2 (RS): K1, M1BL, k3, s2kp, k3, M1BL, k1
Row 3: K5, p1, k5.
Row 4: K1, M1BL, k3, s2kp, k3, M1BL, k1.
Row 5: K5, p1, k5.
Row 6: K1, M1BL, k3, s2kp, k3, M1BL, k1.
Row 7: K5, p1, k5.
Row 8 (dec): K4, s2kp, k4—9 sts.
Row 9: K4, p1, k4.
Row 10 (dec): K3, s2kp, k3—7 sts.
Row 11: K3, p1, k3.
Row 12 (dec): K2, s2kp, k2—5 sts.
Row 13: K2, p1, k2.
Row 14 (dec): K1, s2kp, k1—3 sts.
Row 15: K1, p1, k1.
Row 16 (dec): S2kp—1 st.
Break yarn and draw tail through last st to bind off.
FINISHING your Fairy Izzy Doll
Leaving CO tail at feet for sewing, weave in all other ends securely to the WS. Use the chart as a guide for the following instructions:
STUFF HEAD
Using color C, thread the tapestry needle with a length of yarn approximately 24 in. / 61 cm long. Sew a running st across the first face rnd (Rnd 31, starting just above the locking marker placed at the end of Rnd 30), then stuff the head firmly. Cinch up the yarn to form neck and knot securely at the back of the neck. Do not cut ends as you will use these to define arms as noted below.
STUFF BODY
Thread the tapestry needle with the remaining tail from the CO. Sew a running st across CO edge, then stuff the body loosely. Cinch up the yarn to close bottom of doll and knot securely. Do not cut ends as you will use these to define the legs.
DEFINE LEGS
Using the tail of color A remaining from the Stuff Body instruction, begin at the back middle seam and sew small vertical sts through to the front middle. Pull snugly to create leg definition as you continue to a few rows below the doll’s waist. Fasten yarn securely. Weave all remaining ends to the inside.
DEFINE ARMS
Using the tails of color C remaining from the Stuff Head instruction, sew small vertical sts from back to front to create arms that are 8 sts wide. Fasten yarn securely. Weave all remaining ends to the inside.
EMBROIDER EYES
Embroider eyes using the black worsted weight yarn and the tapestry needle, using the chart for placement. Weave all remaining ends to the inside.
EMBROIDER BODICE
Work bodice with duplicate stitch in color A, using the chart for placement. Weave all remaining ends to the inside.
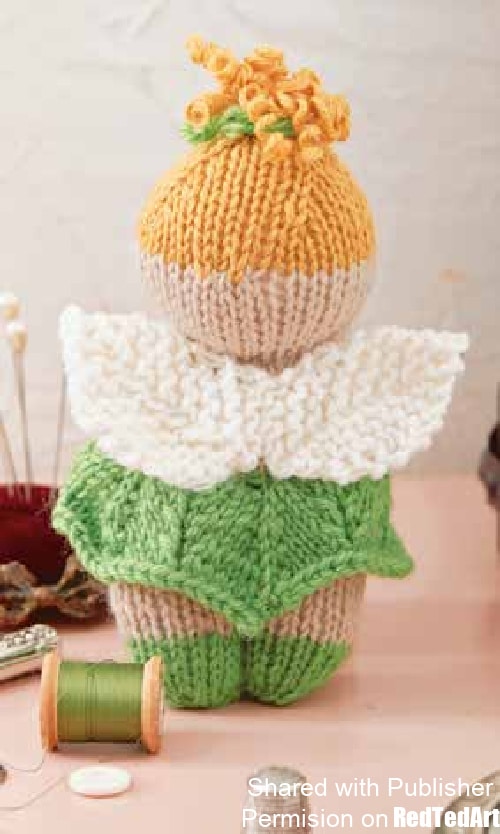
ATTACH WINGS
Using color B, sew wings to center back of doll along the first 5 sts of CO wing edge. Tack into place at shoulders. Weave all remaining ends to the inside.
HAIR
Cut one 60 in. / 101.5 cm strand of color D. Wrap the yarn tightly in a single layer
around a wooden dowel or US 8 / 5 mm wooden/bamboo dpn. Wet yarn and dowel/dpn thoroughly. Place on cookie sheet and dry in 200-degree Fahrenheit / 93-degree Celsius oven for 30 minutes.
Cool. Remove curled strand from dowel. Cut into 8 equal-length pieces.
Insert the crochet hook under both legs of a knit st in the last rnd of hair. Fold 1 strand of hair in half and pull through the knitted st, keeping the loop on your crochet hook. Wrap both ends of the strand of hair around your crochet hook and pull through your loop to secure. Attach 1 strand of yarn in every st.
Style by tying a 12 in. / 30.5 cm strand of color A around the base of the hair strands and fasten into a bow. Trim extra length of tails once desired bow size is determined.