Knitting Pink Toddler Hat
Knitting a pink toddler hat can be such a delightful and heartwarming experience! The soft, rosy yarn sliding through your fingers, as you craft something so cute and precious for a little one, is truly rewarding. Imagining the little one's face lighting up with joy as they put on the cozy hat you lovingly made adds an extra touch of warmth to the whole process. It's a lovely way to show your care and creativity, and the end result is sure to bring smiles all around.
Materials:
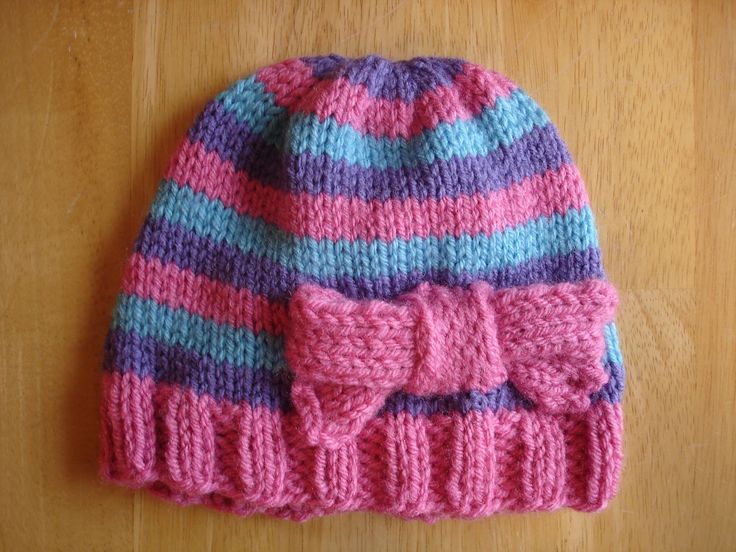
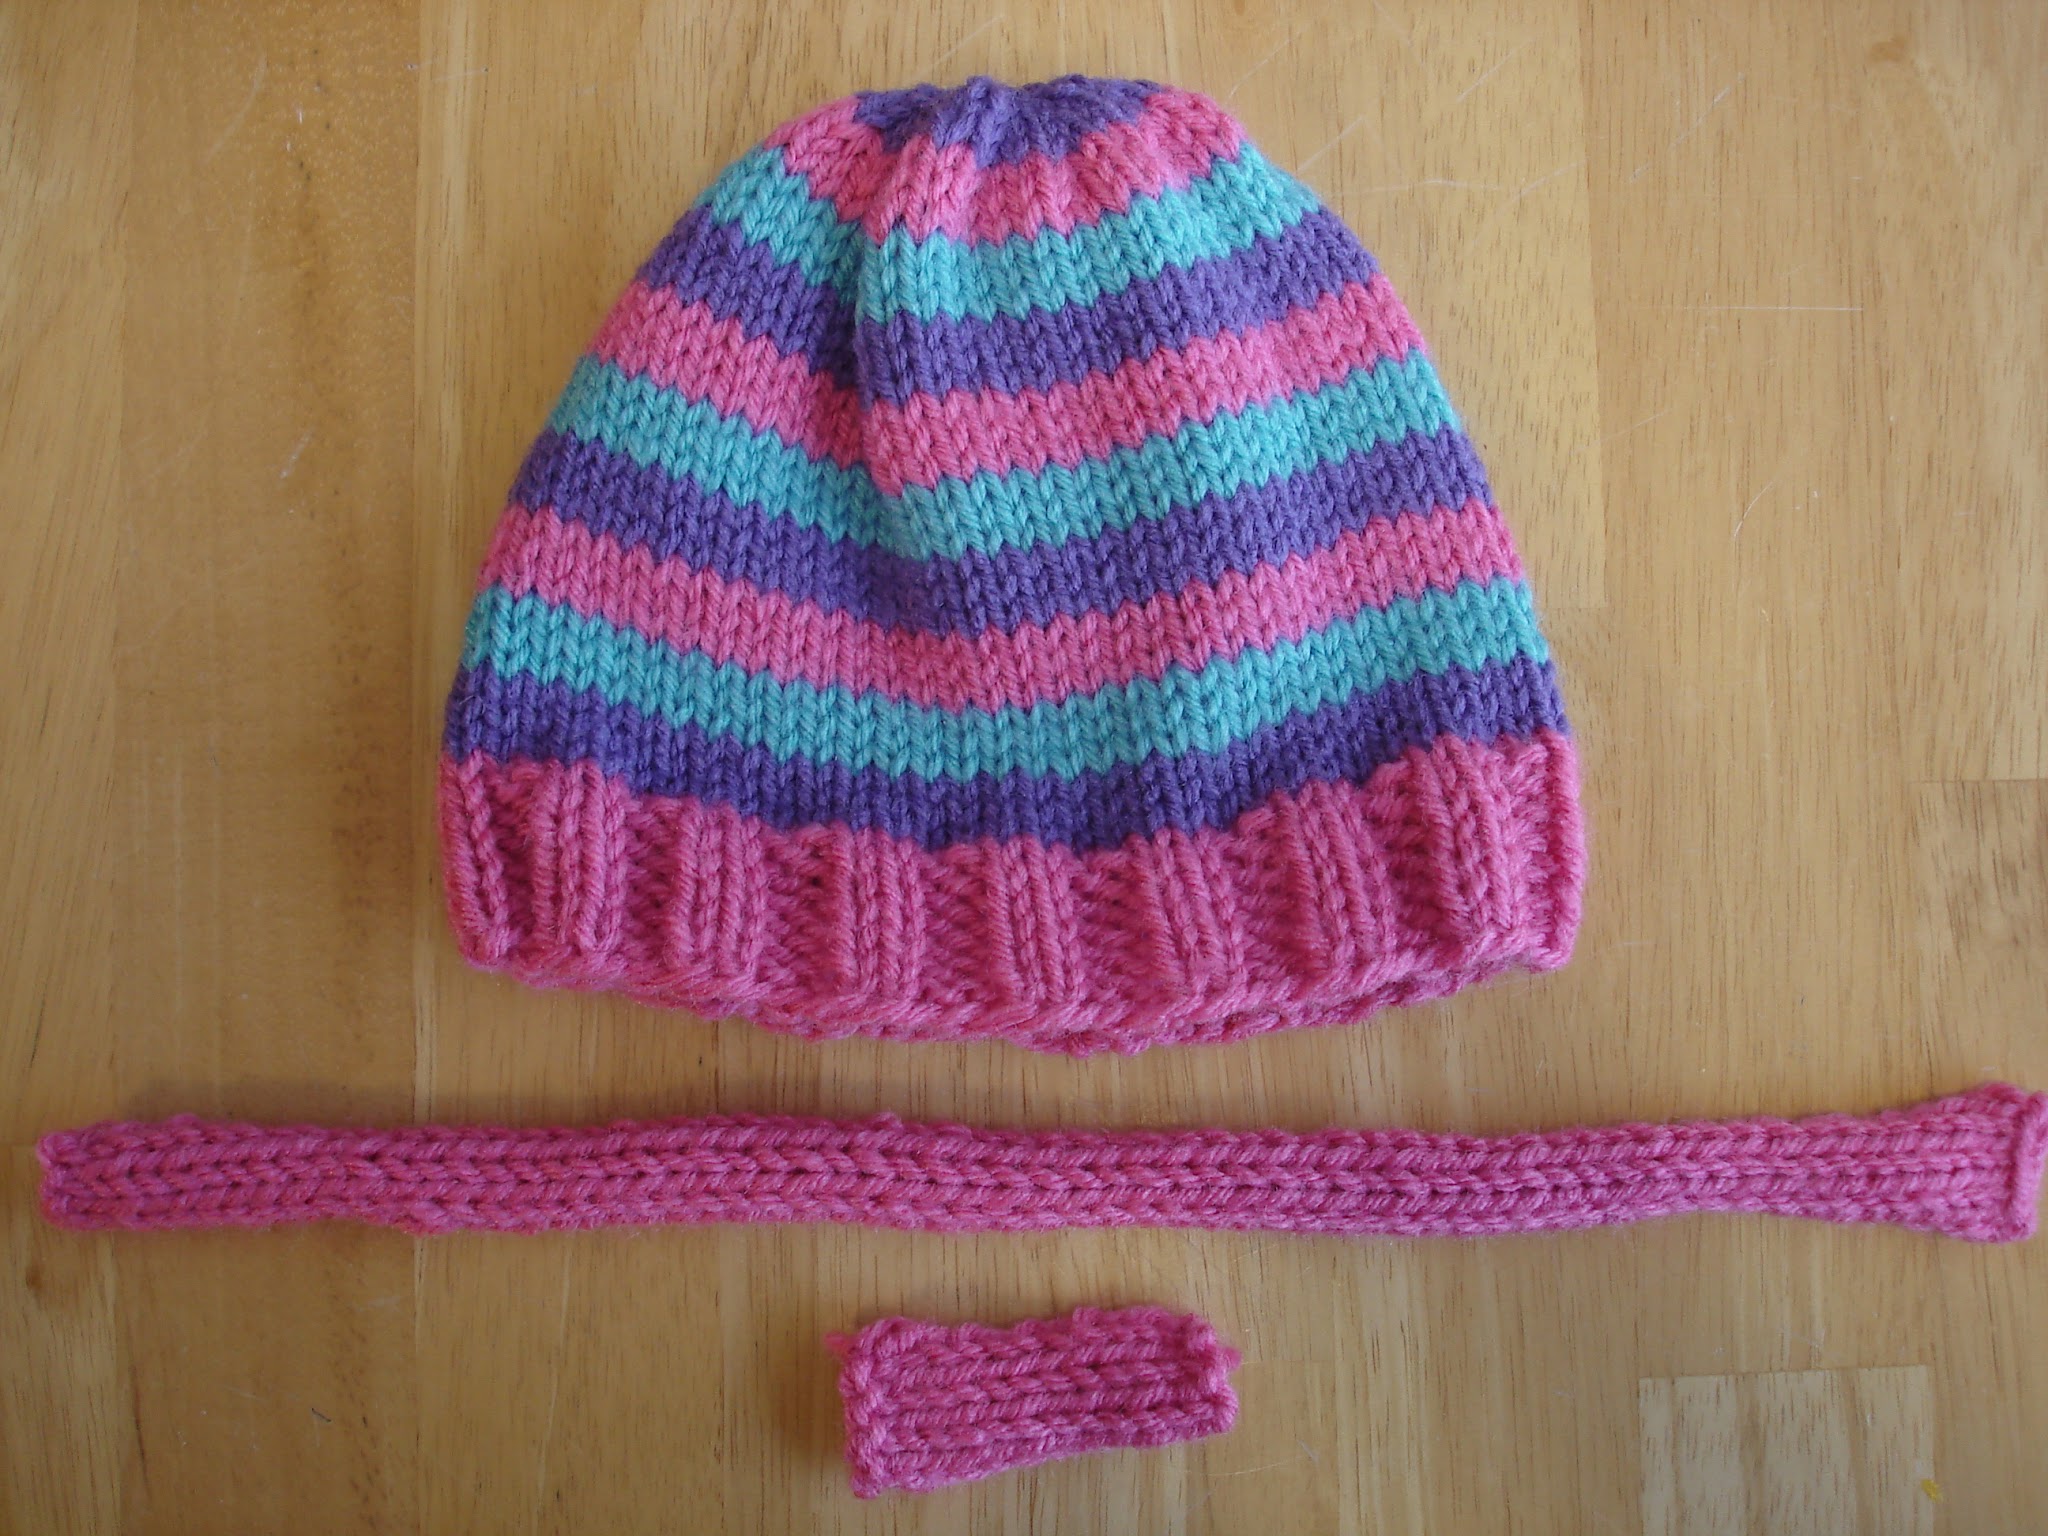
- Worsted weight yarn in fun colors of your choice (Note: for the hat shown, I used 3 colors for stripes…hat looks just as lovely in a solid color)
- US8 16” Circular Needle
- 4 US8 DPNs
- Tapestry Needle
- Stitch Marker
Sizing:
Toddler (1-3 years)
Gauge:
24 stitches and 17 rows = 4 inches
Abbreviations:
- CO: Cast on
- BO: Bind off
- K2tog: Knit two stitches together
- PM: Place Marker
- St st: Stockinette stitch
- RS: Right side
- WS: Wrong side
Instructions for Hat:
CO 72 sts
PM and join in the round, being careful not to twist.
Work 6 rounds of K2, P2 ribbing
(Note: This particular hat has 3 rows of striping for each color, but feel free to mix it up if desired)
Work in st st (knit each round) until hat measures 6.5” from CO edge, switching colors for stripes as desired.
Decrease (continue with stripe sequence if desired):
Row 1: K2, K2tog around
Row 2: Knit
Row 3: K1, K2tog around
Row 4: Knit
Row 5: K2tog around
Using tapestry needle, break yarn leaving a long tail. Thread through remaining stitches and pull tightly. Weave in ends.
Instructions for Bow:
Bow is knit in two parts—1 long piece for side loops and tails, and 1 short piece for center band using US8 needles.
Long piece:
CO 6 sts
Knit in st st for 13 inches
BO
Short piece:
CO 6 sts
Knit in st st for 2.5 inches
BO
Assemble bow as shown below:
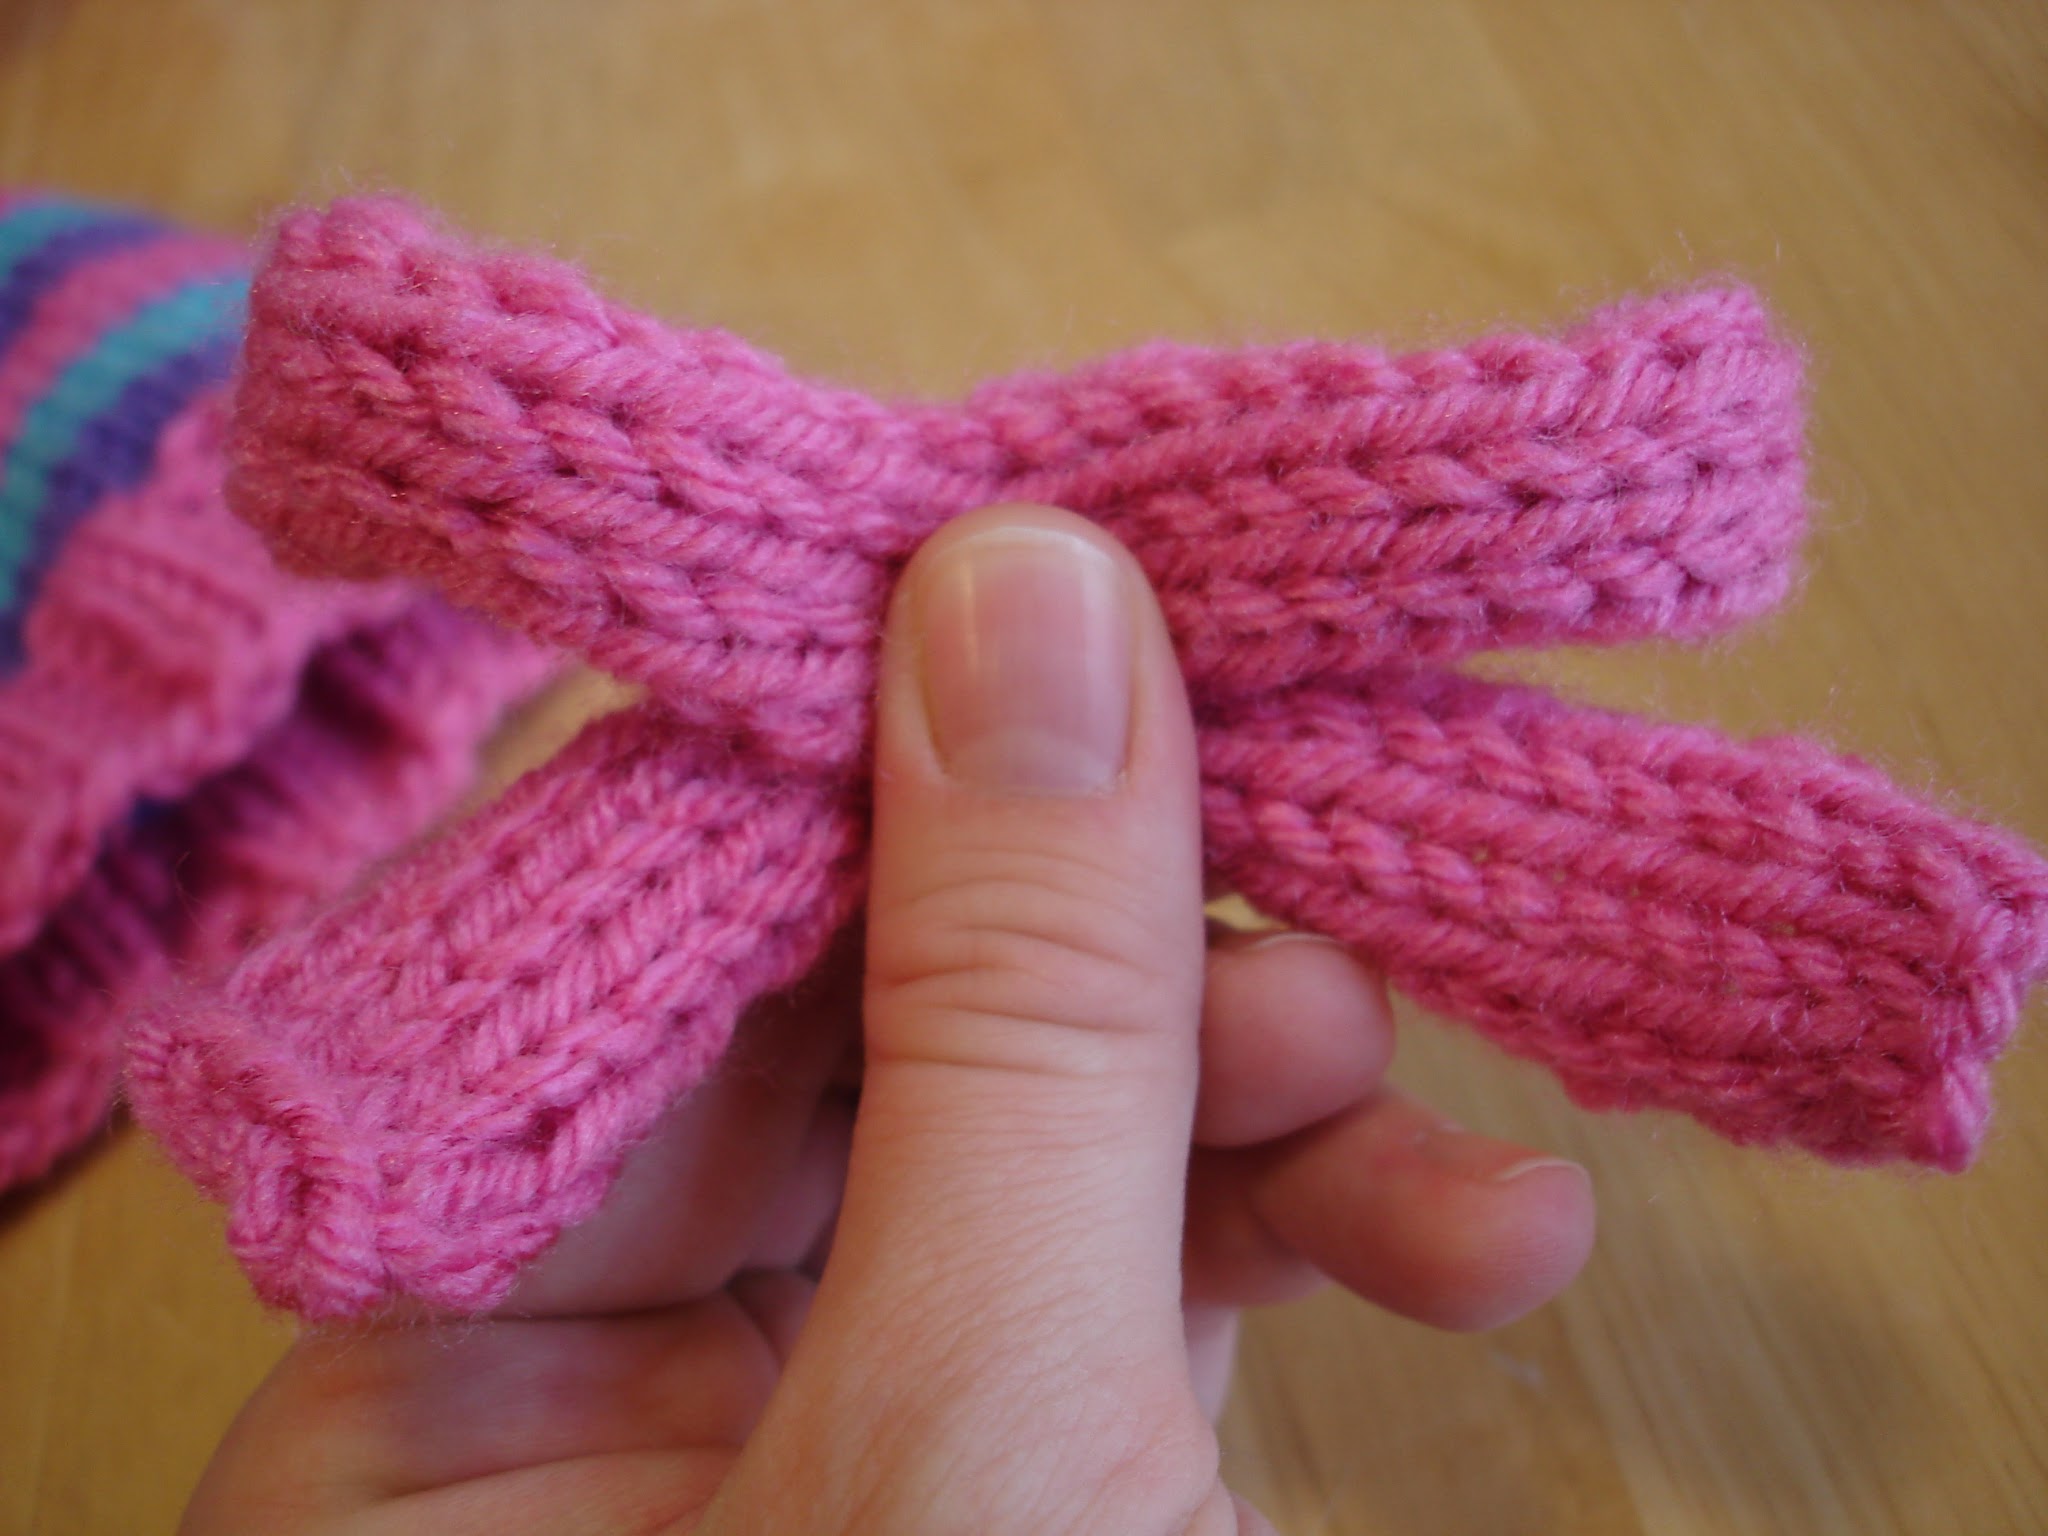
1. Make a loop and pinch in the middle.
2. Carefully twist the two tails so that the stockinette side is facing out, while still holding it in your hand (this gives the bow a more uniform appearance with RS facing out on both loops and tails).
3. Attach to hat in the middle with a stitch or two to hold it down and free up your hands. Then tack down loops and tails with a stitch or two each (I didn’t completely sew down entire bow, just a few well placed stitches to keep it looking three dimensional.
4. Finally place center band around bow and stitch to hat. Lovely!