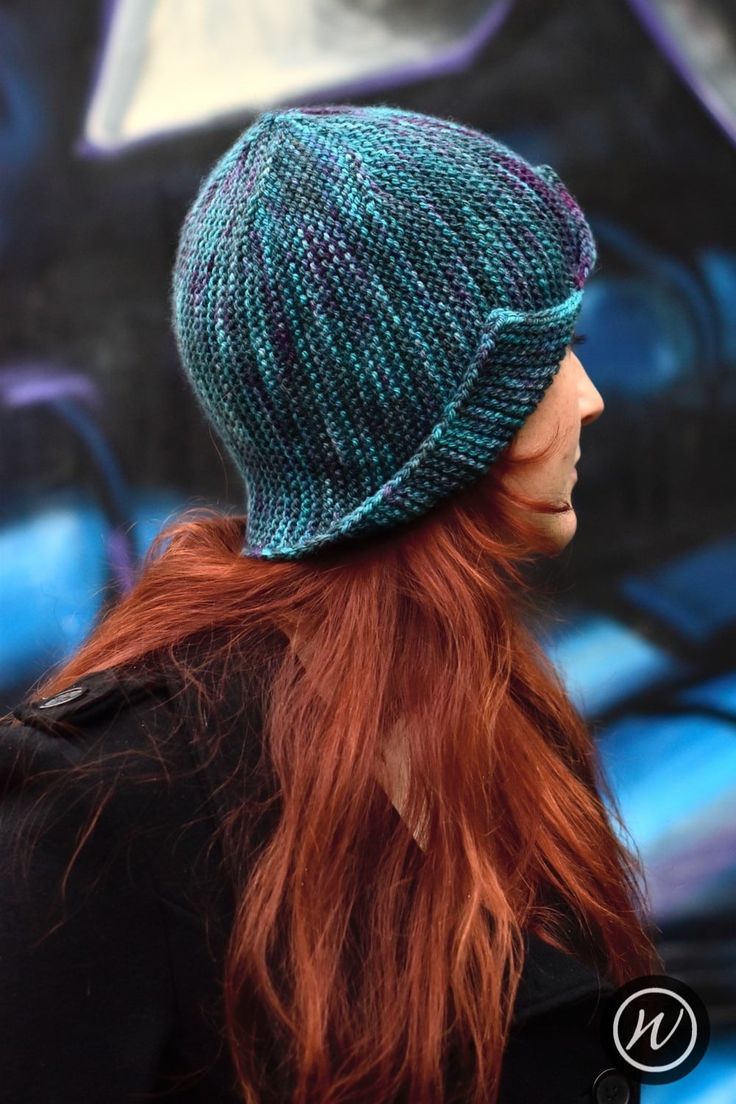
Knitted Adorable Hat
I can just imagine how warm and stylish this Knitted Adorable Hat would keep someone on a chilly day. Knitted hats truly are a special touch to any outfit, adding both warmth and personality. There's something so heartwarming about the craftsmanship and creativity that goes into each knitted piece, making them not just hats, but little works of art.
Yarn
- 100g/145yd/133m
- heavy aran or chunky weight, plied yarn.
Needles & Notions
- Pair 5.5mm/UK5/US9 straight needles or size needed to obtain gauge
- Approx 2yd/2m waste yarn
- 6mm crochet hook
- Stitch marker as necessary
- Tapestry needle
Sample Details
Shown in size 22in/56cm on model with 21.5in/54.5cm circumference head
Gauge
16 sts x 32 rows to 4in/10cm on 5.5mm needles over Garter St.
Sizes
- To fit size: 18 [20, 22] in/ 45.75 [50.75, 56] cm
- Finished size: 15 [16.5, 18] in/ 38 [42, 45.75] cm
Skills Required
- Crochet Cast-on
- Crochet Provisional cast-on
- Slipped Stitch Selvedge
- German Short Rows
- Grafting Garter Stitch
- Standard Bind-off
- Sideways Draw-through Bind-off
- Blocking a Hand Knit Hat
Abbreviations
- K: knit
- rpt: repeat
- st(s): stitch(es)
- S1: slip stitch purlwise with yarn at the back
- SR: perform a short row
Notes
- The amount of negative ease in this pattern affects the overall shape and fit. For a more fitted cloche style with a more rounded crown, increase the suggested negative ease.
- Fit is determined by row gauge and the Hat is knit side to side, constructed from consecutive panels.
How To
Using waste yarn and Crochet Provisional Cast-on method, cast on 29 [31, 33] sts. Change to main yarn.
First Panel
Row 1 (WS): Knit all sts then with main yarn and using Crochet Cast-on method, slip the last stitch knitted onto the crochet hook and cast-on a further 9 [11, 13] sts onto the same needle. Return the stitch on the hook to the needle. [38, 42, 46 sts]
Row 2 (RS): Knit to 1st from the end, SR.
Row 3: Knit to last stitch, bring yarn forward, slip stitch purlwise, turn (creating a slipped stitch selvedge)
Row 4: Knit to 1st before last short rowed stitch, SR.
Repeat Rows 3 and 4, working a slipped stitch selvedge on the brim edge and a short row on consecutive stitches at the crown, until there are 9 [10, 11] short rowed stitches at the crown, ending at the brim edge after a Row 3.
Next row: Knit across all sts working the short rows as you go. [38, 42, 46 sts]
Second Panel
Row 1 (WS): Knit to last stitch, bring yarn forward, slip stitch purlwise, turn (creating a slipped stitch selvedge)
Row 2 (RS): K to 1st from the end, SR.
Row 3: Knit to last stitch, bring yarn forward, slip stitch purlwise, turn (creating a slipped stitch selvedge)
Row 4: Knit to 1st before last short rowed stitch, SR.
Repeat Rows 3 and 4, working a slipped stitch selvedge on the brim edge and a short row on consecutive stitches at the crown, until there are 9 [10, 11] short rowed stitches at the crown, ending at the brim edge after a Row 3.
Next row: Knit across all sts working the short rows as you go. [38, 42, 46 sts]
Work the second panel a further 4 times, working it 5 times in total. You will now have a total of 6 panels worked. On the final repeat, omit final row as this will be replaced by the Kitchener grafting.
Finishing
Cast-off 9 [11, 13] loosely. This should match the extra cast-on stitches in the first panel.
Carefully remove Provisional Cast-on stitch by stitch, taking care to keep in pattern, transferring live stitches to 2nd needle. You’ll graft with the working yarn; cut the working yarn leaving a 1yd/1m tail.
Bring both sets of stitches together and perform Kitchener Stitch for Garter Stitch across all the stitches. When grafting across short rows, you will treat the short rows in exactly the same way as you have throughout the pattern. If you knitted across the short rows, you can treat them as a regular stitch when grafting.
To create a clean graft in Garter Stitch, you need to bring an odd number of rows together, hence the final row on the final panel isn’t knitted, and will be replaced by the graft. You will be grafting from the bottom of the Hat up. Once the graft is complete, thread yarn through the edge stitches and pull to tighten to close the crown.
If the join at the centre of the split brim is a little untidy, use the initial cast-on tail in the first panel to duplicate stitch across the join.
Weave in all ends and block as required.