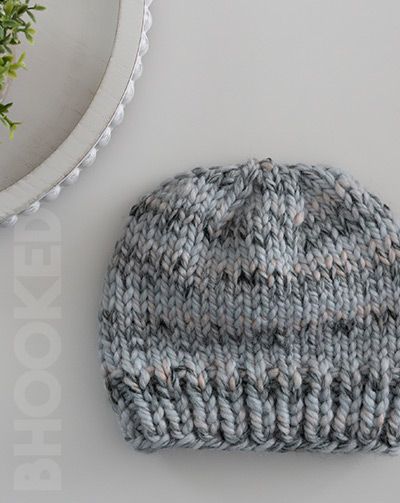
Knitted Baby Hat
Knitted baby hats are not just adorable, they are also incredibly cozy for keeping your little one warm during the chilly weather. These cute accessories come in a variety of colors and patterns, making it easy to find the perfect one to match your baby's style. Plus, the soft and stretchy knit fabric ensures a comfortable fit while adding an extra touch of charm to your baby's outfit. Whether you're heading out for a stroll or just enjoying a cozy day at home, a knitted baby hat is a must-have accessory that will keep your precious bundle looking cute and feeling snug all day long!
Materials:
- Any #6 Super Bulky Yarn; Shown: Lion Brand Mandala Thick & Quick (Colorway pictured: Turbine)
- Baby 30 yds / 27 m
- Toddler 56 yds /37 m
- Child 75 yds/ 46 m
- US 13 Circular Knitting Needles, 16″
- US 13 Double Point Needles
- Yarn Needle
- Scissors
Lion Brand Mandala Thick & Quick yarn is a fun choice for a baby hat because of its color options and how the colors change with this pattern. Each hat will look unique! Plus, it has a soft feel that’s great for a baby hat.
If you can’t find this yarn or want to use something you already have, look for another super bulky (#6) weight yarn. If you’re not familiar with yarn weights, I have an article that explains it all here. Any yarn in this weight category will work fine, but a smooth yarn is best for knitting your first baby hat. That way, you can see the stitches better! Lion Brand Wool Ease Thick & Quick is another great option.
For the needles, you can use any 16″ fixed or interchangeable circular knitting needle as long as it’s a US 13. I recommend Knitter’s Pride Dreamz knitting needles for beginners because the stitches stay on the needles, but they’re still really smooth to knit with. If you don’t already have a pair, I suggest starting with this one.
If you need double-pointed needles, I like this set. Wooden DPNs are great for beginners because the stitches won’t easily slide off as you knit.
Abbreviations
- CO Cast On
- K Knit
- K2tog Knit Two Together
- P Purl
- Rep Repeat
- St(s) Stitch(es)
Pattern Notes
This really easy knit baby hat is worked from the band up to the crown. You’ll start with circular needles and switch to the double-pointed needles when the stitches no longer fit on the circular needles. If you’re familiar with knitting gauge swatches, go ahead and do one to see if it matches the pattern’s gauge:
Gauge: 11 stitches and 13.5 rounds = 4″ in stockinette stitch
Baby Hat Sizing Details
Alright, let’s talk about sizing for this hat pattern. I’ve got it set up for three sizes, but you won’t see words like ‘baby’, ‘toddler’, or ‘child’ written out. Instead, you’ll see instructions like this:
36(42, 48)
Here’s the deal:
The first number (36 in this case) is for the baby size.
The middle number (42) is for the toddler size.
And the last number (48) is for the child size.
So, if you’re knitting the baby size, you’ll use the first number; for the toddler size, go with the middle number; and for the child size, use the last one in the parentheses.
Just keep an eye out for these sets of numbers as you go through the pattern, and you’ll be making the perfect size hat without any confusion!
Finished Sizes
Baby | 14.5″ circumference; 6.5″ long | fits 15-16″
Toddler | 16.5″ circumference; 7.5″ long | fits 17-19″
Child | 18.5″ circumference; 8.5″ long | fits 19-21″
How to Knit a Baby Hat – Pattern Instructions
Band
Rounds 1: CO 36 (42, 48) . *K1. P1. Rep from * to end of round.
Round 2: *K1. P1. Rep from * to end of round.
Repeat: Rep last round 5 (5, 7) more times.
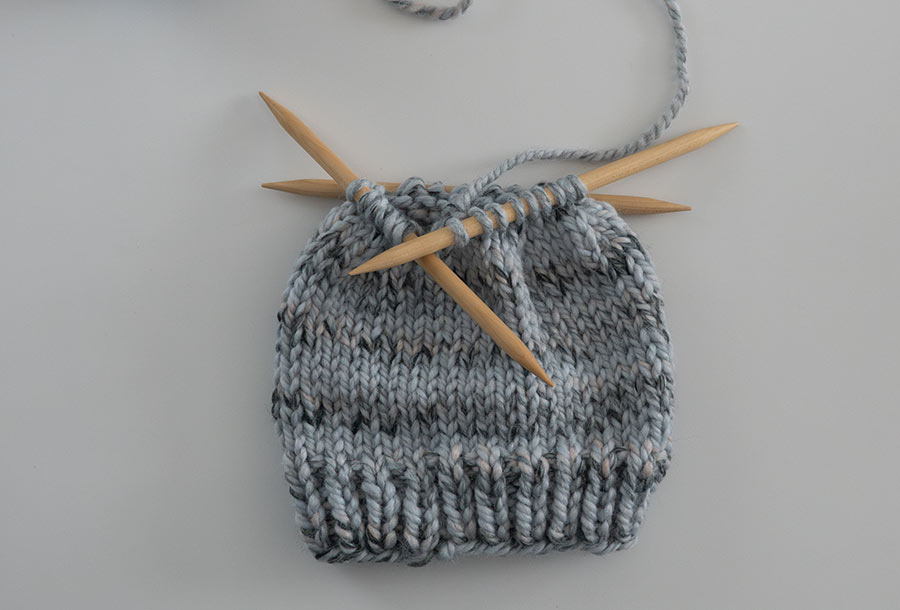
Hat Sides
Next Round: K all sts.
Repeat: Rep the last round 10 (14, 15) more times.
Crown
Round 1: *K4. K2tog. Rep from * to end of round. {30 (35, 40) sts}
Round 2: *K3. K2tog. Rep from * to end of round. {24 (28, 32) sts}
Round 3: *K2. K2tog. Rep from * to end of round. {18 (21, 24) sts}*
Round 4: *K1. K2tog. Rep from * to end of round. {12 (14, 16) sts}
Round 5: *K2tog. Rep from * to end of round. {6 (7, 8) sts}
Finishing
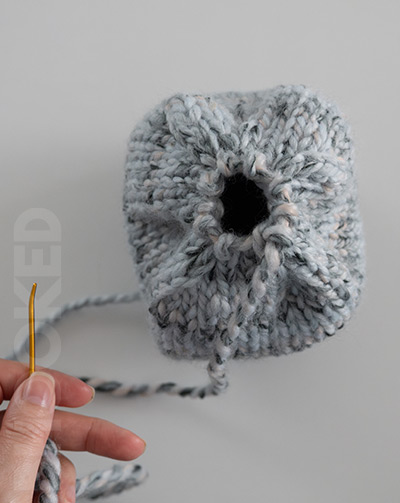
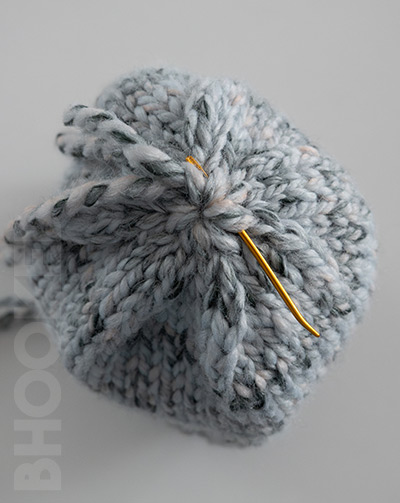
Fasten off leaving an 8″ tail. Use a yarn needle to thread the tail through the remaining stitches.
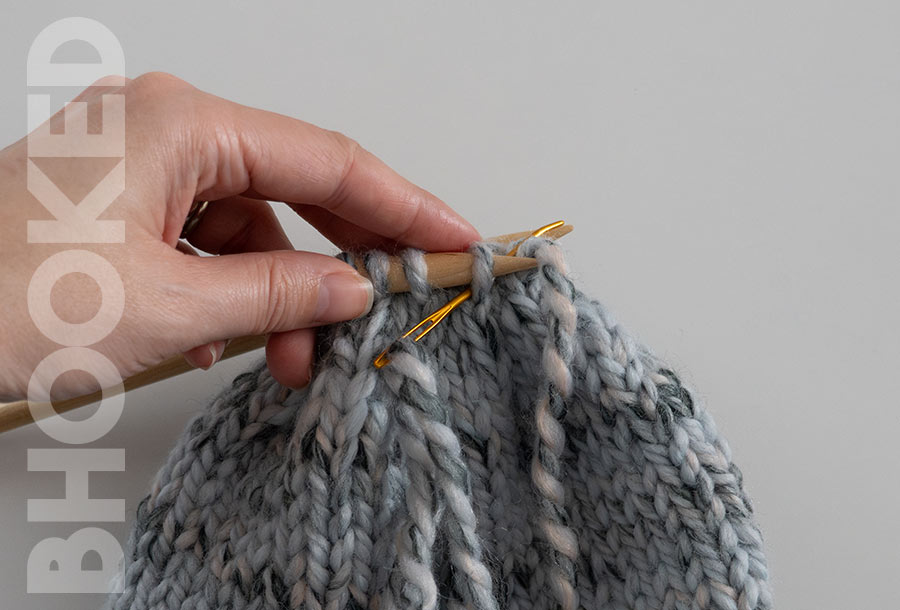
Then just pull the tail to close the hole. Run the tail around the opening a few times to secure it, and weave it in along the inside of the hat.