Knitted Waffle Headband
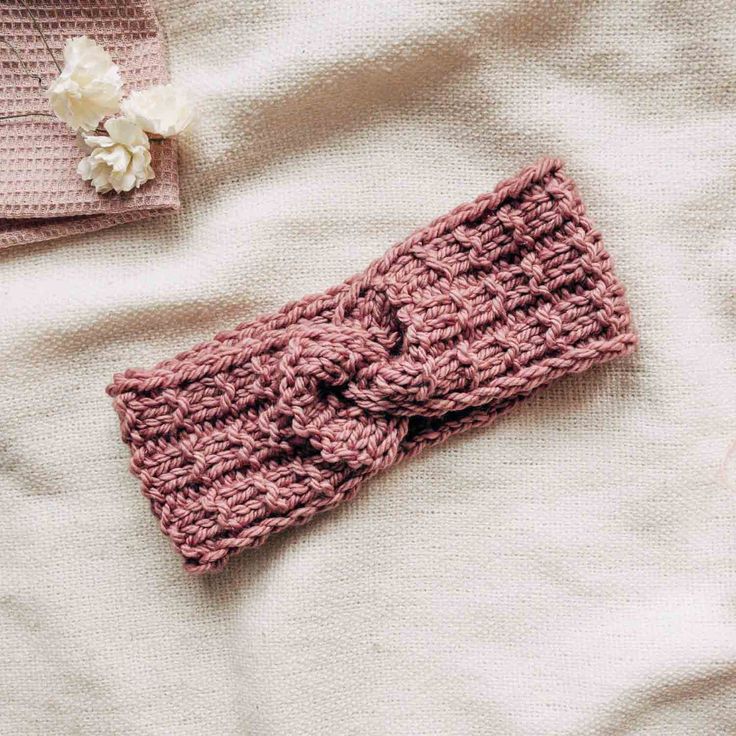
The knitted waffle headband is an adorable and practical accessory perfect for keeping you cozy and stylish during the chilly months. Its unique waffle knit pattern adds a touch of charm to any outfit while keeping your ears warm. Whether you're heading out for a brisk walk or simply lounging at home, this headband will be your new favorite go-to accessory. Don't be surprised if you start getting compliments left and right – this headband is as cute as it is functional!
sizes
Width: 11 cm (4.5"), circumference - adjustable
supplies
yarn
- For this headband I used Sewrella Yarn Classic Bulky yarn in colorway Charlotte - squishy and super soft hand dyed merino!
- You can also use different bulky weight yarn to knit up this headband! A couple of options that should work well:
- Knit Picks Swish Bulky
- Knit Picks Wool of the Andes Bulky
- Yardages for 50 - 60 cm (20 - 24") head circumferences: approx. 35 - 50 m (38 - 55 yds).
needles
8 mm (US 11) straight or circular needles, or to fit gauge
other notions
tapestry needle, scissors, tape measure
gauge
10 stitches x 18 rows in 10x10 cm (4x4”) in waffle-like stitch, blocked
Waffle-like stitch - worked over multiplies of 3 sts.
Row 1 (RS): *k2, p1* until end of row.
Row 2 (WS): *k1, p2* until end of row.
Row 3 (RS): *k2, p1* until end of row.
Row 4 (WS): k until end of row.
pattern notes
- To determine your head circumference, measure your head in the widest point using a tape measure. The knit headband should be approx.
- 2.5 cm (1") shorter than measured circumference, to make sure it sits snug on your head.
- You can check the fit of the headband by wrapping it around head and pinching it together, lightly stretching.
- If you'd like to knit a wider headband, cast on additional 3 sts for each 3 cm (1.25"). It will increase yardage needed proportionally.
abbreviations
- k - knit
- p - purl
- RS / WS - right side / wrong side
- sl1wyif - slip 1 st purlwise with yarn in front
- st(s) - stitch(es)
- ** - work instruction between asterisks given number of times or until given moment
instructions
Cast on 12 sts with Long Tail Cast On, or another cast on method of your choice.
Work Rows 1-4 until your headband is approx. 2.5 cm (1") shorter than your head circumference.
Row 1 (RS): sl1wyif, p1, *k2, p1* until 1 st left, k1.
Row 2 (WS): sl1wyif, k1, *p2, k1* until 1 st left, k1.
Row 3 (RS): same as Row 1.
Row 4 (WS): sl1wyif, k until end of row.
FINISHING
Bind off all sts using a standard bind off and break yarn leaving a 40 cm (16") tail. Weave in the cast on edge tail. You will use the bind off tail to sew the headband on the wrong side.
Place the headband flat, with right side facing up, then fold the edges inwards.
Pinch each edge so that they fold in half.
Insert one folded edge into the other so there are four alternating layers. The part with the yarn tail should be positioned outside.
Sew through all the layers back and forth until the other end of the join. Pay attention that you guide the needle through all the layers in each pass.
Break yarn and weave in ends. Turn the headband inside out. Block the headband to finish.