Knitted Rosebud Tote Bag
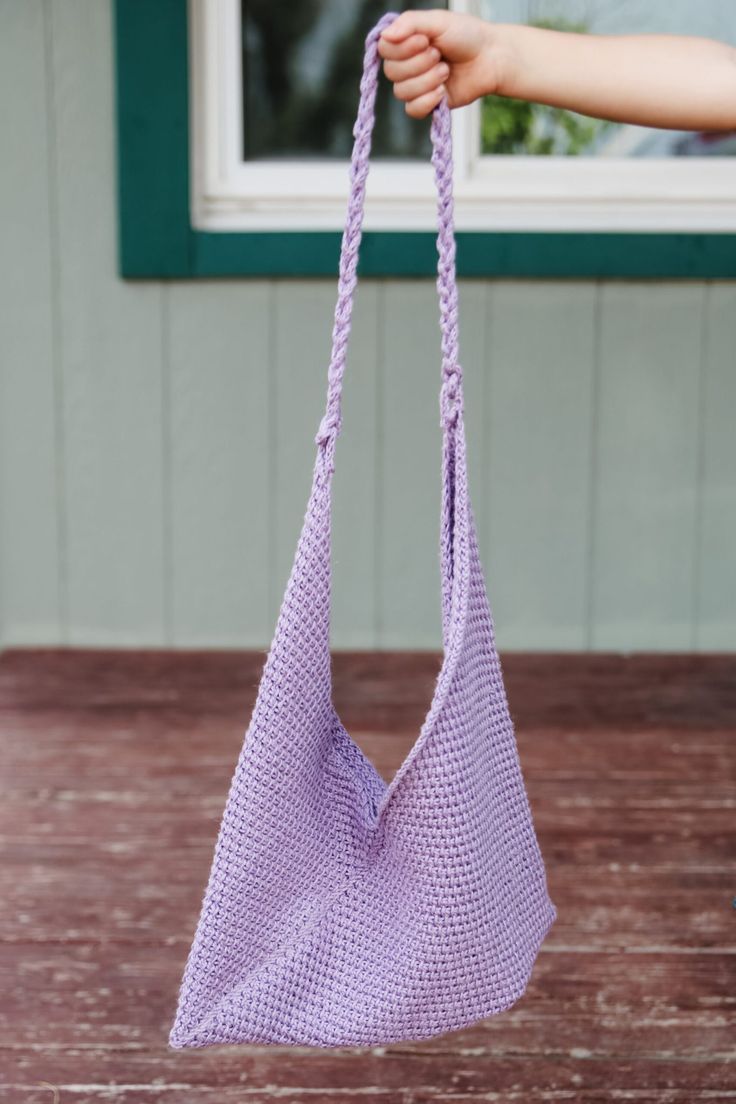
The Knitted Tote Rosebud Bag is an absolute must-have for anyone looking to add a touch of charm to their daily outings. With its delicate design and cozy knitted texture, this bag is not only practical but also a stylish accessory that will surely earn you compliments wherever you go! Whether you're heading to the farmers' market or meeting up with friends for coffee, this adorable tote is sure to become your new favorite go-to accessory. So go ahead, treat yourself to this sweet little bag and add a sprinkle of whimsy to your everyday adventures!
Materials: Approximately 3 skein of KnitPicks Cotlin, needle, stitch markers, optional magnet closures
Needle Size: 5(US) 3.75mm needles
Gauge (tension): 24sts to make 10cm across (row gauge does not matter here), using size 5(US) 3.75mm needles working in pattern stitch
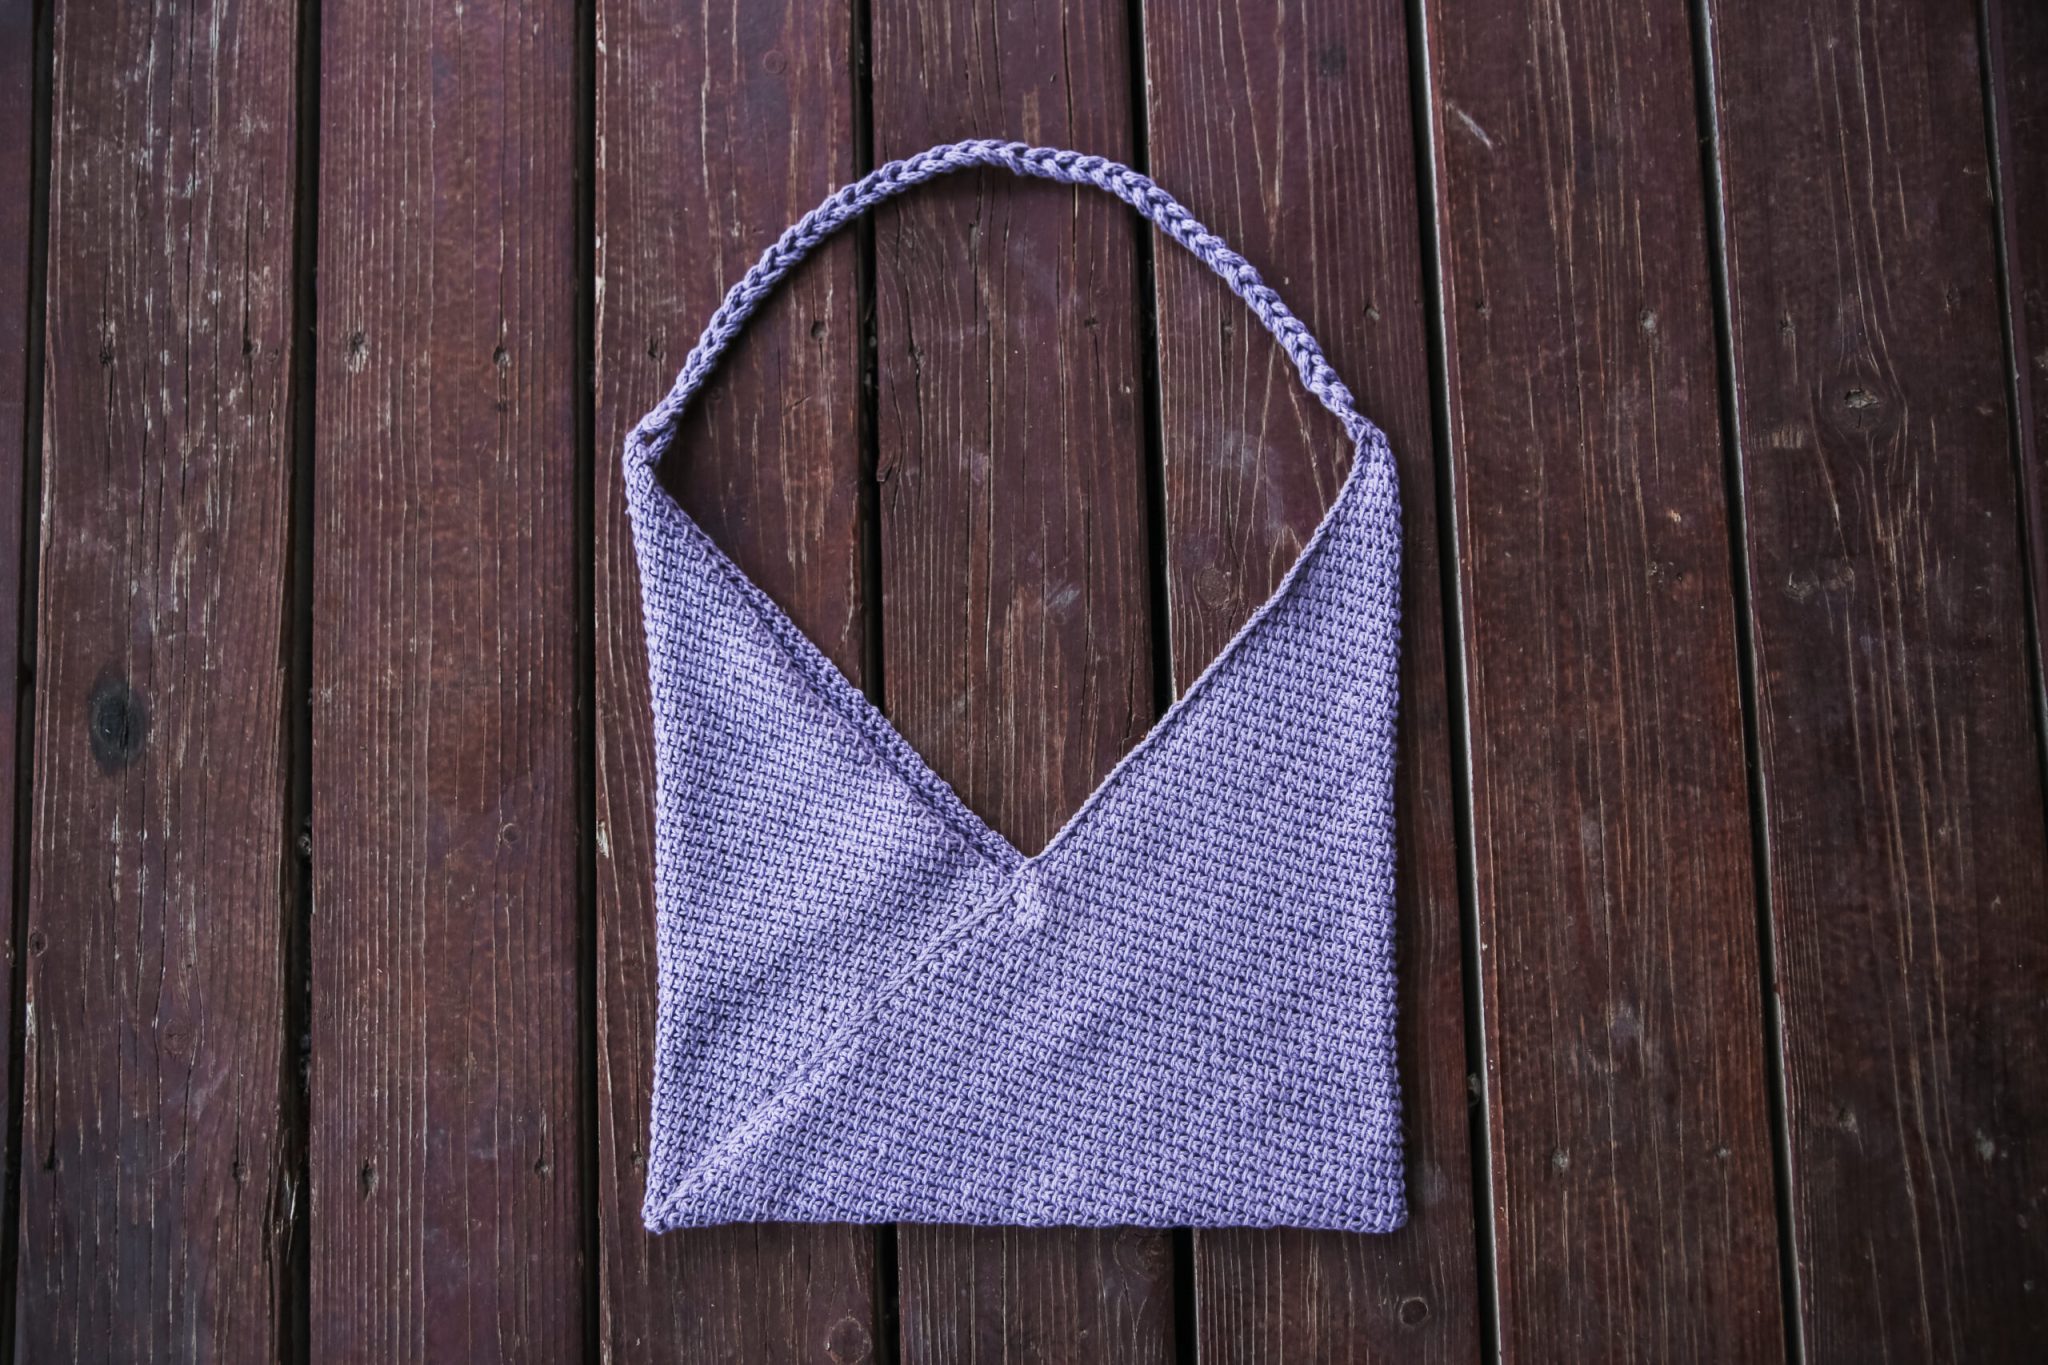
Finished Chest Measurement: 34.5cms across x 36cms tall with a 53cms braided icord handle
METHOD
This pattern single rectangle folded to create the bag.
ROSEBUD STITCH PATTERN
Row 1 (right side row) – Sl1, (sl1 purlwise with yarn in back, k1, yo, psso) repeat (to) across to last st, k1
Row 2 – Purl across
Row 3 – sl1, (k1, sl1 purlwise with yarn in back, k1, yo, psso) repeat (to) across to last 2sts, k2
Row 4 – purl across
ABBREVIATIONS
- k – knit
- P – purl
- pm – place marker
- sm – slip marker
- k2tog -knit 2 stitches together
- psso – pass slipped stitch over
- yo – yarn over
- st – stitch
- sl – slip stitch
Rosebud Bag Pattern
MAIN BODY OF BAG
Cast on 186 sts
Work in rosebud stitch pattern for 16cms.
Bind off.
Your rectangle should measure approximately 36×15.5cms.
FOLDING THE BAG
Lay your finished work wrong side facing up.
Fold the bottom left corner up and the top right corner down.
See fig 1
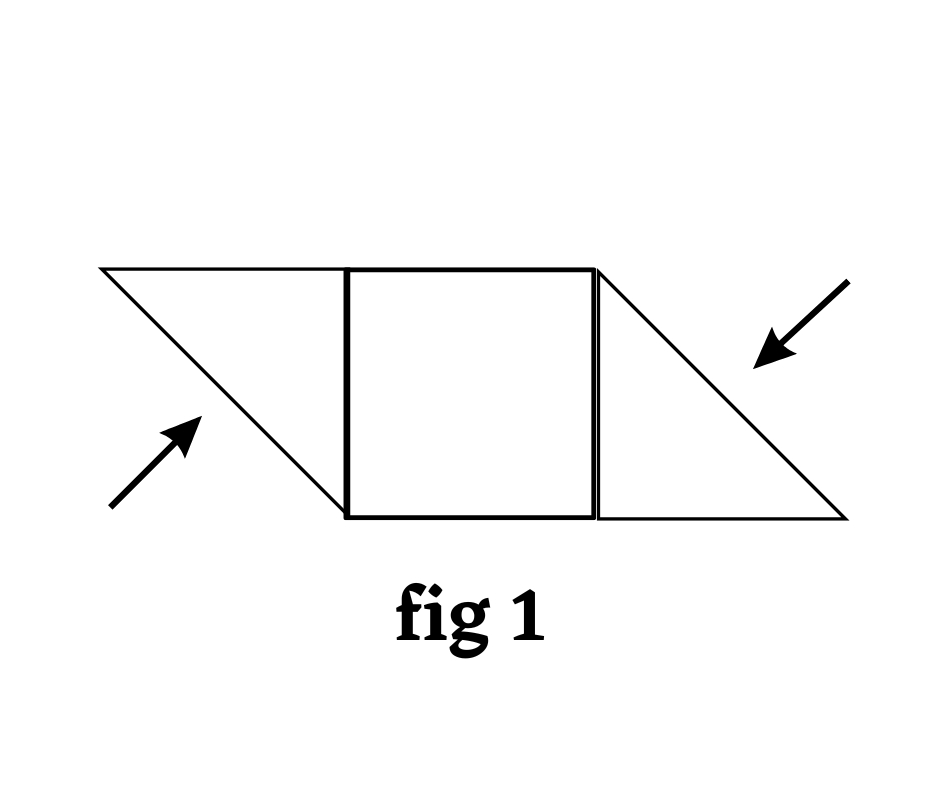
Now fold the right side up, lining up with the left edge that was folded over. See fig2

Sew the seams on both the front and back. I like to use a mattress stitch center of the bind off/cast on edge but a whip stitch works beautifully too.
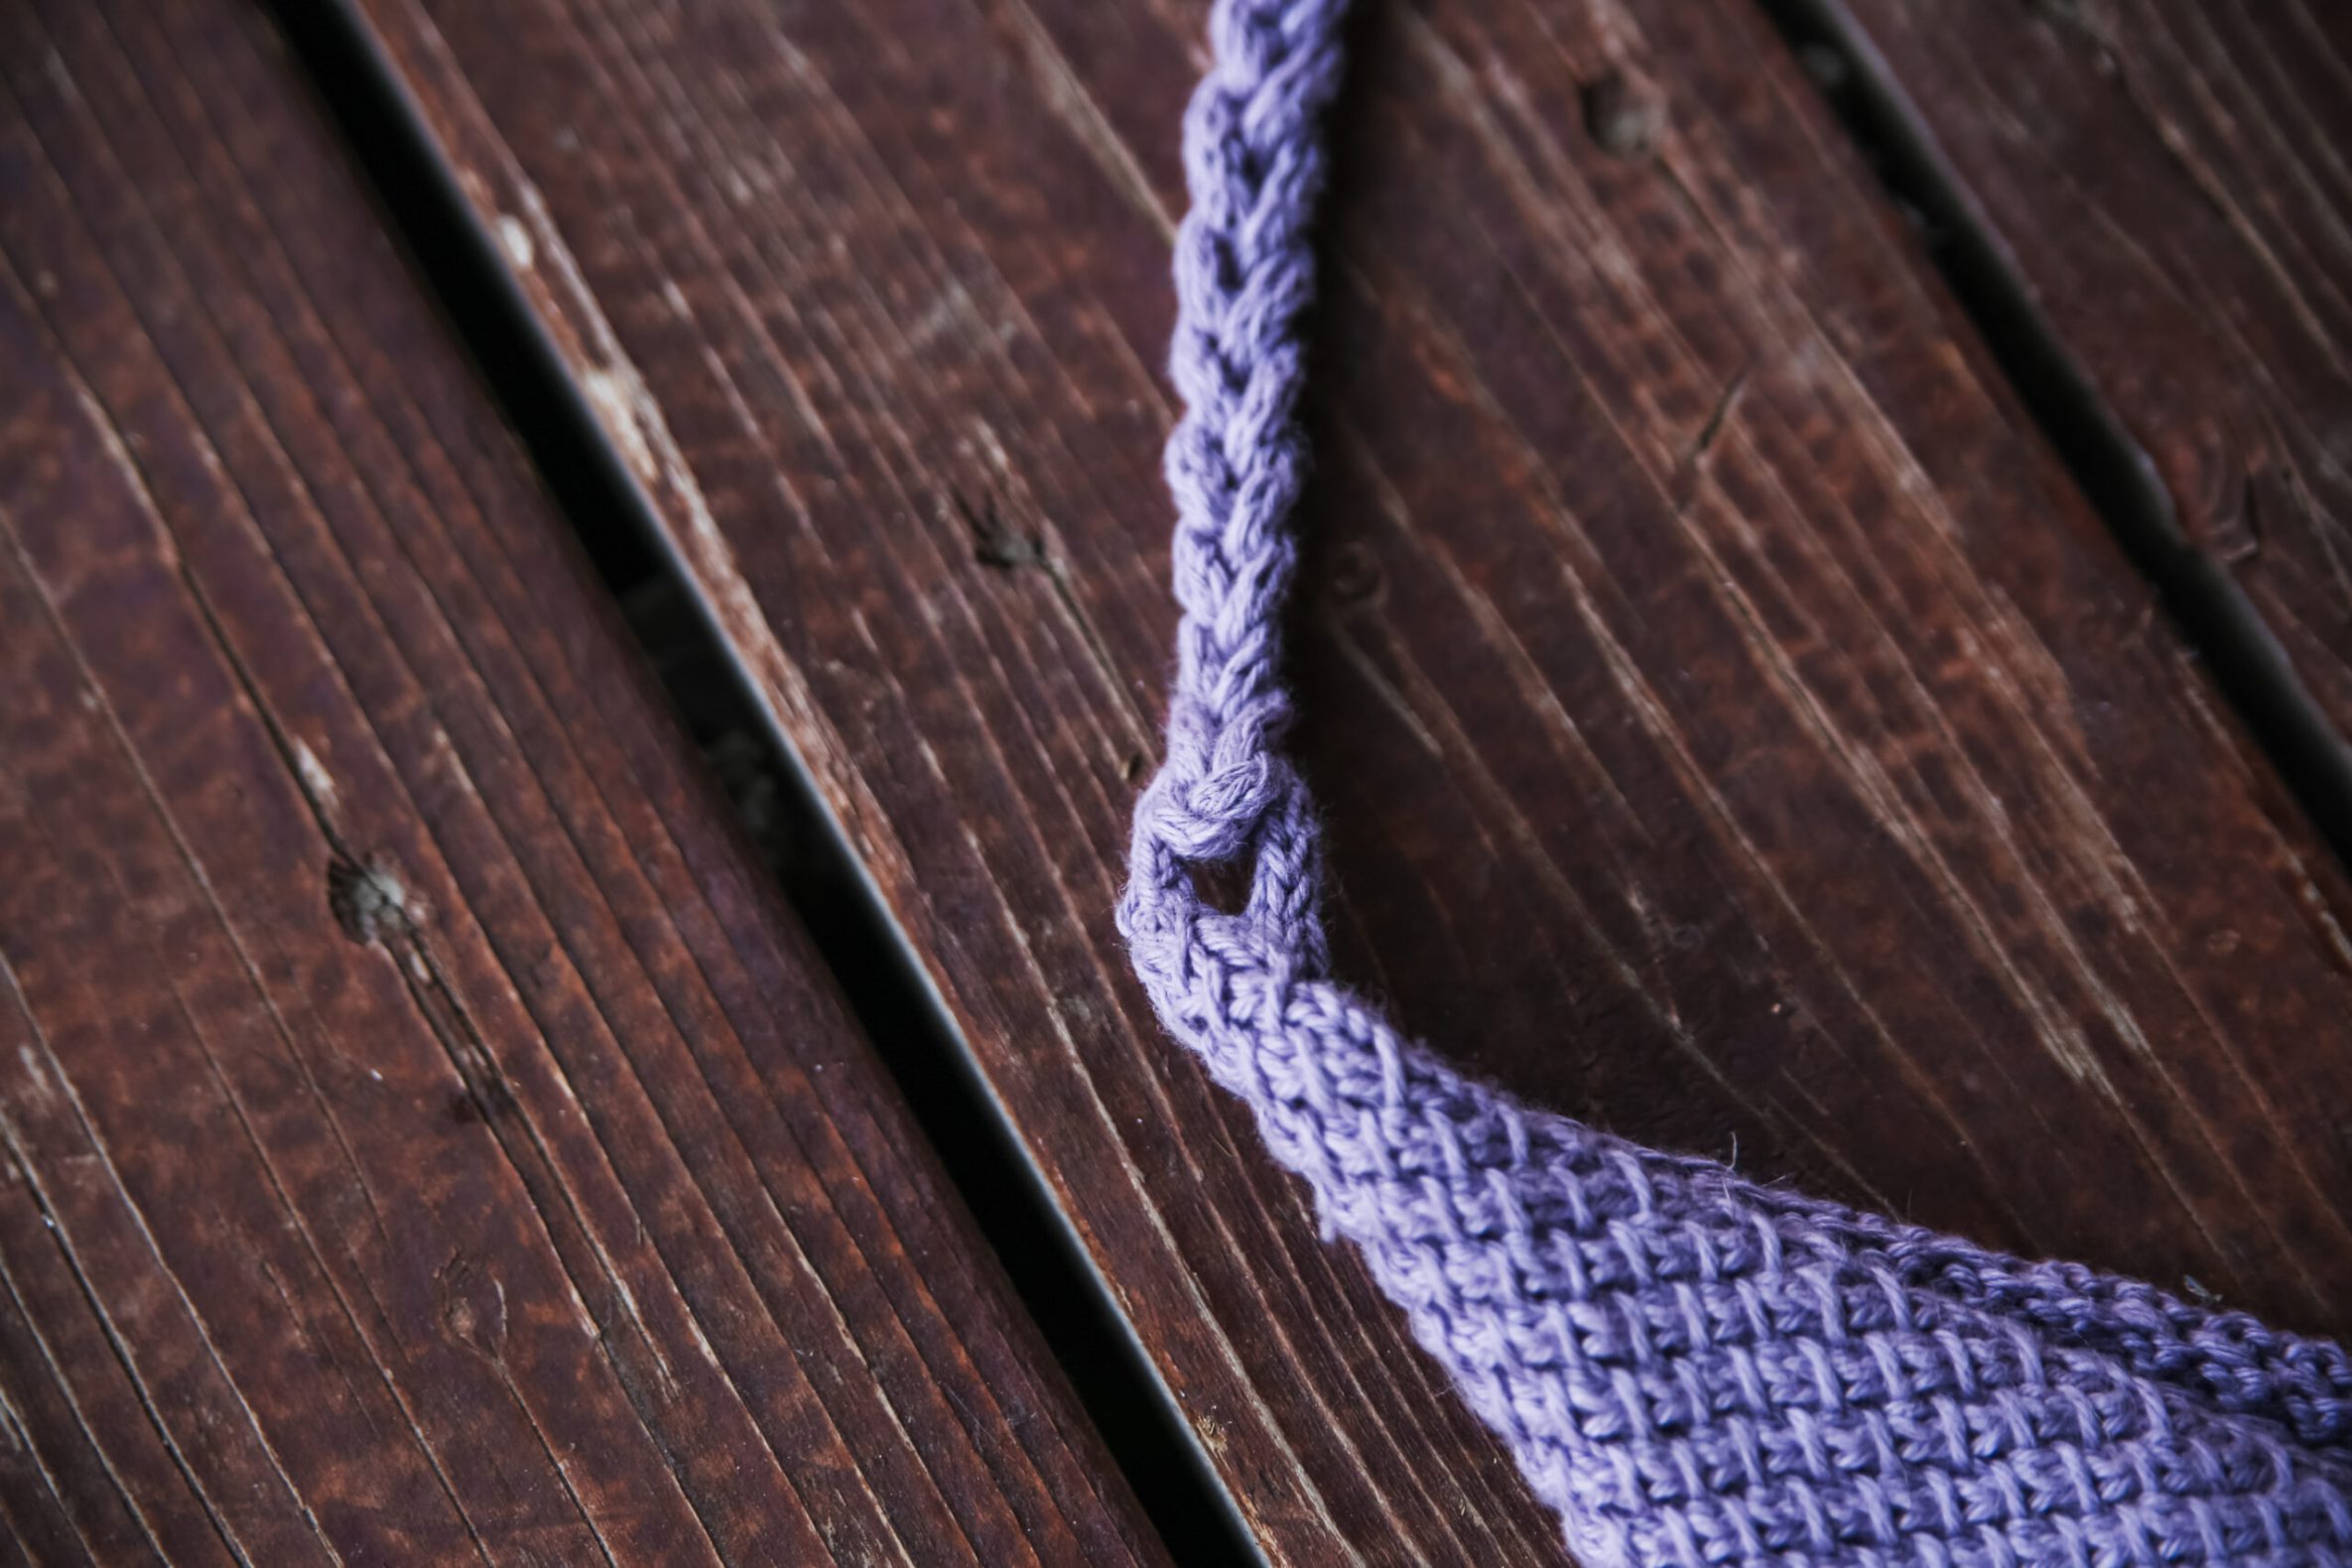
I-CORD LOOP (make 2)
Work an i-cord for 10 rows leaving a long enough tail on the cast on and bind off to sew the loop to the top of the folded corners.
HANDLE
Work an i-cord and finger chain stitch until the handle measures 53cms. Or you can make 3 icords and braid them together if you do not know how to make a chain stitch (which is a crochet term).
Using the end, sew the braid to the loop you sewed on in the previous step.
FINISHING
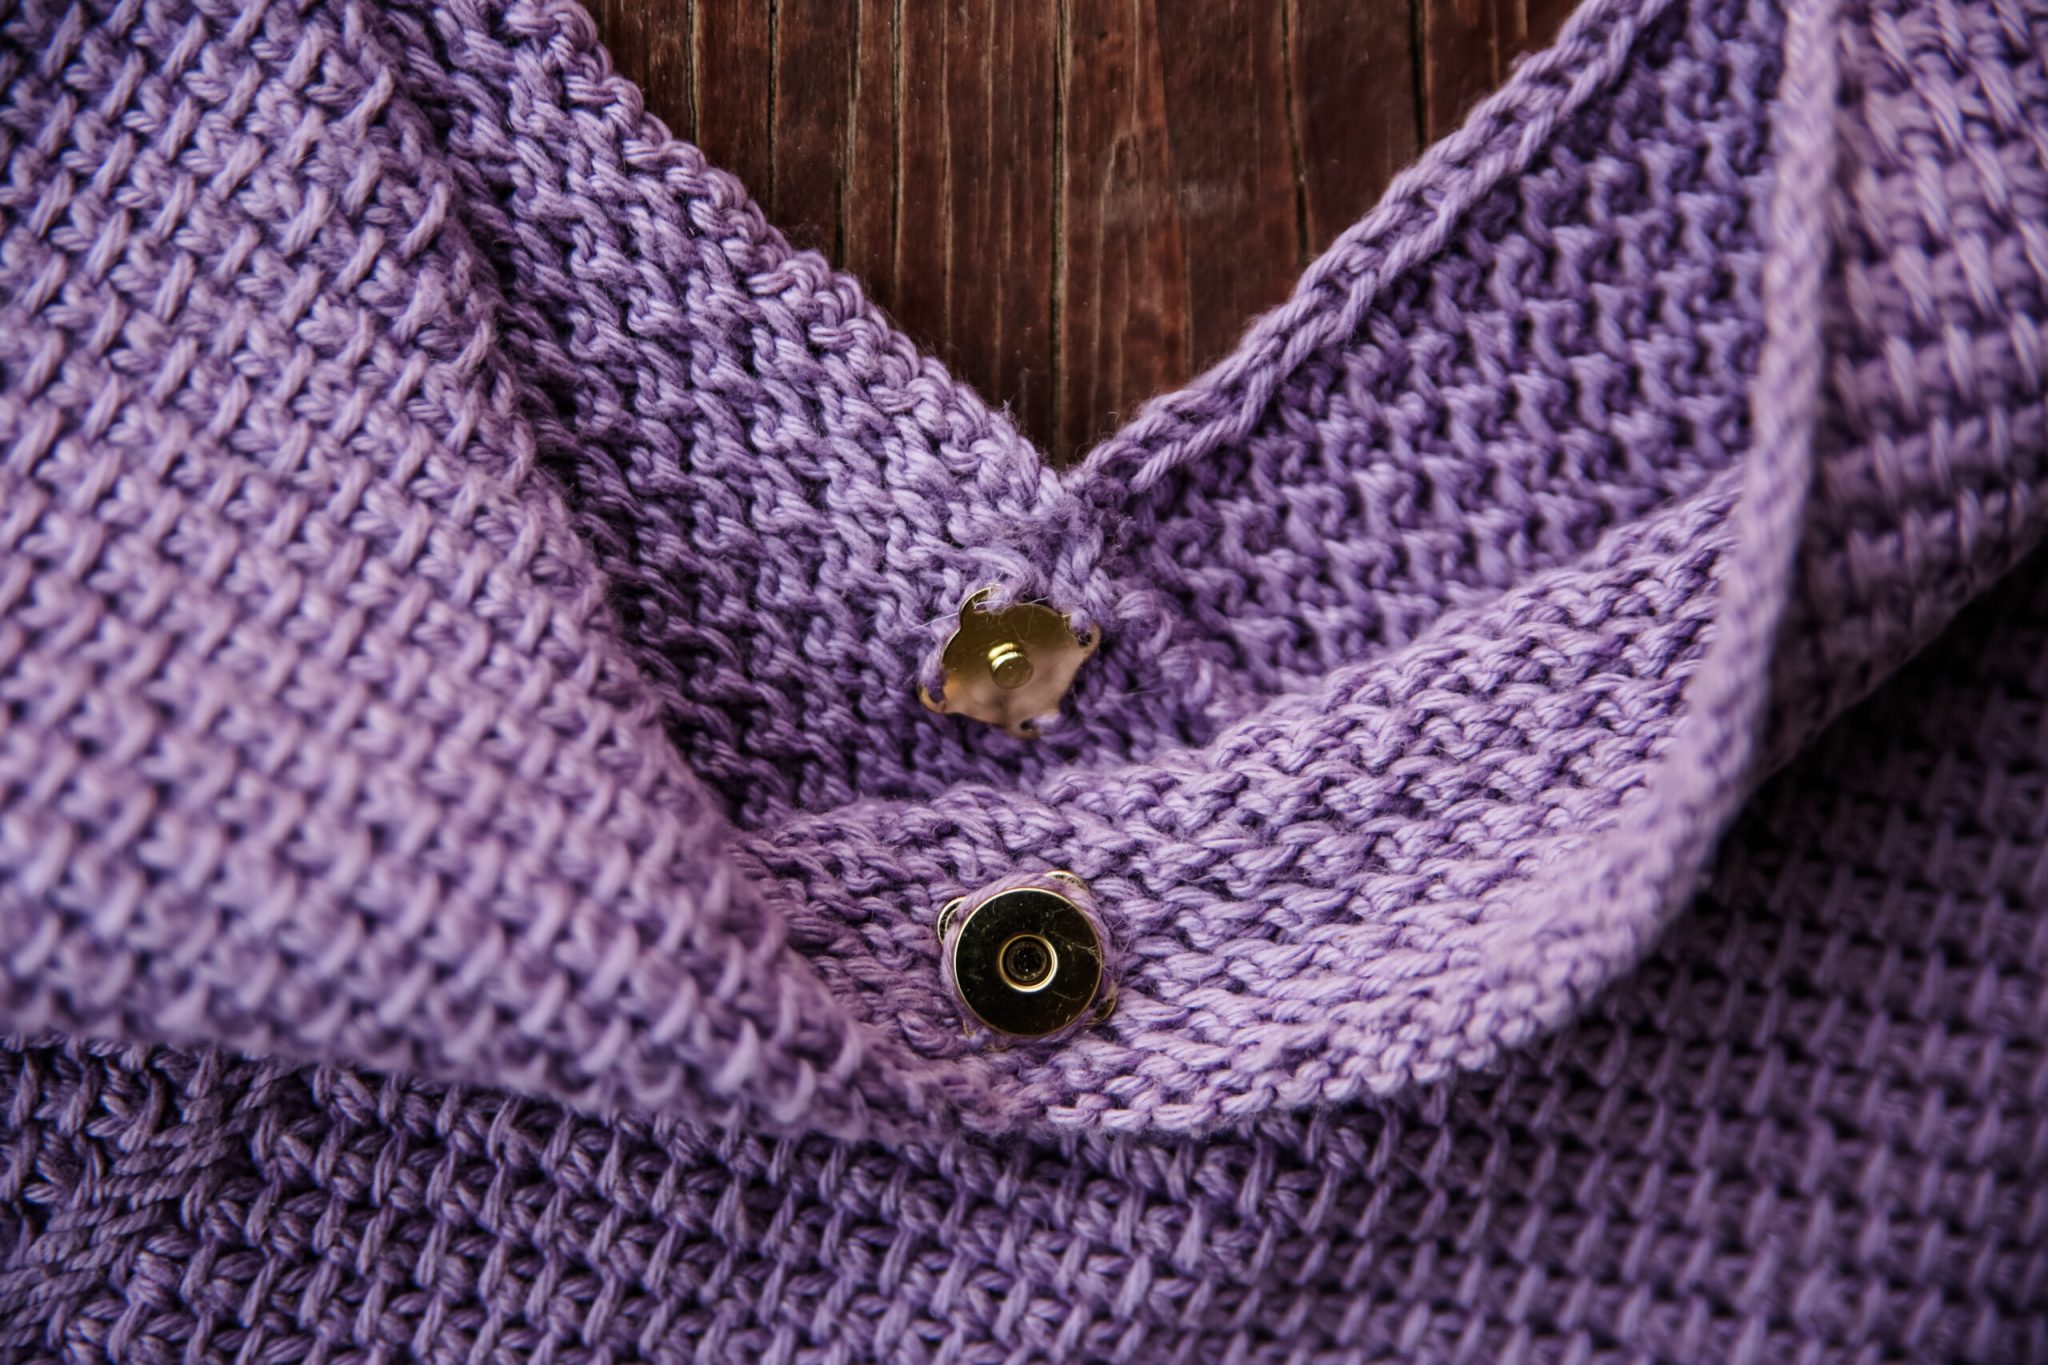
Weave in all ends. If desired you can add a magnetic snap to keep it closed.