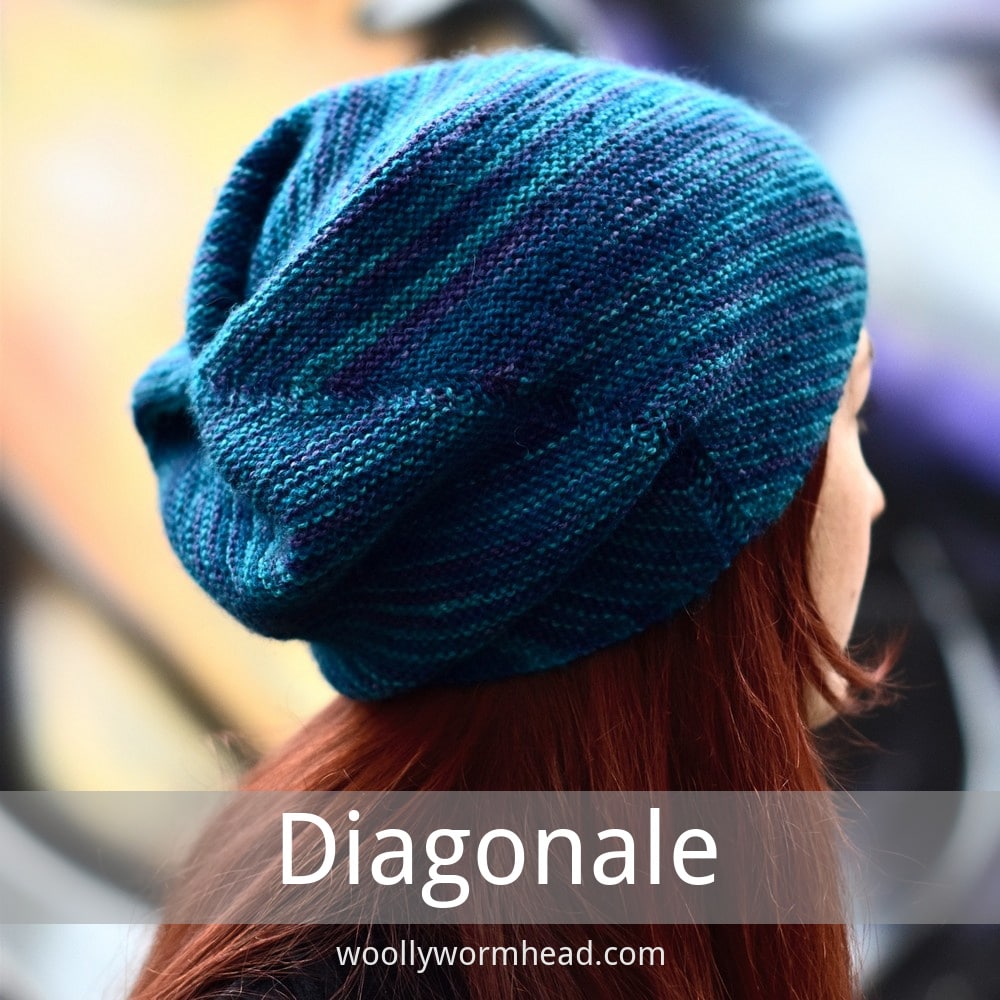
Knitted Slouchy Structural Hat
Oh, the Knitted Slouchy Structural Hat! This trendy accessory not only keeps you warm and stylish but also adds a touch of effortless cool to any outfit. The carefully knitted design gives it a relaxed, laid-back look that screams comfort and fashion at the same time. Whether you're heading out for a casual day or want to spice up your winter wardrobe, this hat is a perfect choice. With its slouchy silhouette and structural design, you'll be turning heads and staying cozy all season long.
Materials:
Yarn
- 100g/361yd/330m
- Handdyed 4ply or sport weight yarn
Needles & Notions
- Pair 3mm/UK11/US2½ straight needles or size needed to obtain gauge
- Stitch marker as necessary
- Tapestry needle
Sample Details
- Shown in WoolWorxx BFL Fingering [390yd/357m per 100g; 100% Bluefaced Leicester]
- Shown in size 23in/58.5cm on model with 21.5in/54.5cm circumference head
Note
This pattern is deceptively simple – it’s simply a length of garter stitch worked flat with the corners stitched together! What makes it special is that it’s worked on the bias. This Hat can be made in any gauge, in any yarn. And it’s perfect for beginners.
Gauge
24 sts x 48 rows to 4in/10cm on 3mm needles over Garter St.
Sizes
- To fit sizes: 16 [18, 21, 23] in/ 40.75 [45.75, 53.25, 58.5] cm
- Finished size: 14 [16, 18, 20] in/ 35.5 [40.75, 45.75, 50.75] cm
Skills Required
- Increases and Decreases
- Garter Mattress Stitch
- Blocking a Hand Knit Hat
Abbreviations
- K: knit
- st(s): stitch(es)
- kfb: knit into the front and back of the next stitch
- kbf: knit into the back then front of the next stitch
- k2tog: knit next 2sts together
- ssk: slip next 2sts knitwise, then knit these 2 sts together through the backs of the loops
- k3tog: knit next 3sts together
How To
With main yarn and your choice of cast-on method, cast on 3sts. Ideally leave a tail of around 9 [10, 11, 12] in/ 23 [25.5, 28, 30.5] cm
Body Part 1
Foundation Row: K1, knit into the front then back then front of next stitch, K1 [5sts]
Row 1: Knit all sts
Row 2: K1, Kfb, K1, Kbf, K1 [7sts]
Row 3: Knit all sts
Row 4: K1, Kfb, K to last 2sts, Kbf, K1
Repeat Rows 3 and 4 until work measures 7 [8, 9, 10] in/17.75 [20.25, 22.75, 25.5] cm along an edge from the cast on point, ending after a plain knit row.
Body Part 2
Row 1: K1, Kfb, K to last 3sts, k2tog, K1
Row 2: Knit all sts
This sets up the bias pattern, and the width of our strip of knitting will remain constant.
Repeat these two rows until work measures approximately 16 [18, 20, 22] in/ 40.75 [45.75, 50.75, 56] cm along the longest edge, ending after a plain knit row.
Body Part 3
Row 1: K1, ssk, K to last 3sts, k2tog, K1
Row 2: Knit all sts
Repeat these two rows until 5sts remain ending after a plain knit row then:
Final Row: K1, k3tog, K1.
Break yarn and draw through remaining 3sts to close.
Ideally leave a tail of around 9 [10, 11, 12] in/ 23 [25.5, 28, 30.5] cm
Finishing
Fold work in half length-ways.
Using the yarn tails, and using the mattress stitch method for garter stitch, close each side seam.
Bring together the top corners and secure them with a few stitches. You can also turn this Hat inside out for an envelope style finish.
Weave in all ends. A gentle wash and blocking is recommended.