Knitted Miniature Bag
Oh, a knitted miniature bag is just the cutest accessory you'll ever find! These tiny bags are not only adorable but also incredibly versatile. Plus, it's the perfect size to hold your essentials like keys, phone, and lip balm. Who knew something so small could make such a big impact!
Supplies:
- Claudia Hand Painted Fingering yarn or sock yarn of your choice
- Size US 3 straight needles for bag, size US 2 double-pointed needles for the I-cord handle
- Scrap yarn for stuffing the bottom of the bag and for making tiny skeins
- Two toothpicks and small wooden beads for making needles
- Craft glue
To make the miniature knitting bag:
Using the size 3 needles, cast on 22 stitches.
Knit in seed stitch for approx. 2.5 inches.
Knit two rows in garter stitch to form the first fold at the bottom of the bag.
Purl one row. This is the bottom of the bag.
Knit two rows in garter stitch to form the second fold.
Knit in seed stitch for approx. 2.5 inches.
Bind off.
To finish the bag:
Sew side seams using mattress stitch.
Knit a 5 inch I-cord using size 2 DPNs and two stitches. (If you don't know how to knit an I-cord, here are simple instructions at About.com . It's really, really easy.)
Sew I-cord to inside seam of bag to form handle.
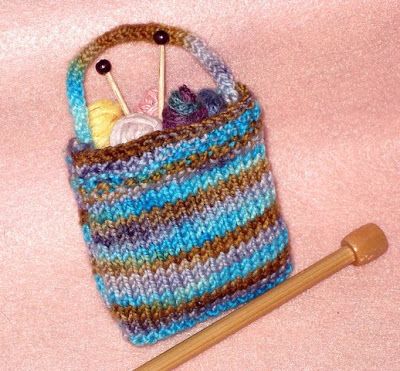
Make 4 or 5 tiny skeins using scrap yarn. Dab craft glue on the yarn as you form the skein so it holds its shape.
Make toothpick needles by cutting the tips off of two toothpicks and using craft glue to secure each bead to the tip of each toothpick.
Stuff the bottom of the bag with cotton or scrap yarn. Dab glue inside so it won’t come out.
Arrange the tiny skeins near the top of the bag so they are slightly peeking out. Dab glue inside the bag again to secure the skeins.
Place the toothpick needles inside the bag so the ends stick out, as shown in the picture.