Knitted Ribbon Stitch Clutch
The Knitted Ribbon Stitch Clutch is an absolute showstopper! It's the perfect mix of elegance and charm, making it a must-have accessory for any occasion. The intricate ribbon stitch design adds a touch of sophistication, while the cozy knitted material gives it a warm and inviting feel. You'll love how versatile this clutch is, pairing beautifully with both casual and formal outfits. It's sure to be your new favorite go-to accessory that will leave you feeling stylish and fabulous every time you carry it!
Finished Size
Clutch: Approximately 12” (30.5 cm) wide x 9.5” (24 cm) height with the flap folded down after assembly.
Materials
- King Cole Timeless Classic Super Chunky yarn (90% acrylic/10% alpaca, 3.5 oz/100 g/93 yd/85 m) – 2 skeins each in 4649 Topaz (CA) and 4650 Quartz (CB), or approximately 120 yd (110 m) each in CA and CB in any super bulky weight yarn.
- US Size 10.5/6.5 mm Knitter’s Pride Ginger Interchangeable Needles, or size needed to obtain gauge.
- Clover Quick Locking Stitch Marker set (for knit seamlessly in the round version).
- Clover bent-tip yarn needle.
- We Crochet Premium Blocking Mats.
Gauge
14 sts = 4” (10 cm) in stockinette stitch. Exact gauge is not critical for this pattern. Your stitches should be tight and firm, creating a dense fabric which may curl.
To work gauge swatch, CO 16 sts.
Row 1: K across.
Row 2: P across.
Rep Rows 1-2 until swatch measures approximately 4” (10 cm) long. Bind off in pattern for Row 1.
Your swatch will probably be curling. Pin it flat without stretching to measure. Your swatch should measure between 4.25” (11 cm) to 4.5” (11.5 cm) wide.
Abbreviations Used in This Pattern
- CA – Color A
- CB – Color B
- CO – cast on
- k – knit
- k2tog – knit 2 stitches together (decrease)
- p – purl
- p2tog – purl 2 stitches together (decrease)
- rep – repeat
- sl – slip stitch purlwise
- st(s) – stitch(es)
- wyib – with yarn in back
- wyif – with yarn in front
- [] Repeat instructions between brackets as indicated.
Pattern Notes
If you have difficulty “reading” your stitches, place a locking stitch marker on the front of Row 1 of the Front Panel to mark the right/front side.
Clutch
Front Panel
With CA, CO 40 sts.
Set Up Row 1: (Right Side) K across.
Set Up Row 2: P across.
Set Up Rows 3-4: Rep Rows 1-2 again. Do not fasten off CA.
Row 1: With CB, [k3, sl 1 wyib] across.
Row 2: With CB, [Sl 1 wyif, k3] across. Do not fasten off CB.
Row 3: With CA, k across.
Row 4: With CA, p across. Do not fasten off CA.
Row 5: With CB, [k1, sl 1 wyib, k2] across.
Row 6: With CB, [k2, sl 1 wyif, k1] across. Do not fasten off CB.
Rows 7-8: Rep Rows 3-4 once.
Rows 9-32: Rep Rows 1-8, 3 times.
Rows 33-38: Rep Rows 1-6 once. Fasten off CB at the end of the repeat of Row 6.
Rows 39-42: Rep Rows 3-4 twice.
Bind off in pattern for Row 3. Fasten off CA.
Your piece may be curling dramatically. Block it flat using spray or wet blocking (see Pattern Notes).

Back Panel
With CB, CO 40 sts.
Row 1: Sl 1, k across to last st, p1.
Row 2: Sl 1, p across.
Rows 3-48: Rep Rows 1-2, 23 times.
Do not bind off; keep stitches on the needle.
Fasten off CB with long yarn tail (approximately 36”/91.5 cm) for seaming.
Your piece may be curling, but do not block it yet.

Front Flap
Continue working on the Back Panel piece.
Row 1: (RS) Change to CA, p across. (40 sts)
Row 2: Sl 1, p across.
Row 3: Sl 1, k to last 3 sts, k2tog, p1. (Decreases by 1 st to an odd number of sts)
Row 4: Sl 1, p2tog, p across. (Decreases by 1 st to an even number of sts)
Rows 5-38: Rep Rows 3-4, 17 times. (4 sts)
Row 39: Rep Row 3. (3 sts)
Row 40: Sl 1, p2tog. (2 sts)
Row 41: K2tog. (1 st)
Do not bind off.
Fasten off CA with long yarn tail (approximately 36”/91.5 cm) for seaming. Draw yarn tail through last loop on needle and fasten off.
Assembly and Finishing
Block this piece flat as follows using spray or wet blocking (see Pattern Notes).
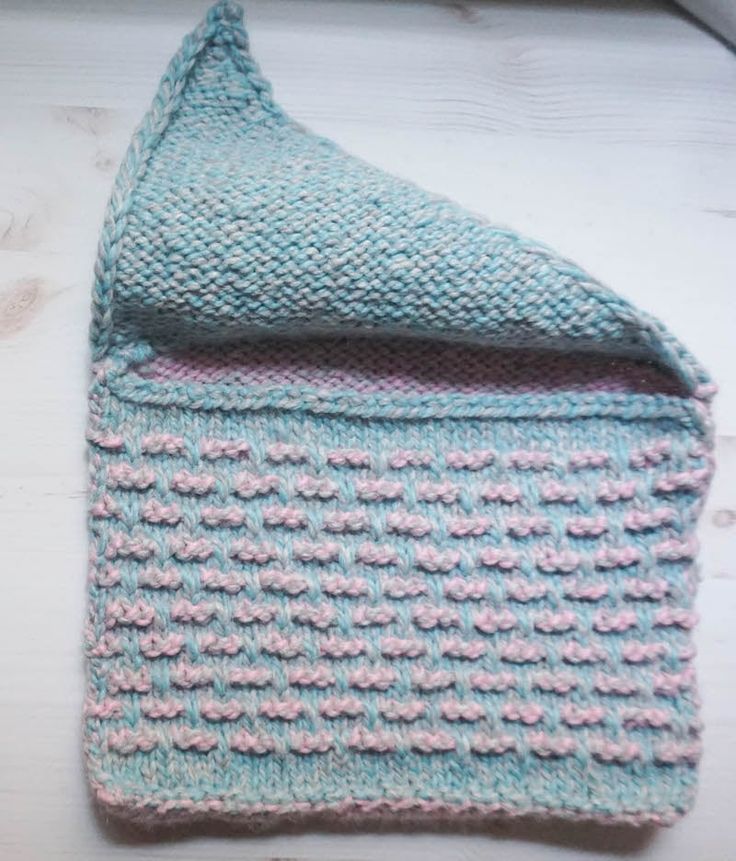
Fold over the asymmetrical flap at Row 1 of the Front Flap and pin the Back Panel to the size of the Front Panel as shown in the photo below.

Thread the long yarn tails from the end of your project into your yarn needle and seam the pieces together using the mattress stitch. Position Wrong Sides together with Right Sides facing out. Seam the Front Panel to the Back Panel along three sides so that the asymmetrical flap and the top long edge are not seamed.
With yarn needle, weave in ends on inside of Clutch.