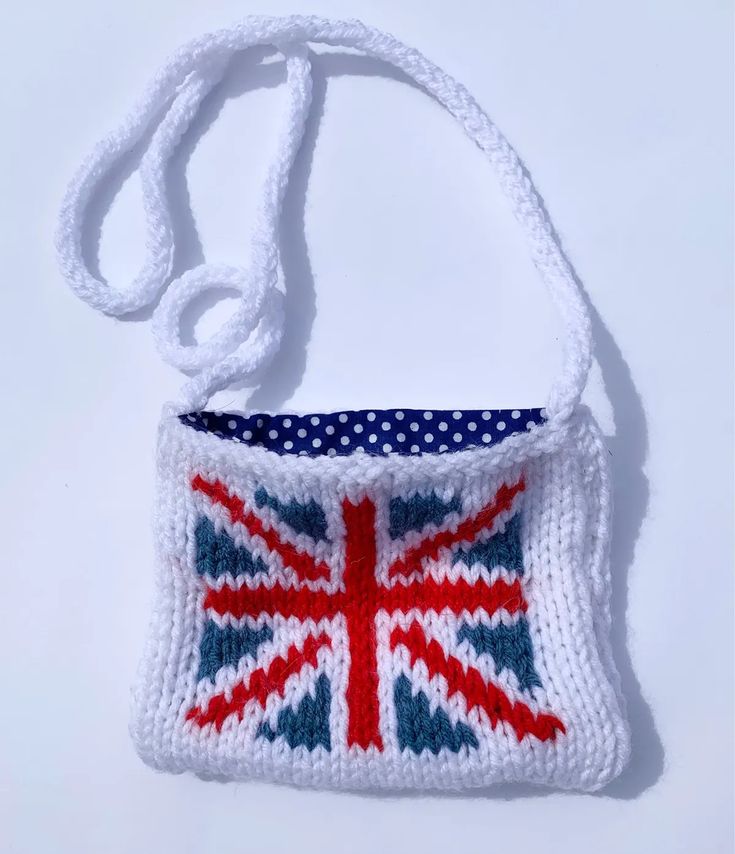
Knitted Adorable Pouch
Knitted adorable pouches are the perfect way to add a touch of charm and functionality to your everyday life! These cute little knit creations are not only great for organizing smaller items like coins, lip balms, or hair accessories but also make a stylish statement piece. Whether you're looking to treat yourself or find a sweet gift for a friend, a knitted adorable pouch is sure to bring a smile to anyone's face. The cozy texture and beautiful colors of these pouches make them a joy to use and display. Get ready to add a touch of warmth and cuteness to your day with a lovely knitted adorable pouch!
You will need:
- DK yarn from your stash, approx 50-75g each of white, red, blue DK yarn (yarn is knitted held double throughout)
- A pair of 5mm needles
- Two 7mm DPNs (double-pointed needles)
- Lining fabric, 20x30cm
- White sewing thread
- Sewing needle and pins
- Iron
Measurements
17x13cm, not including strap
Note: Except for the strap, yarn is held double and the bag is knitted in stocking stitch throughout.
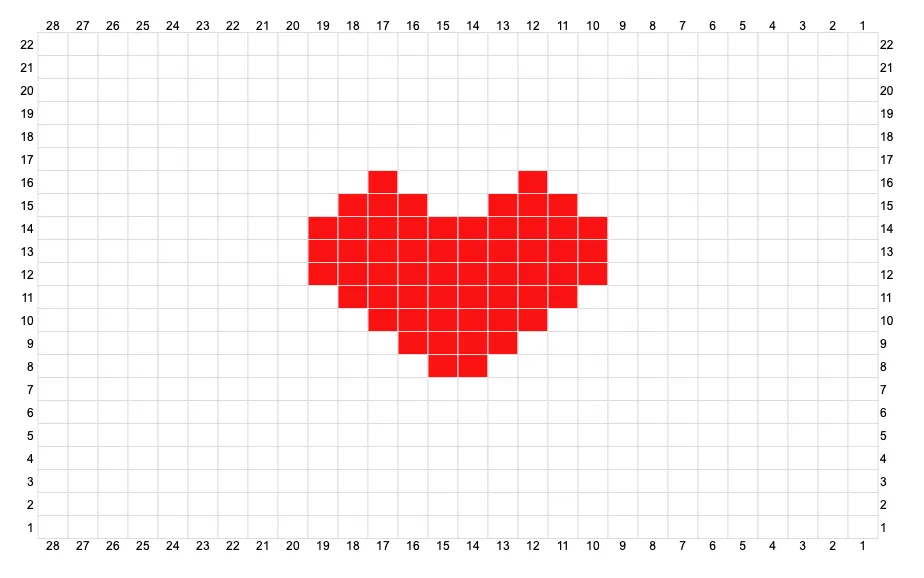
Using the charts
Start from the bottom right-hand corner. Read right-side rows from right to left and wrong side rows from left to right. A row of squares represents a row of knitting.
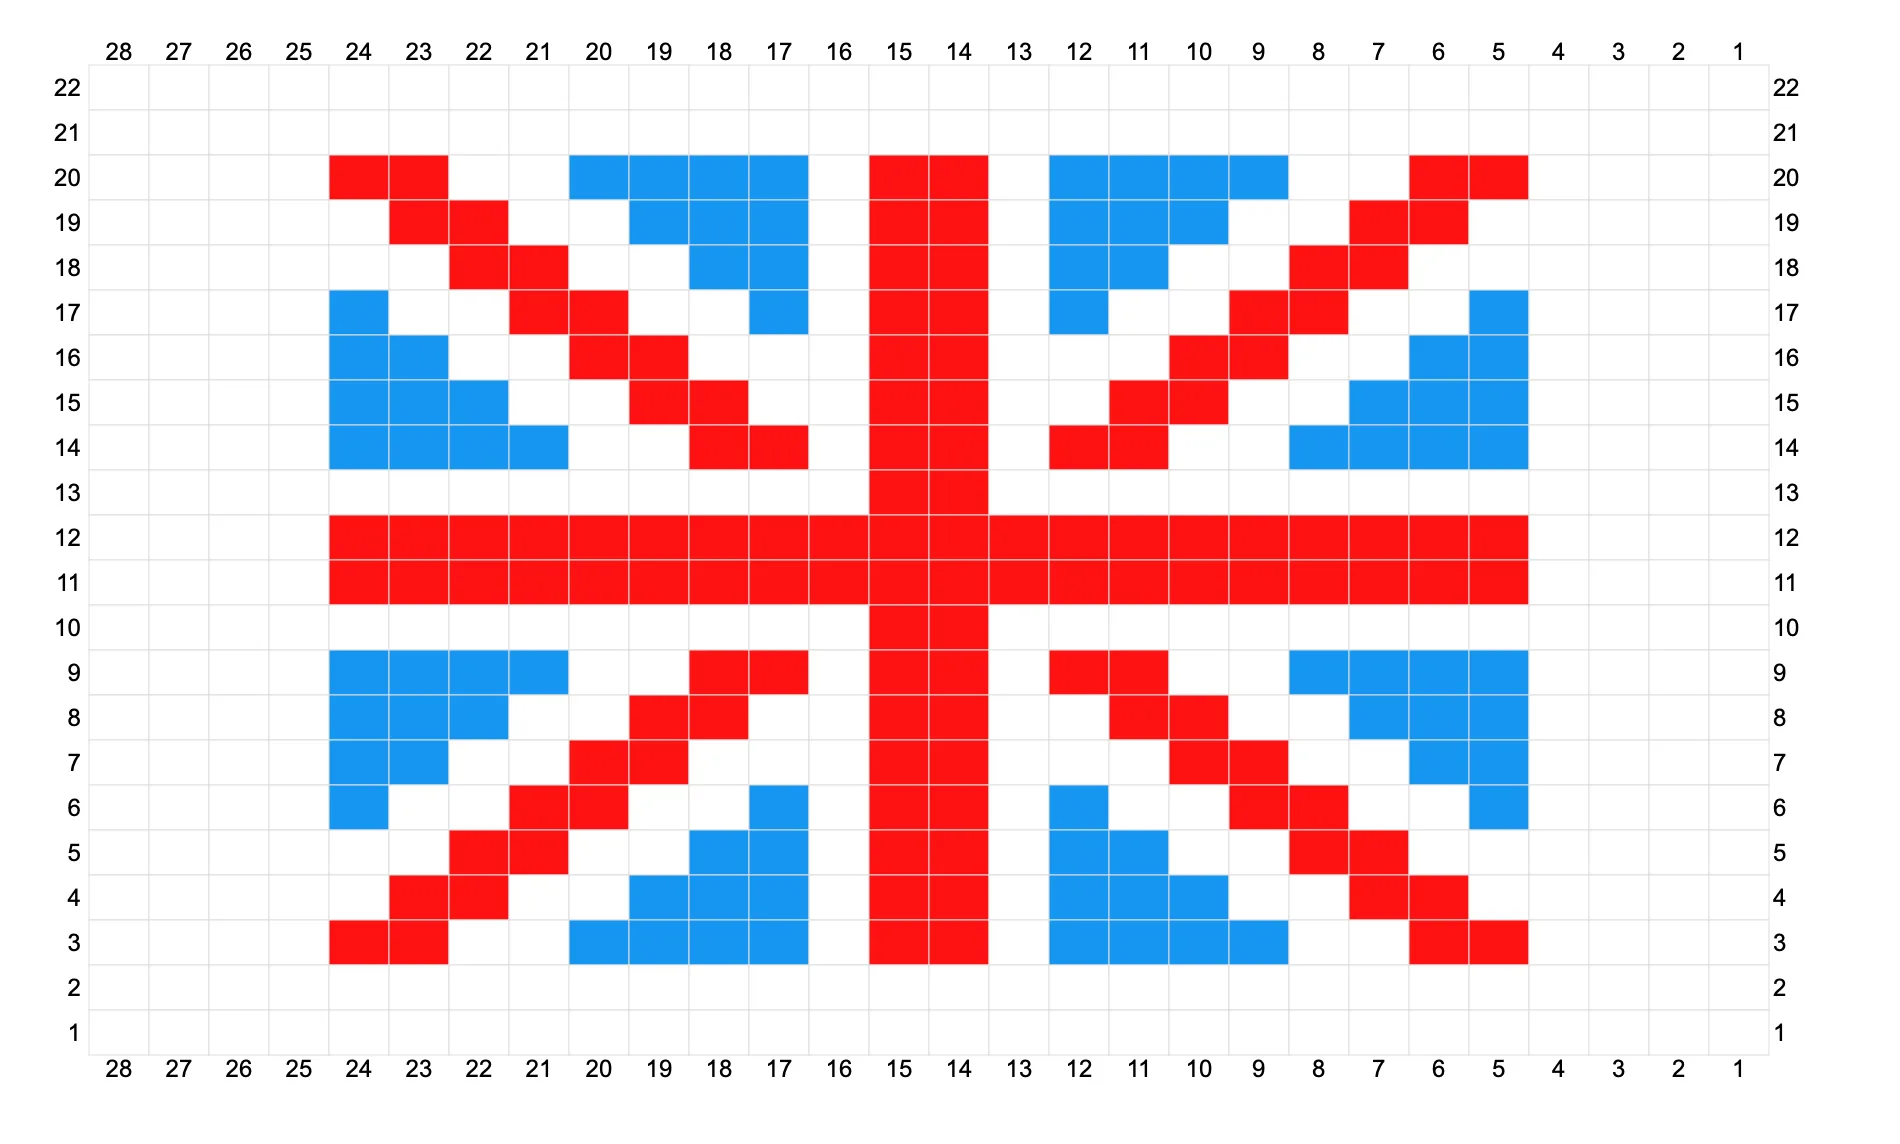
Colour work
The Union Jack Chart is knitted in Fair Isle even when the floats at the back of the work span more than 7 stitches. If floats span more than 7 stitches it is recommended that the yarn being carried is wrapped around the working yarn at 7-stitch intervals. Alternatively, the Union Jack can be knitted using Fair Isle plus the intarsia method for the white borders at each edge.
Knitted pouch pattern
You will need:
- Yarn
- Knitting needles
- Double-pointed needles
- Fabric
- Thread
- Needle and pins
- Iron
Front of the knitted pouch (Union Jack)
Step 1
Cast on 28 sts using 5mm needles and white.
Row 1 Knit.
Row 2 Purl.
Working in st st begin the Union Jack Chart starting with a knit row and bringing in the red and blue colours when needed.
Next row Purl.
Next row Knit.
Cast off.
Neaten ends bearing in mind the bag is lined so all colourwork ends will be hidden.
Back of the knitted pouch (Heart)
Step 1
Cast on 28 sts using 5mm needles and white.
Row 1 Knit.
Row 2 Purl.
Working in st st begin the Heart Chart starting with a knit row and bringing in the red colour when needed.
Next row Purl.
Next row Knit.
Cast off.
Neaten ends bearing in mind the bag is lined so all colourwork ends will be hidden.
I-cord strap
Step 1
Cast on 3 st using 7mm DPNs and white (not doubled), leaving a 20cm yarn tail.
Knit to the end of the row but do not turn, hold the working needle in your left hand and push the stitches back to the right end of the needle. Pull the yarn along the back of the stitches and knit the row again. Repeat until you have reached your preferred strap length. Cast off leaving a 20cm tail. For more help with i-cord head to ourhow to make i-cords tutorial.
Making up your knitted pouch
Step 1
Place the bag Front and Back RS together. Pin in place and sew the base and side seam edges using white yarn and whip stitch.
Turn RS out. Slip the strap ends inside the bag, one on each side, and using their long yarn tails, sew them in place.
Cut your lining to the width of the bag plus seam allowances and twice the depth of the bag plus seam allowances.
Fold the short edges of the lining down 1cm wrong sides facing. Iron in place.
Fold the lining in half right sides facing, keeping the ironed edges folded.
Sew up both side seams leaving a 1cm seam allowance and catching in the ironed folds
Place the lining inside your knitted bag with the wrong sides facing the wrong sides of the knitted bag.
Whip stitch the bag lining to the top edge of the knitted bag around both sides and working around the straps.