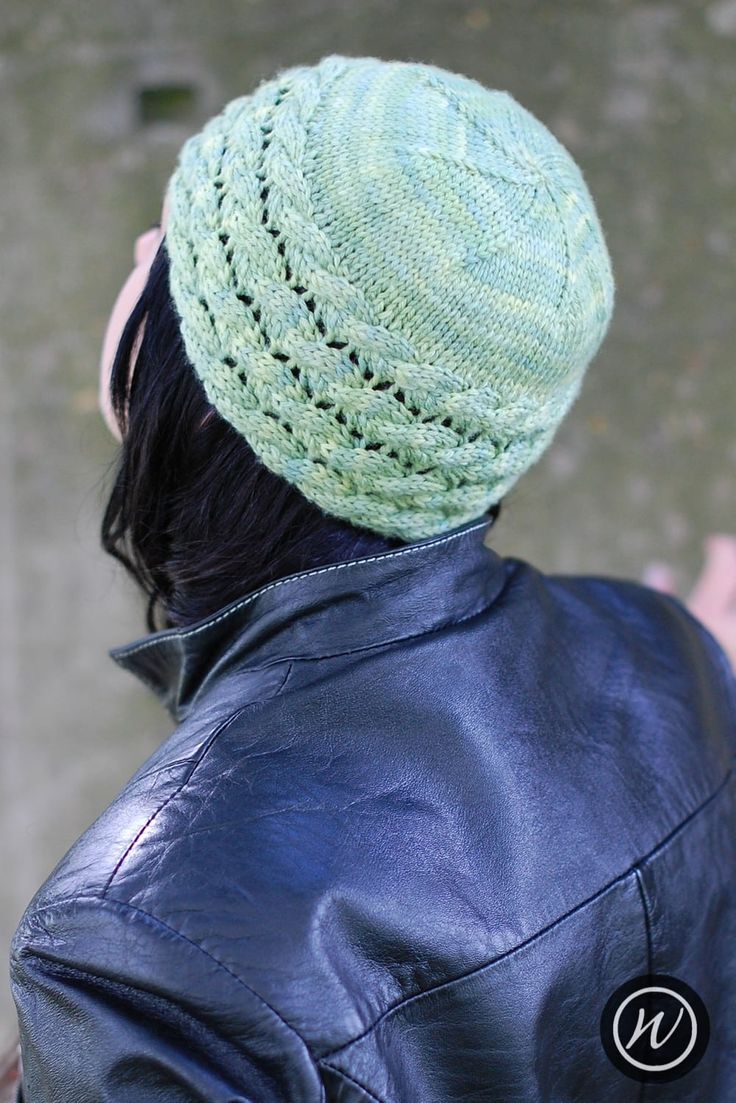
Knitted Trenza Beanie
The Knitted Trenza Beanie is an absolute must-have for staying cozy and stylish during the colder months! This adorable beanie features a unique Trenza knit pattern that adds a touch of charm to any outfit. Not only does it keep your head toasty warm, but it also gives you that effortlessly chic look you've been searching for. It's the perfect accessory for those brisk mornings and chilly evenings, making you feel both fashionable and snug all day long!
Yarn
102 [127, 155] yd/93 [117, 142] m
30yd/28m for a 6x6in/15x15cm swatch in St.St.
Heavy DK or Worsted weight, plied yarn.
Needles & Notions
Set 4mm/UK8/US6 DPNs/Circular or size needed to obtain gauge
Pair 4mm/UK8/US6 straight needles or size needed to obtain gauge
4mm crochet hook
Approx. 3yd/3m waste yarn
Stitch marker as necessary
Tapestry needle
Sample Details
Shown in Natural Dye Studio Dazzle DK [240yd/220m per 100g; 100% BFL]
Shown in size 21in/53.25cm on model with 21.5in/54.5cm circumference head
Gauge
20 sts x 26 rows to 4in/10cm on 4mm needles over St.St.
Sizes
To fit size: 18 [21, 23] in/45.75 [53.25, 58.5] cm
Finished size: 15 [17.5, 20] in/38 [44.5, 51] cm
Skills Required
Crochet Provisional cast-on
Knitting in the round
Increases and Decreases
Cabling Without a Needle
Yarnovers
Grafting Stocking Stitch
Draw-through Bind-off
Blocking a Hand Knit Hat
Abbreviations
K: knit
P: purl
rpt: repeat
R/rnd(s): rounds
st(s): stitch(es)
yo: wrap yarn round needle to create a yarnover
k2tog: knit next 2 sts together
p2tog: purl next 2sts together
C6F: slip next 3 sts onto cable needle & hold at front of work, knit next 3 sts then 3 sts from cable needle (left twist)
How To
Using waste yarn and Provisional Cast-on method, cast on 29 sts. Change to main yarn.
Brim
Row 1 & all odd rows: K1, [P4, p2tog, P1, yo] 3 times, P7
Row 2: Knit all sts
Row 4: *K1, C6F; repeat from * to last st, K1
Row 6: Knit all sts
Repeat these 6 rows a total of 18 [21, 24] times
Carefully remove Provisional Cast-on and using Stocking Stitch Kitchener, graft both ends of strip together to form a tube.
Body
Rejoin main yarn and pick up and knit 77 [91, 105] sts from brim then work 3 [5, 7] rounds of stocking stitch by knitting every stitch
Crown
18in size jump to Rnd 7, 21in size jump to Rnd 4, 23in size start at Rnd 1
Rnd 1: *K13, k2tog; rpt from * to end [98 sts]
Rnd 2: Knit all sts
Rnd 3: *K12, k2tog; rpt from * to end [91 sts]
Rnd 4: *K11, k2tog; rpt from * to end [84 sts]
Rnd 5: Knit all sts
Rnd 6: *K10, k2tog; rpt from * to end [77 sts]
Rnd 7: *K9, k2tog; rpt from * to end [70 sts]
Rnd 8: Knit all sts
Rnd 9: *K8, k2tog; rpt from * to end [63 sts]
Rnd 10: *K7, k2tog; rpt from * to end [56 sts]
Rnd 11: Knit all sts
Rnd 12: *K6, k2tog; rpt from * to end [49 sts]
Rnd 13: *K5, k2tog; rpt from * to end [42 sts]
Rnd 14: Knit all sts
Rnd 15: *K4, k2tog; rpt from * to end [35 sts]
Rnd 16: *K3, k2tog; rpt from * to end [28 sts]
Rnd 17: Knit all sts
Rnd 18: *K2, k2tog; rpt from * to end [21 sts]
Rnd 19: *K1, k2tog; rpt from * to end [14 sts]
Rnd 20: Knit all sts
Rnd 21: *k2tog; rpt from * to end [7 sts]
Break yarn and draw through remaining 7sts, tighten to close.
Finishing
Weave in all ends. A gentle wash and blocking is required to help the decrease lines settle in and lay flat.