Knitted Jester Hat
Oh, the Knitted Jester Hat is truly a whimsical and delightful accessory to add to your wardrobe! With its playful design and vibrant colors, this hat is sure to bring a smile to everyone who sees it. The intricate knitting pattern gives it a cozy feel, perfect for keeping you warm and stylish during the colder months. Whether you're out for a stroll in the park or attending a fun-filled costume party, this hat is sure to be a conversation starter and a fun way to express your unique personality. So go ahead, embrace your inner jester and bring a touch of joy to your everyday look with the Knitted Jester Hat!
Yarn
195yd/178m/100g
Heavy Aran or Chunky weight, single or multi-ply yarn.
Needles & Notions
Set 5mm/UK6/US8 DPNs/Circular or size needed to obtain gauge
Stitch marker as necessary
Tapestry needle
Sample Details
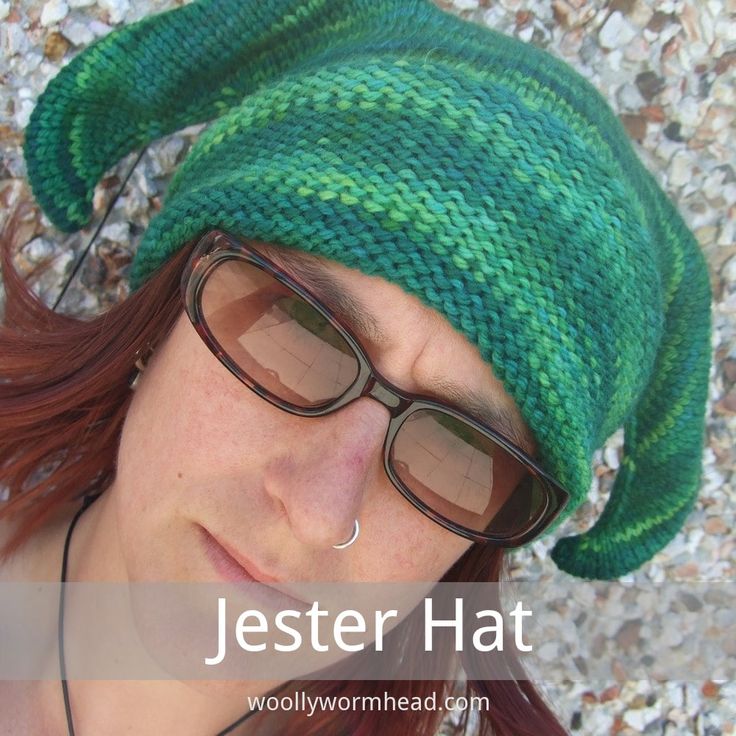
Shown in BabyLongLegs organically Farmed Merino [195yd/178m per 100g; 100% Merino]
Shown on model with 22in/56cm circumference head.
Note
The main pattern here is for the 2-point version; notes for a 3-point version is included at the end. The size given here is for an average sized head – increasing or decreasing for the 2-point version is easy, just remember that you need to have the no. of stitches you cast on with divisible by 4.
If you go for a larger size, you may need more yarn… alternatively you could make the main body a tad shorter, or increase a few less stitches at the top. To adjust the size, work a gauge swatch in your chosen yarn and determine from there how many more (or less) stitches you need to cast on for each version, remembering to allow approximately 2in/5cm, or roughly 10%, of negative ease, (i.e. you Hat needs to be a little smaller than the intended head size to ensure a snug fit)
Gauge
17 sts x 22 rows to 4in/10cm on 5mm needles over St.St.
Sizes
Pattern is given for typical adult women’s size, approximately 21 inches. However, armed with a gauge swatch and measurements of the person the Hat is intended for, you can adjust this pattern accordingly to suit your tastes. Just remember to allow for negative ease.
Skills Required
Cable Cast-on
Knitting in the round
Increases and Decreases
Grafting Stocking Stitch
Modified 3-needle Bind-off
Blocking a Hand Knit Hat
Abbreviations
K: knit
rpt: repeat
R/rnd(s): rounds
st(s): stitch(es)
M1: pick up the horizontal loop before the next stitch, place it onto the left needle & knit into the front of it
How To
Using Cable Cast-on method, cast on 76 sts (or a number divisible by 4). Join in the round, being careful not to twist stitches. Place stitch marker to indicate start of round.
Body
Knit every row to form stocking stitch.
Continue plain for 7in/18cm or desired length.
It is now a good idea to make sure the stitches are evenly distributed across 4 needles, with a 5th as the working needle.
Crown
Next rnd:
Needle 1: K18, M1, K1
Needle 2: K1, M1, K18
Needle 3: K18, M1, K1
Needle 4: K1, M1, K18.
(1 round completed)
You will now have 4 points of increase, each at the end of a needle, and you will be increasing 4 sts per round.
Next rnd: K19, M1, K2, M1, K38, M1, K2, M1, K19.
Next rnd: K20, M1, K2, M1, K40, M1, K2, M1, K20.
Next rnd: K21, M1, K2, M1, K42, M1, K2, M1, K21.
Continue in this fashion, increasing one stitch either side of the K2’s, increasing 4 sts per round. As you gain more stitches, it may become tight on the needles. This is due to the combination of rapid increases either side of the 2 sts that remain straight. Don’t worry, as this is what will give the points their curl.
Finishing the points
When you have reached a total of 152 sts, bind off. Use either Kitchener stitch, 3-needle bind-off or crochet bind-off. Each of these will give a neat top edge. To give it a more professional look, I started the bind-off from the tips of the points, working towards the centre. To divide for bind-off, separate your stitches like this:
The stitches that fall between your M1 increases are the centre of your points, and the adjacent M1’s form the lower edge of your point. Move your stitches so that the point can be folded in half, with the centre fold underneath your work. Then bind-off the amount of stitches for your point (i.e. If you have 152 sts for the 2-point version, that is 76 sts per point, so when preparing to bind off you will have 38 sts on each needle)
Note
It isn’t absolutely necessary to reach 152 sts – this is a suggested number of stitches suitable for this gauge and for the 2 -point version. If you run out of yarn, bind-off there.
The more stitches you have before you bind off will give wider and curlier points; less will make them slightly shorter. For the 2-point version shown in the photo, knitting continued until all the skein was used before casting off.
How to (1 point version)
Cast on required amount of stitches depending on gauge and finished size, divisible by 2. Work plain body same as before. The increases for the point can be anywhere on the round that you choose – centre back is ideal.
If you cast-on 76sts, the increases would start as follows:
Next rnd: K37, M1, K2, M1, K37.
Next rnd: K38, M1, K2, M1, K38 etc etc
Carry on until the point is large enough or you get fed up!
How to (3 point version)
Cast on required amount of stitches, divisible by 6. Work plain body same as before. The best way to arrange the point is to have one either at the centre front or the centre back and the other 2 equally placed on the round.
For 78 sts, increases would start as follows:
Next rnd: K1, M1, K24, M1, K2, M1, K24, M1, K2, M1, K24, M1, K1
Next rnd: K1, M1, K26, M1, K2, M1, K26, M1, K2, M1, K26, M1, K1 etc etc.
How to (4 point version)
Cast on required amount of stitches, divisible by 8 (typically 80sts for an adult). This one will get tricky on the needles as you start to increase for the points, and your points won’t be as wide either.
For 80 sts, increases would start as follows:
Next rnd: K1, M1, K18, M1, K2, M1, K18, M1, K2, M1, K18, M1, K2, M1, K18, M1, K1
Finishing
Weave in all ends. A light blocking is needed to allow the increases to settle and prevent puckering.
Enjoy your Hat! Jester was designed to be a fun, simple Hat, ideal for a quick knit or beginners making their first project on DPNs. It suits hand-dyed and variegated yarns perfectly.