Knitted Moss Stitch Fingerless Mittens
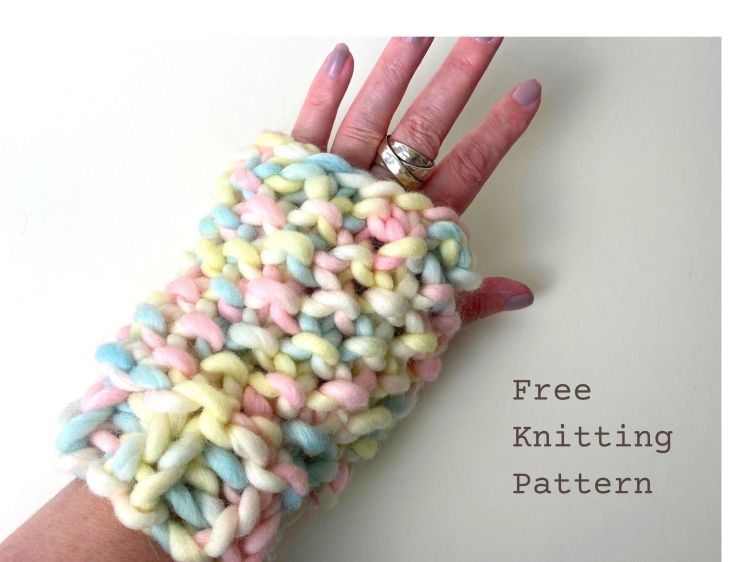
If you're looking to add a cozy and stylish touch to your winter wardrobe, the Knitted Moss Stitch Fingerless Mittens are a perfect choice! These mittens not only keep your hands warm but also allow your fingers to be free for texting or sipping your favorite hot beverage on chilly days. The moss stitch pattern gives them a unique textured look, making them a fashionable accessory to any outfit. Crafted with soft yarn, these fingerless mittens provide both comfort and warmth, making them ideal for outdoor activities or simply lounging at home. Whether you're a seasoned knitter looking for a fun project or shopping for a thoughtful handmade gift, these knitted moss stitch fingerless mittens are sure to bring a touch of warmth and style to your winter days.
You will need:
- Pair each of 10 and 12mm needles/US size 15 and 17.
- 100g of super chunky yarn – Look for a yarn that works with 10 or 12mm needles. The yarn shown in the photo is The Wool by We Are Knitters. This is a beautiful pure super chunky wool which is very chunky and warm.
- Darning needle to sew up seam and a pair of scissors.
Abbreviations:
K – knit
• P – purl
• Kfb – knit into front and back of the same stitch, thus increasing by one
Tension Information: Over 2cm on 12mm needles in moss stitch – approx 2 stitches and 2 rows.
Instructions:
When casting on and off, leave long yarn tail ends to sew up the side seams.
On 10mm needles cast on 14 stitches.
Work 3 rows of 1 x 1 rib (K1, P1 across each row).
Next row – kfb once, p to end of row.
There are now 15 stitches on your needle and the right side is facing.
Switch to 12mm needles.
Work the following 1 row pattern (moss stitch) until piece measures 16cm from cast on edge, or until required length. End with a wrong side row (right side facing for cast off).
*K1, p1; repeat from * to end of row
Cast off in k.
Sew up side seam, leaving a space for your thumb. Sew in loose ends.
Knit another mitten exactly the same but take care that the thumb hole is correctly positioned for the opposite hand thumb.
And that’s it