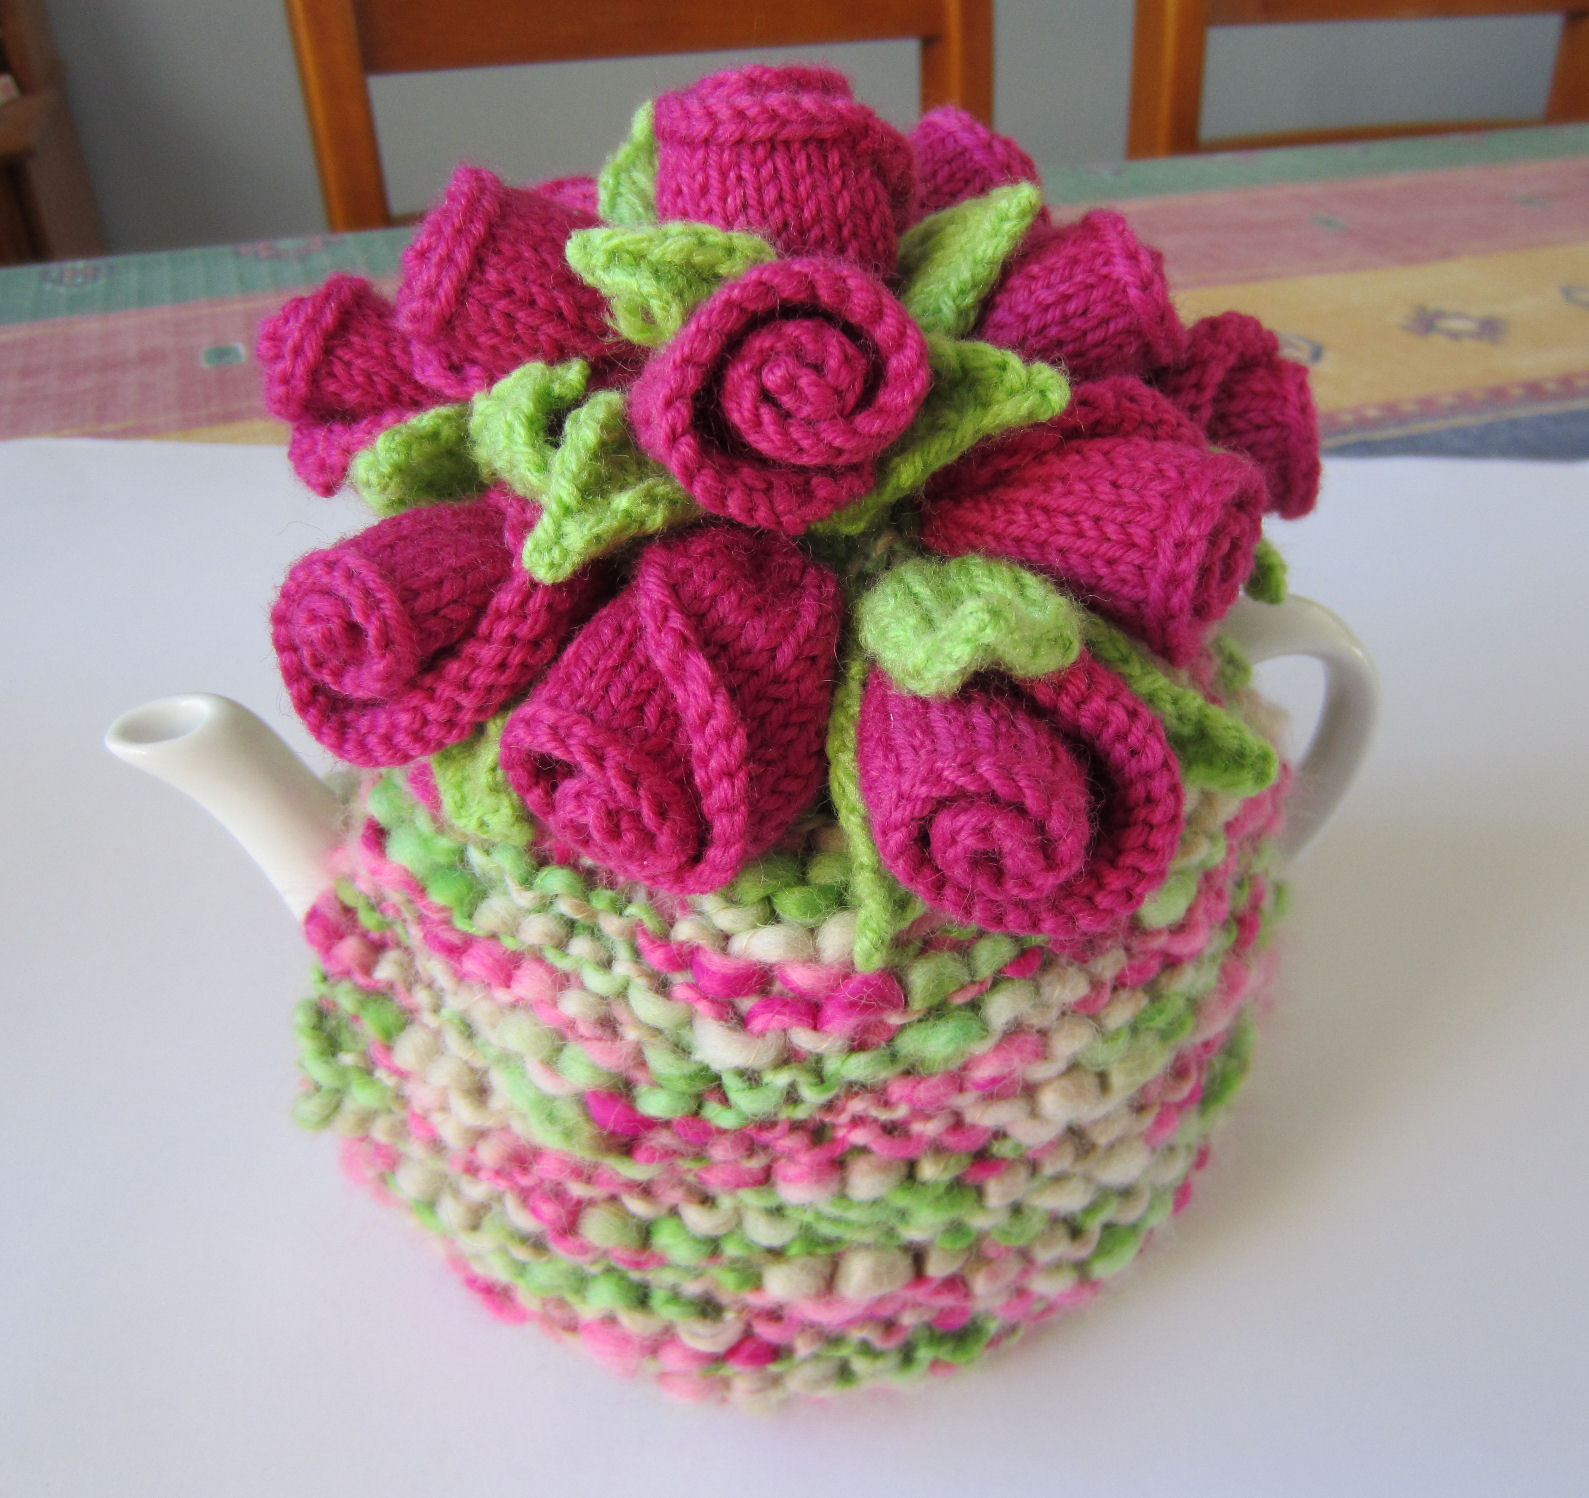
Knitted Rosebuds Tea Cosy
The Knitted Rosebuds Tea Cosy is an adorable and charming addition to your cozy tea time routine. This delightful tea cosy not only keeps your teapot warm but also adds a touch of elegance with delicate rosebud details. Its intricate design and soft knitted texture make it a unique and lovely accessory for your tea kettles. Whether you are enjoying a relaxing evening alone or hosting a tea party with friends, this tea cosy is sure to bring a smile to your face every time you reach for it. Embrace the warmth and beauty of this Knitted Rosebuds Tea Cosy and make your tea moments even more delightful and stylish!
Materials
The cosy is designed only for this specific yarn. I won't guarantee the same results from alternative yarns, but I'll list as much information as I can, if you can't source this specific yarn.
- Lincraft Big Wool 50g balls x 2 (approx 40m per 50g ball)
Colourway - pink/green/cream
The yarn is classed as Bulky & is thick & thin texture. The ball band tension is 10sts x 15 rows (10cm x 10cm) using 8mm needles.
However to achieve a thicker fabric for this cosy I used 6mm needles giving an approx tension of 12sts x 26 rows (10cm x 10cm) worked over garter stitch.
- Moda Vera Pure Wool 8ply (dk) - 50g balls x 2 in Dark Pink for Rosebuds.
- Moda Vera Pure Wool 8ply (dk) - 50g balls x 1 in Light Green for Leaves.
- 6mm needles
- 4mm needles
Front & Back Alike - make 2
Using 6mm needles & "Lincraft Big Wool" cast on 25sts.
Working in Garter Stitch, knit until 13cm from beginning.
Next Row - ( K2, K2 tog) to last st, K1 - 19sts.
Knit 7 rows.
Next Row - (K1, K2 tog) to last st, K1 - 13sts.
Knit 5 rows.
Next Row - (K1, K2 tog) to last st, K1 - 9sts.
Thread yarn through remaining stitches, pull tight & fasten off.
Rosebuds - make 15.
With 4mm needles & Pink 8ply, cast on 34 sts.
Using St st throughout K2 rows.
Next Row - Decrease at the beginning of this row & every knit row until 10 rows from beginning. (To decrease neatly Sl1K1PO).
Cast off.
Leave a long length of yarn at the end of each rose & set of leaves for sewing up.
Leaves - Make 10
3 leaves are knitted as one piece of knitting to wrap around the rosebud. I only put leaves on 10 of the rosebuds otherwise there is too much foliage on the cosy. The rosebuds without leaves are then used for fillers at the end.
With 4mm needles & green 8 ply cast on 21 sts.
Next row - K across 7 sts turn & work on these sts for the first leaf.
St st another 5 rows, starting with a purl row.
Next row - Decrease each end of this row, & every K row until there are 3 sts, ending with a P row.
Next row - Decrease in first 2 sts, K1.
Next row - P2 together.
Fasten off.
Attach yarn & work in the same way on the next 7 st left on needle, & then again with the final 7 sts to form 3 leaves joined at the cast on edge.
Putting it all together.
Sew the front & back pieces of the cosy together, about an inch at the bottom (or whatever suits your own teapot) & from the top down both sides leaving space for your spout & handle. I think mine was sewn about 11cm down from the top.
The Rosebuds
With the longest edge at the bottom, start by curling the side in & then sewing it in place from the bottom to halfway up the flower. I find this stops the inside of the rosebud from popping out. Now sew a gathering stitch along the bottom edge & pull the gather in about this much.
Start curling the rosebud from the inside edge, the gathering stops the rosebud from looking just like a tube. Stitch the rounds in place on the bottom edge as you go. Try to keep the bottom flat. When you get to the end curl the decreased edge out as you do the last turn & stitch in place near the bottom.
You'll get the hang of it after 15 goes lol.
The Leaves
Run a gathering stitch along the bottom of the triple leaf piece. You only have to gather it up enough to fit around the bottom of the rosebud like this.
Sew it in place, I also put a tiny stitch halfway up each leaf into the rosebud to keep it close against the flower.
Now attach the rosebuds. I started with the ones with leaves, putting 3 around the top (you can put a filler one right in the middle of these at the end). Then alternate another row down from these leaving some space for 4 more filler flowers without leaves to fill up spaces. Just play around with it, until you're happy with the look.
The best way is to attach the flowers with a stitch while it's sitting on the teapot & fasten them on securely afterwards.